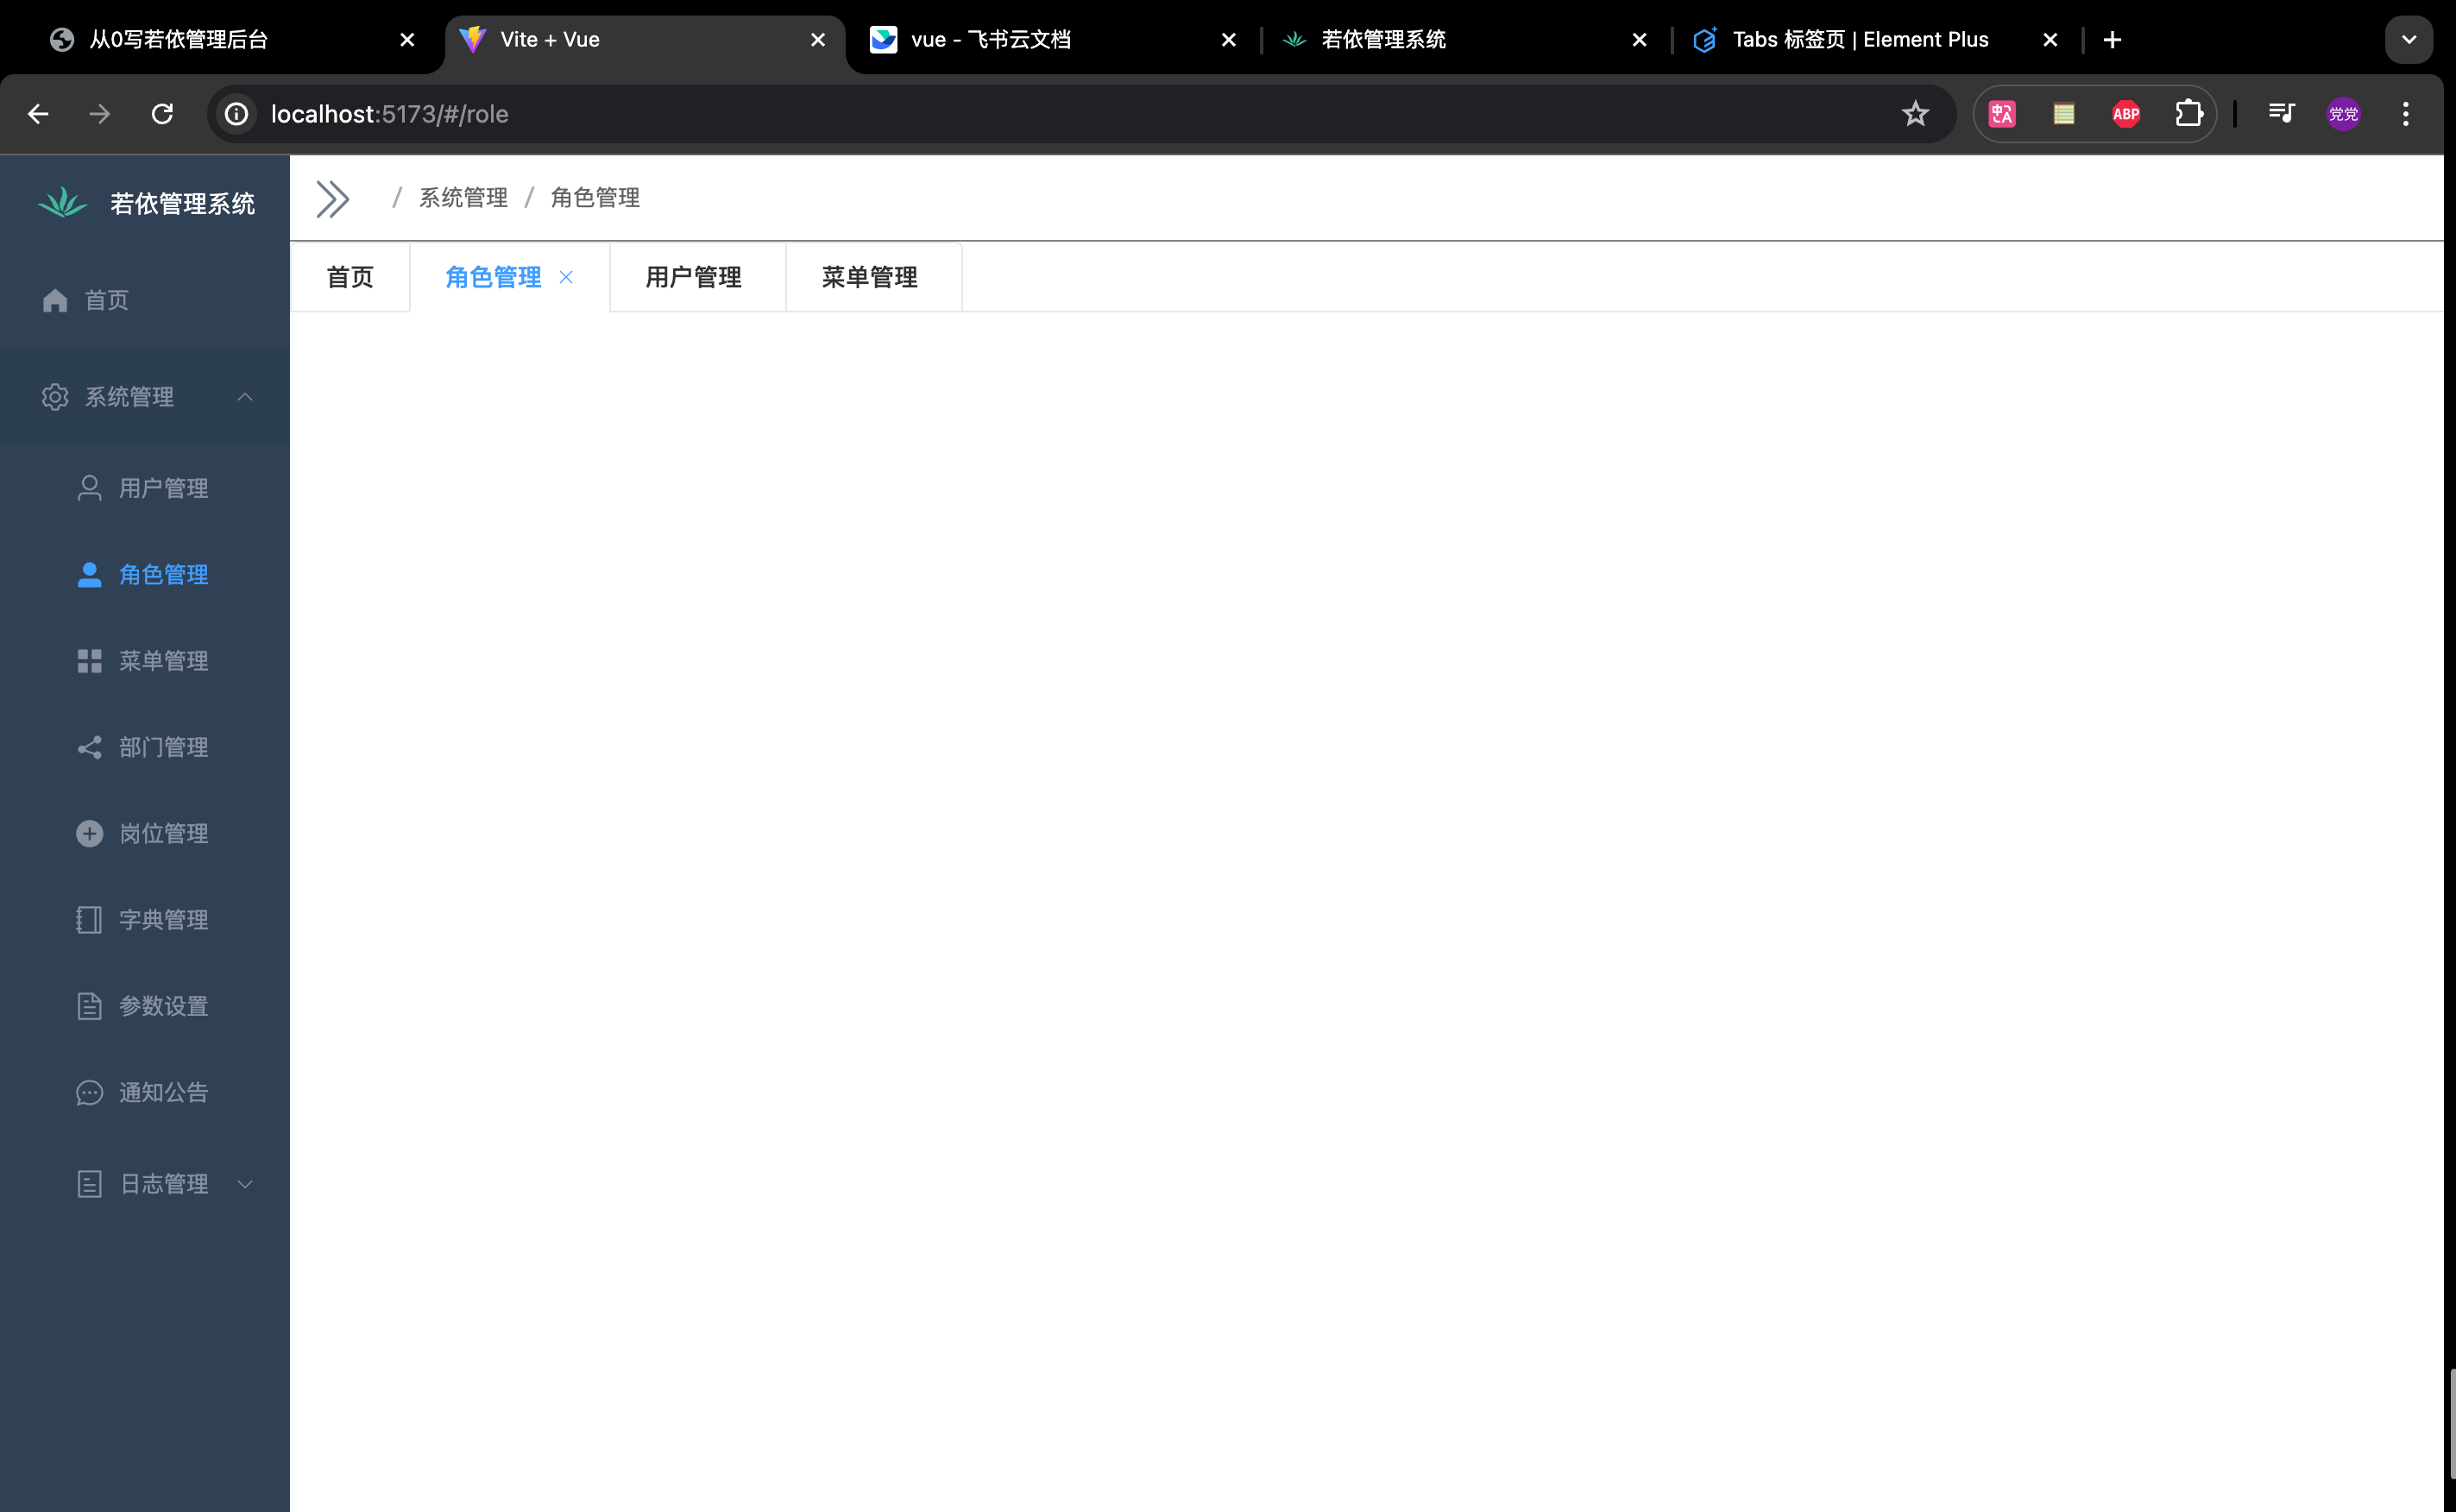
从0写若依管理后台(二)
页面布局
清除默认的样式
我们需要请求 vue 创建给我们的 css 样式、以及默认各种标签中自带的样式
创建重置默认标签样式文件
reset.css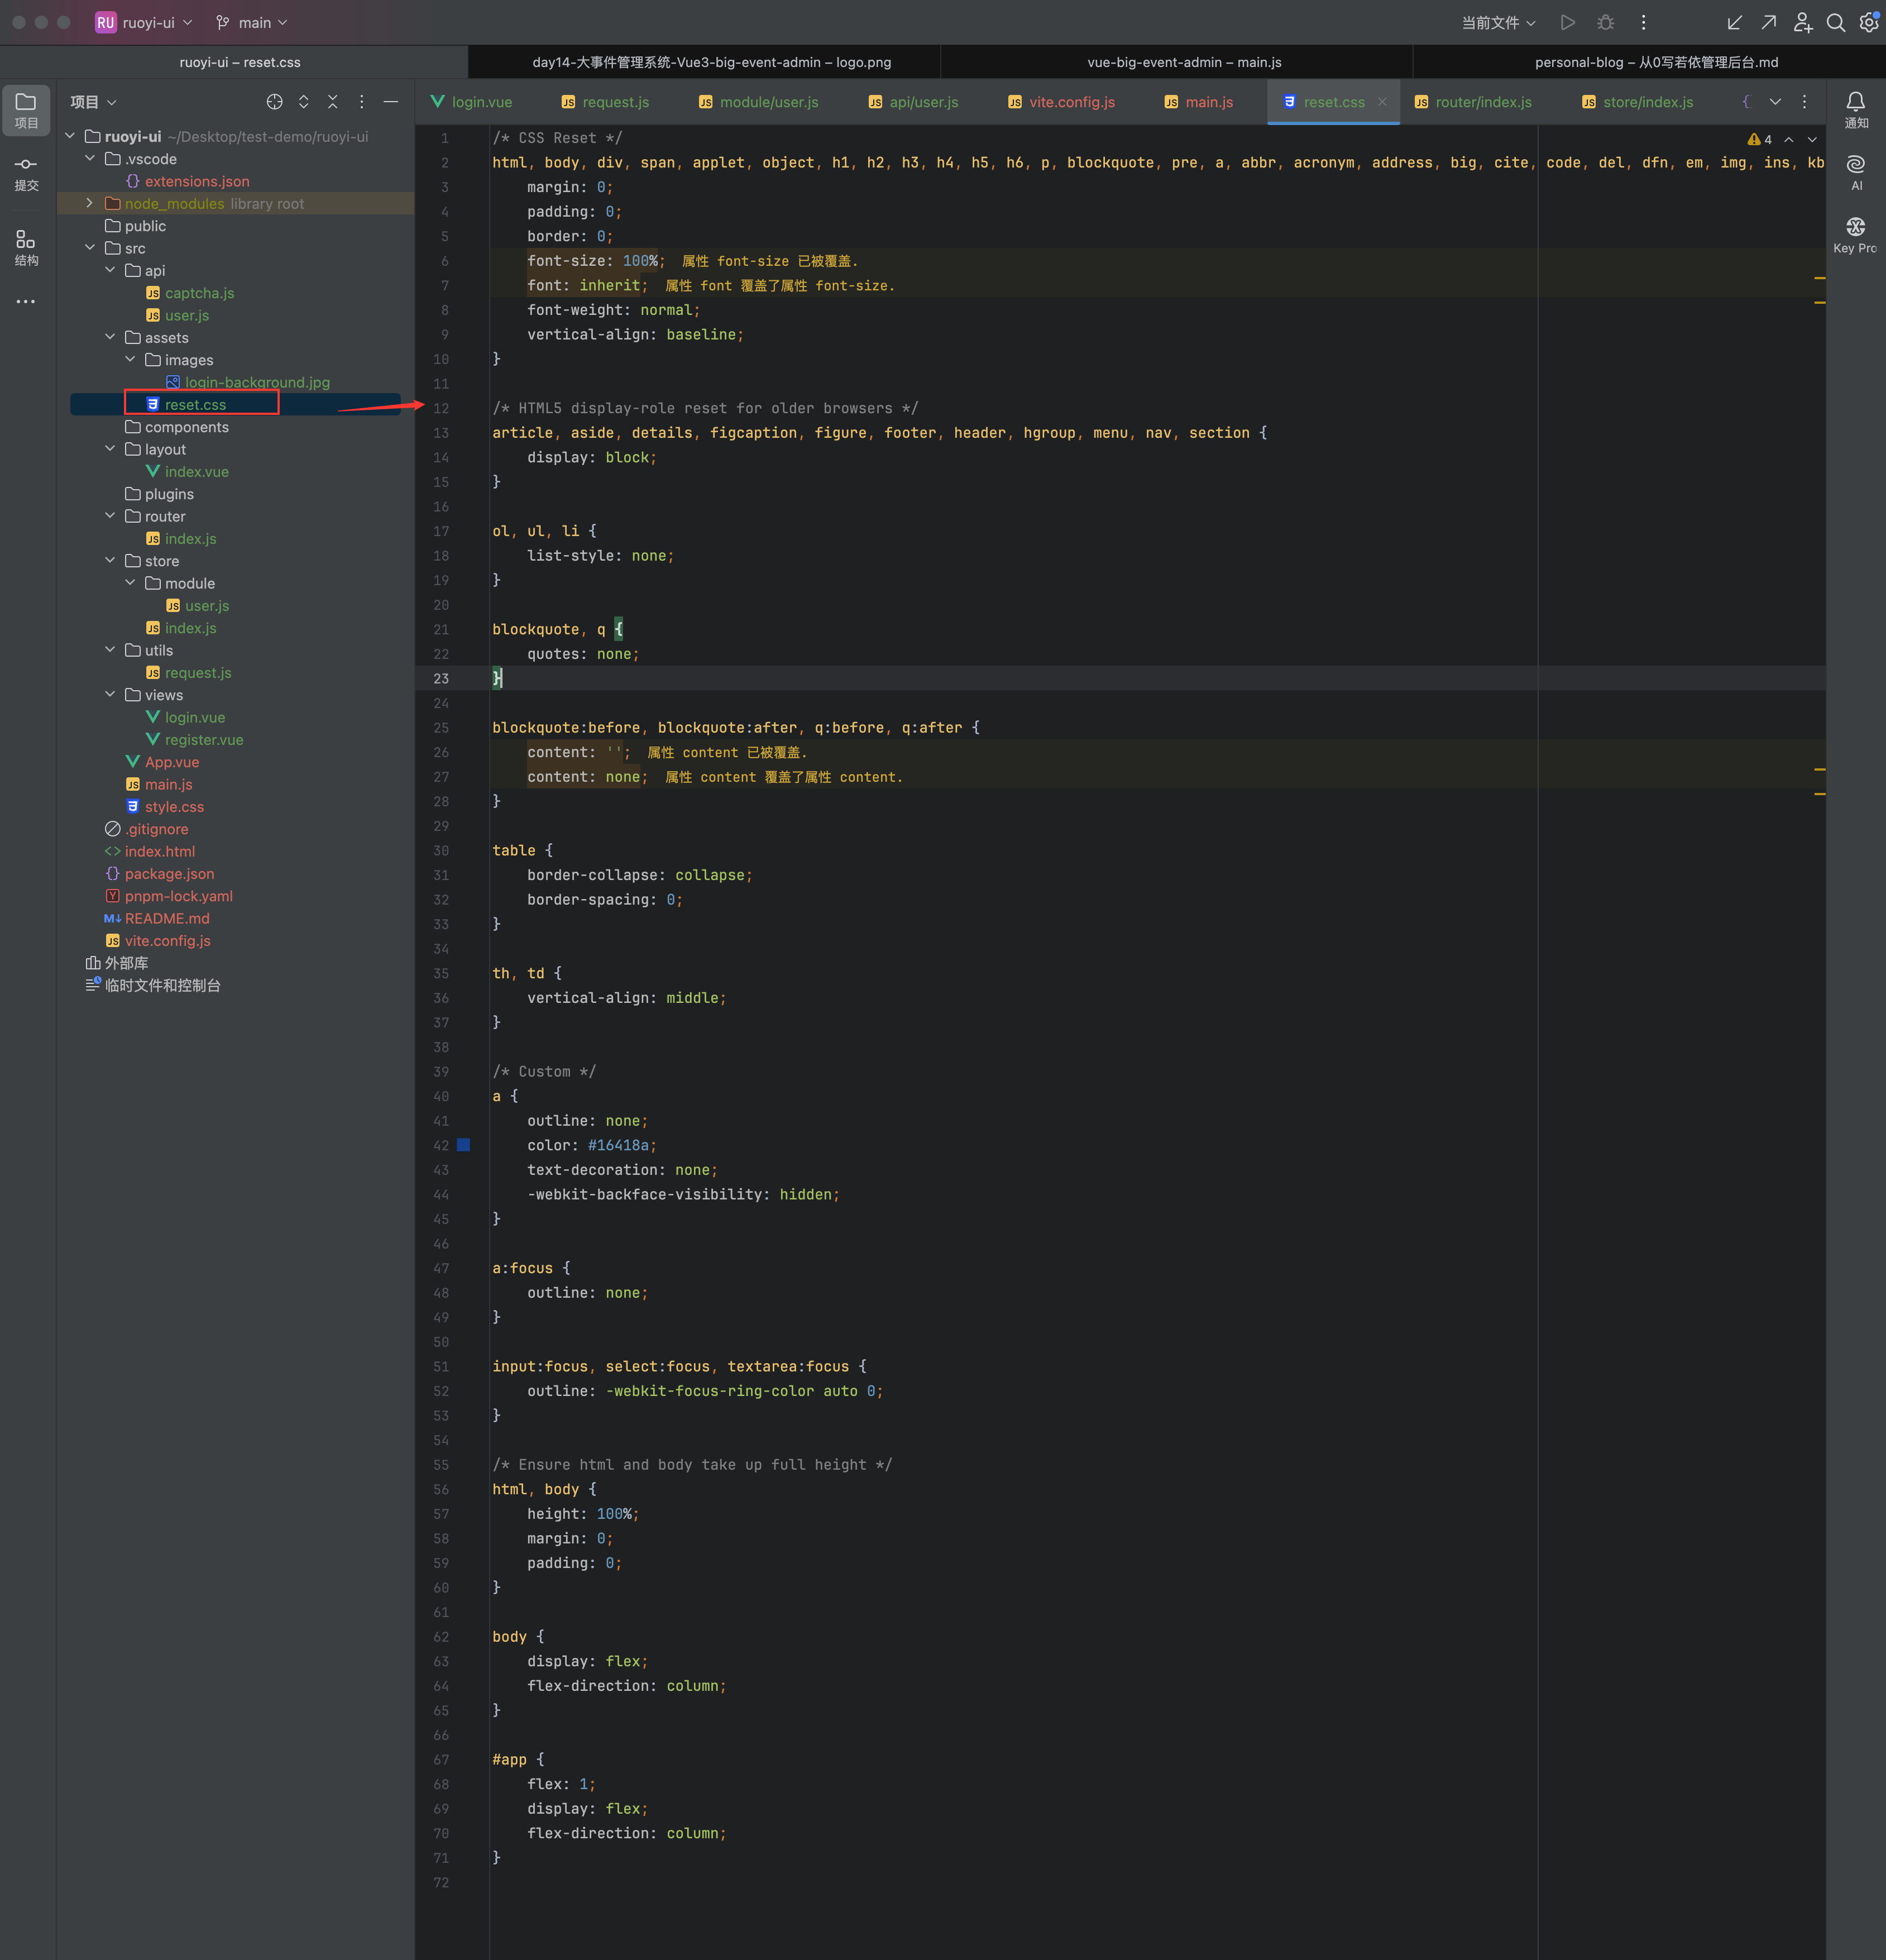
/* CSS Reset */
html, body, div, span, applet, object, h1, h2, h3, h4, h5, h6, p, blockquote, pre, a, abbr, acronym, address, big, cite, code, del, dfn, em, img, ins, kbd, q, s, samp, small, strike, strong, sub, sup, tt, var, b, u, i, center, dl, dt, dd, ol, ul, li, fieldset, form, label, legend, table, caption, tbody, tfoot, thead, tr, th, td, article, aside, canvas, details, embed, figure, figcaption, footer, header, hgroup, menu, nav, output, ruby, section, summary, time, mark, audio, video {
    margin: 0;
    padding: 0;
    border: 0;
    font-size: 100%;
    font: inherit;
    font-weight: normal;
    vertical-align: baseline;
}

/* HTML5 display-role reset for older browsers */
article, aside, details, figcaption, figure, footer, header, hgroup, menu, nav, section {
    display: block;
}

ol, ul, li {
    list-style: none;
}

blockquote, q {
    quotes: none;
}

blockquote:before, blockquote:after, q:before, q:after {
    content: '';
    content: none;
}

table {
    border-collapse: collapse;
    border-spacing: 0;
}

th, td {
    vertical-align: middle;
}

/* Custom */
a {
    outline: none;
    color: #16418a;
    text-decoration: none;
    -webkit-backface-visibility: hidden;
}

a:focus {
    outline: none;
}

input:focus, select:focus, textarea:focus {
    outline: -webkit-focus-ring-color auto 0;
}

/* Ensure html and body take up full height */
html, body {
    height: 100%;
    margin: 0;
    padding: 0;
}

body {
    display: flex;
    flex-direction: column;
}

#app {
    flex: 1;
    display: flex;
    flex-direction: column;
}
引入
reset.css,删除默认的style.css我们直接删掉
style.css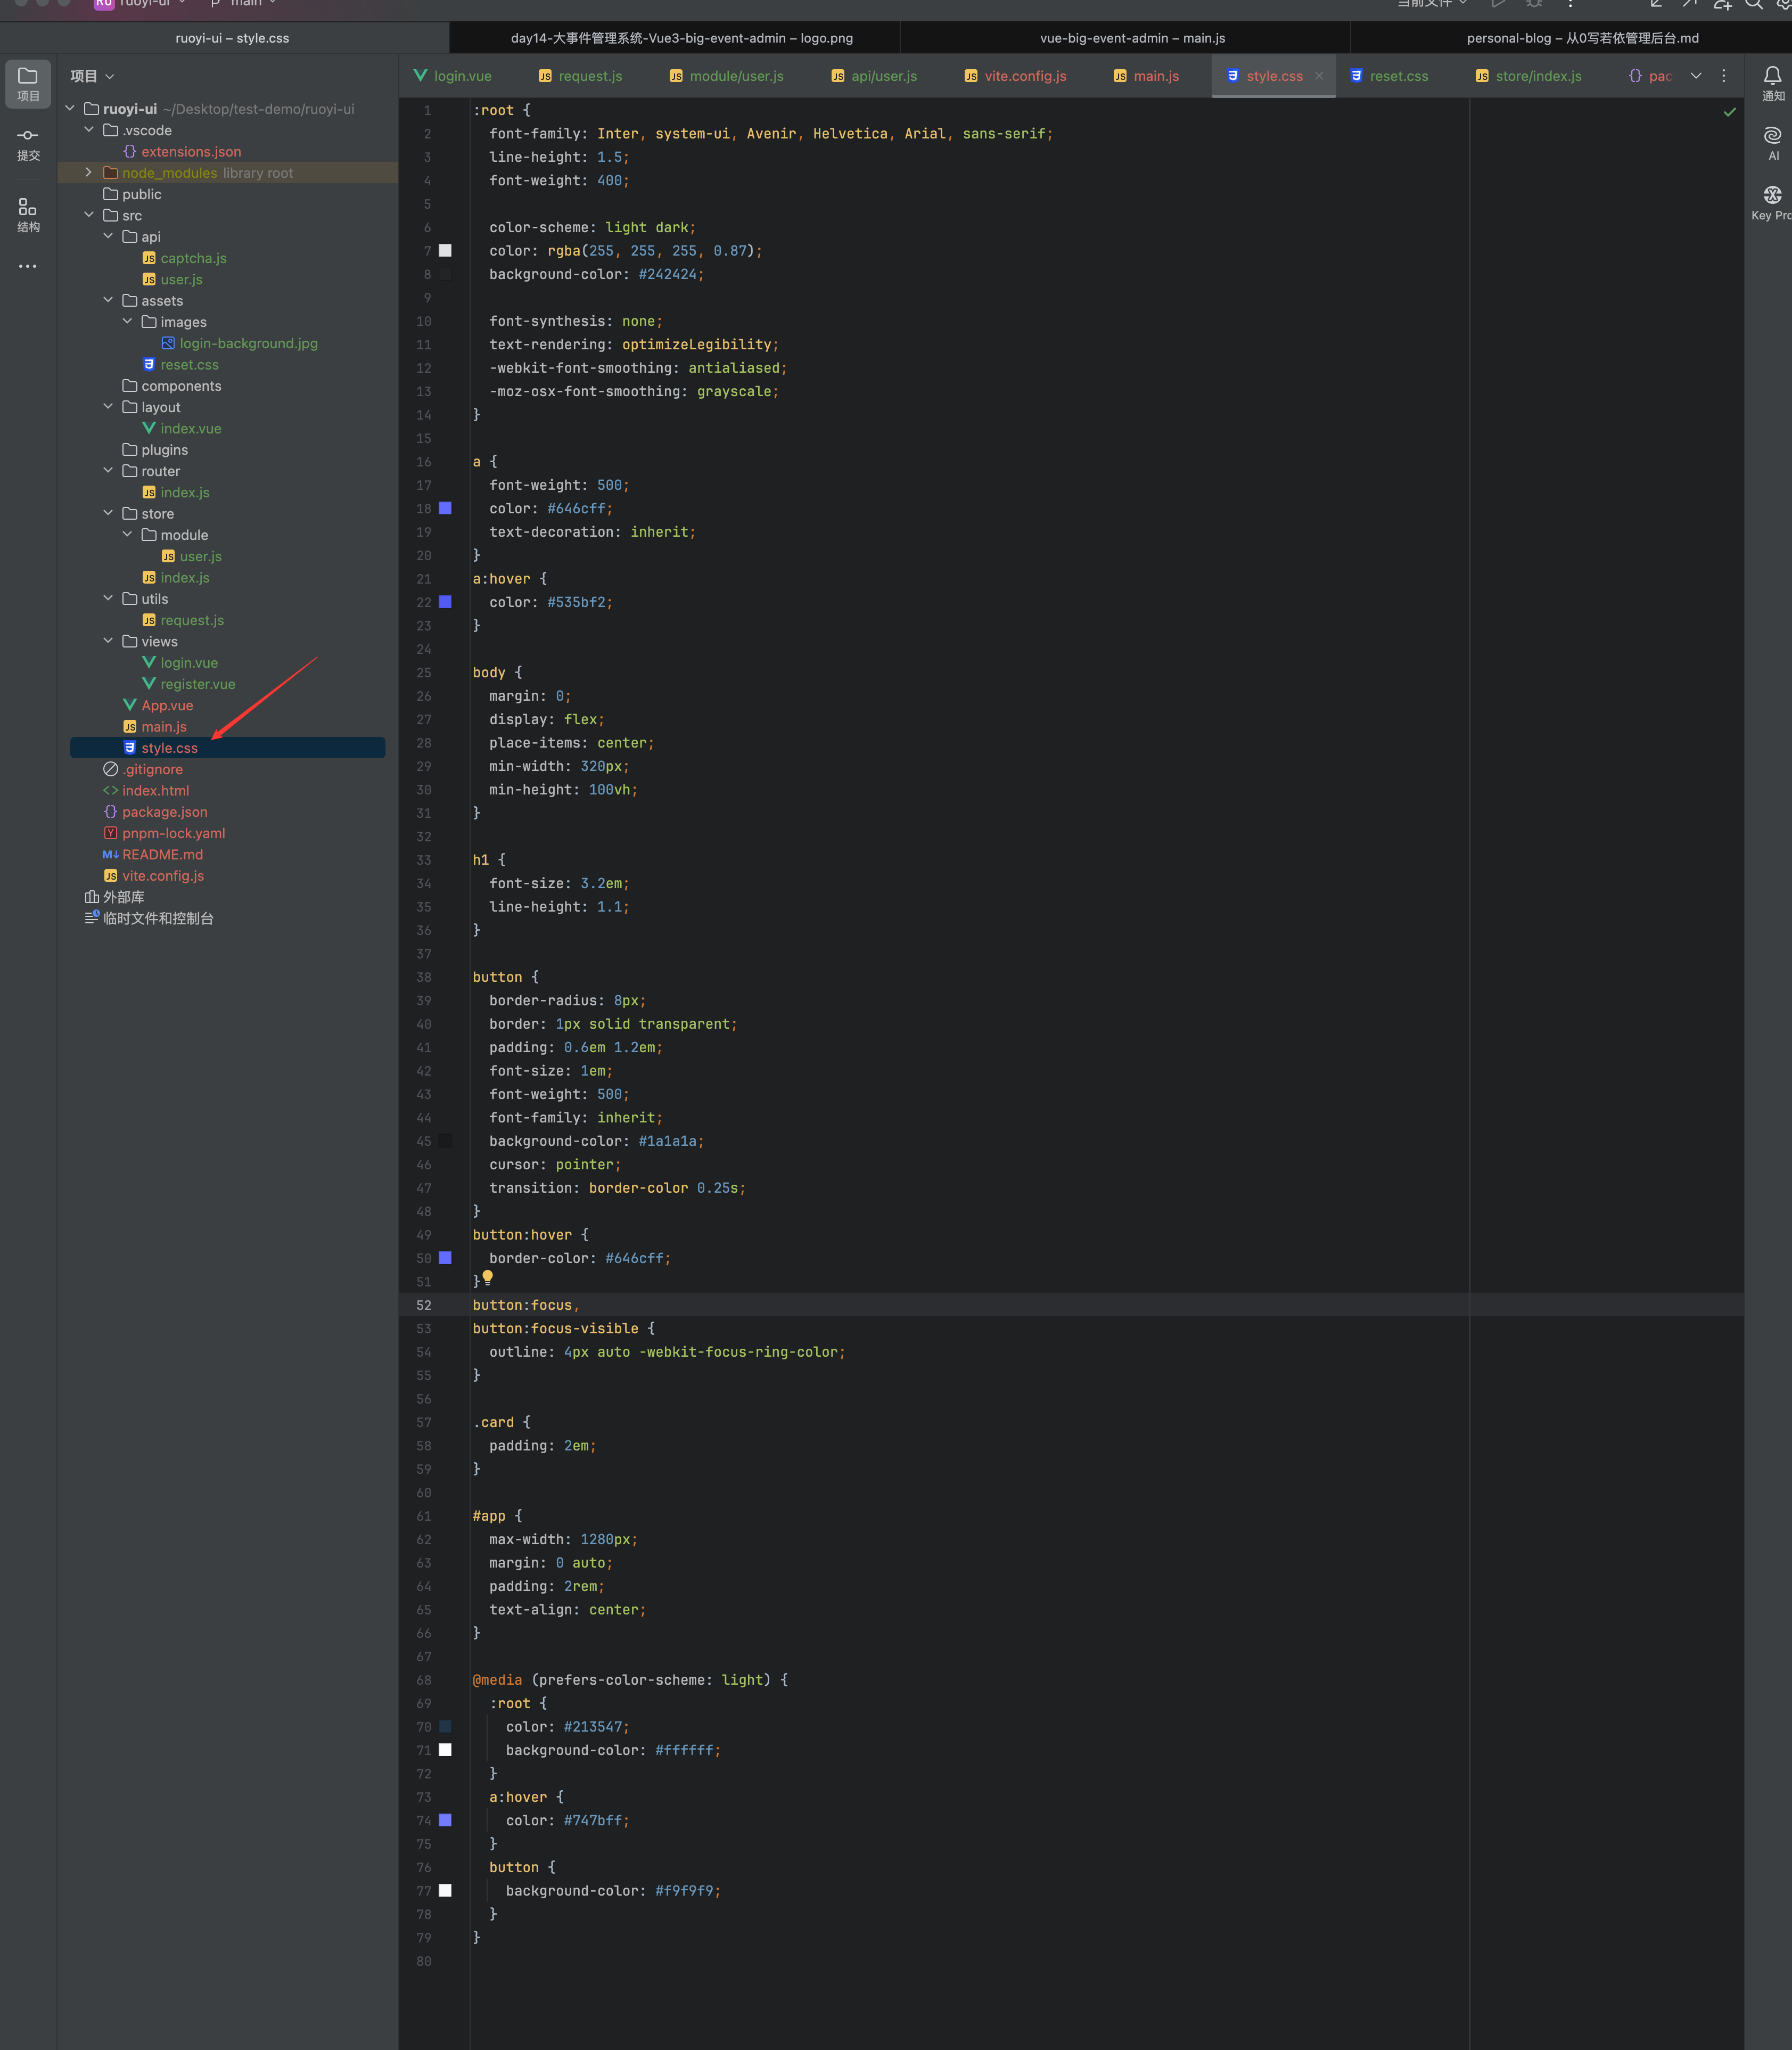
引入我们的
reset.css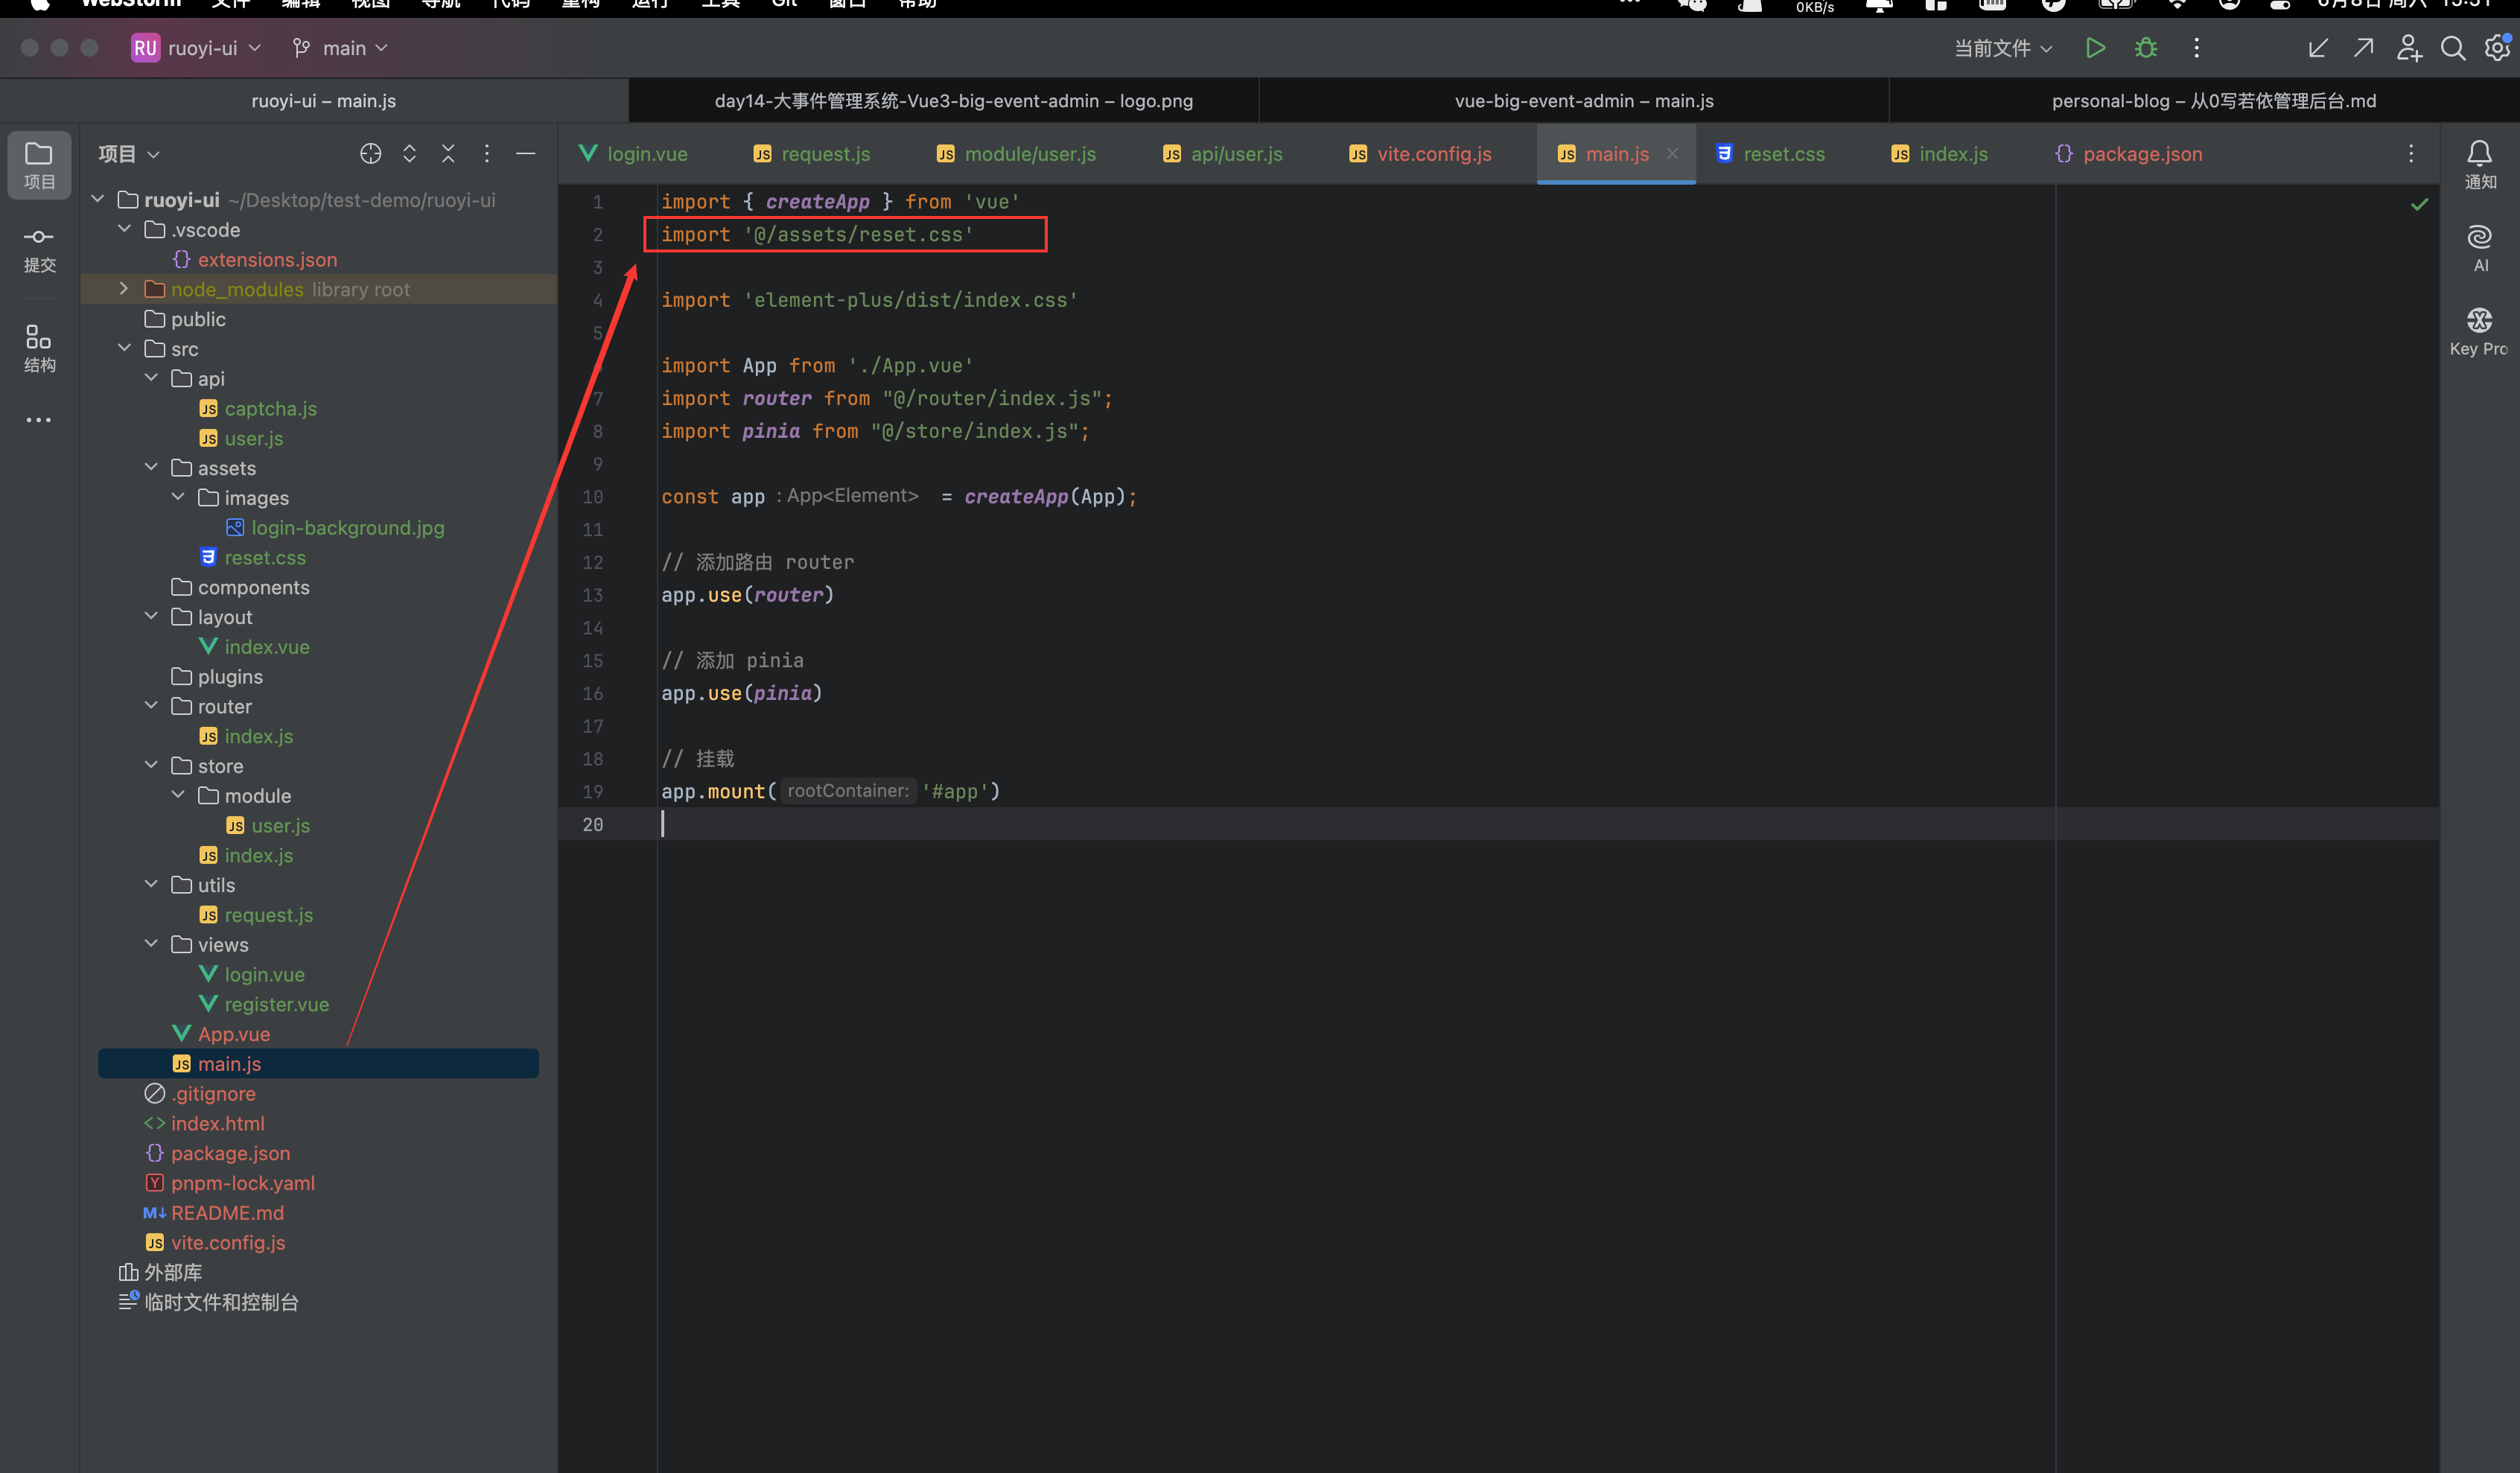
验证是否成功
我们看一下我们的 login 页面
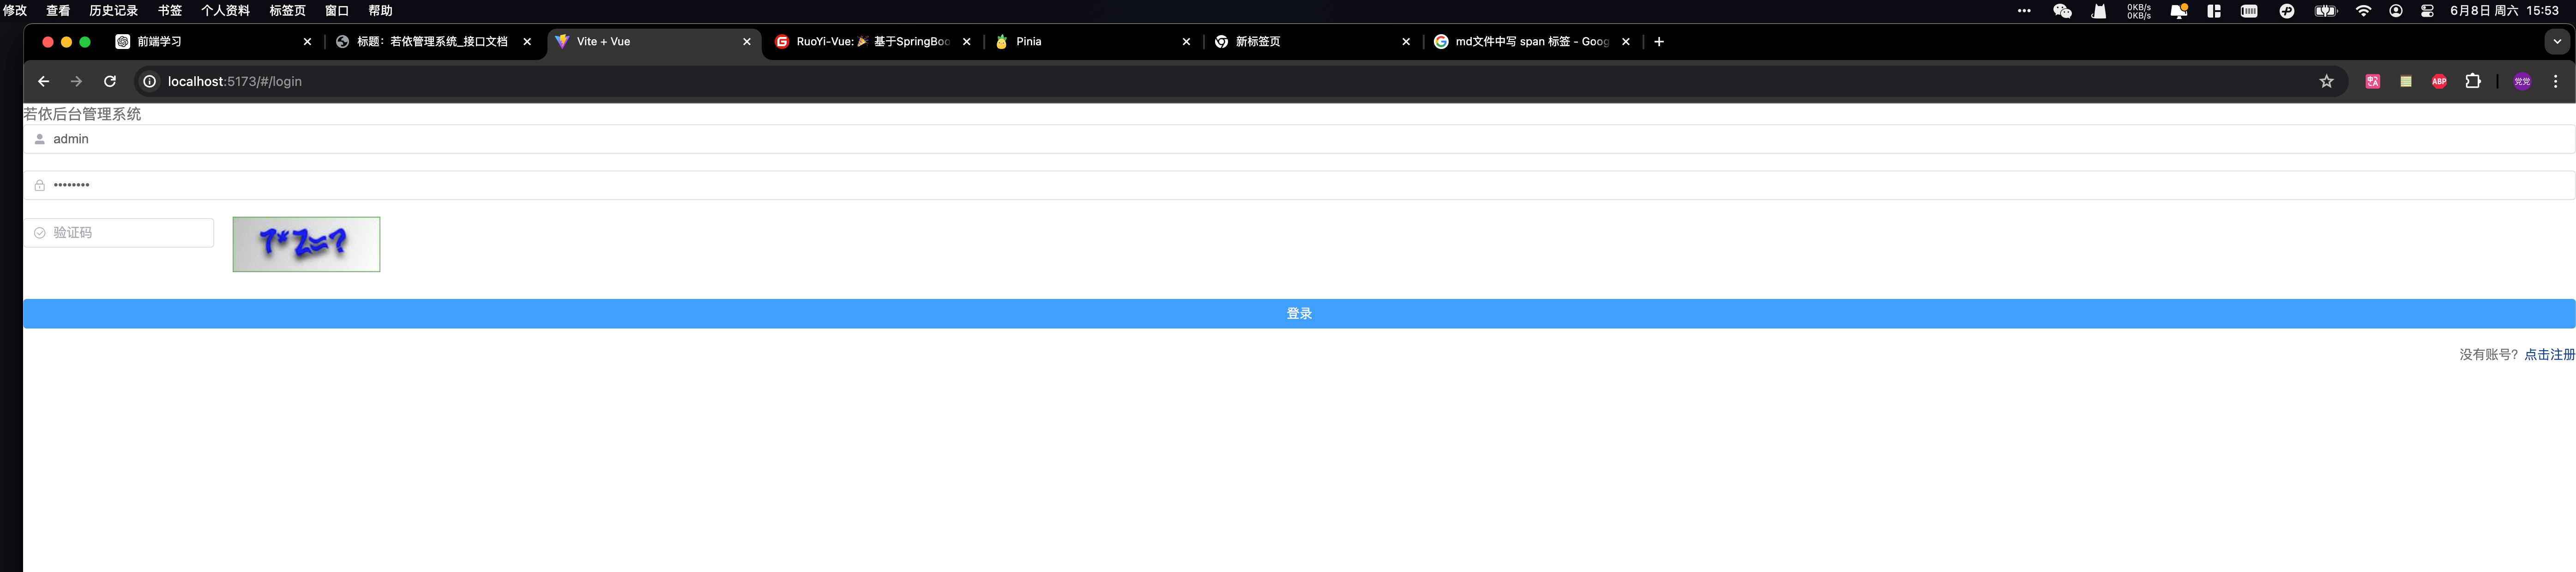
发现样式没有了,也不居中了;别慌,也就说明我们上面重置的步骤生效了,接下来头疼的来了,画页面。
不会画页面咋办,那就真的没办法,只能chatgpt、chrome、百度;要不然系统的学一下 html、css 了,我这里就不系统介绍了,后面的就直接贴代码了,自己去挑样式了。
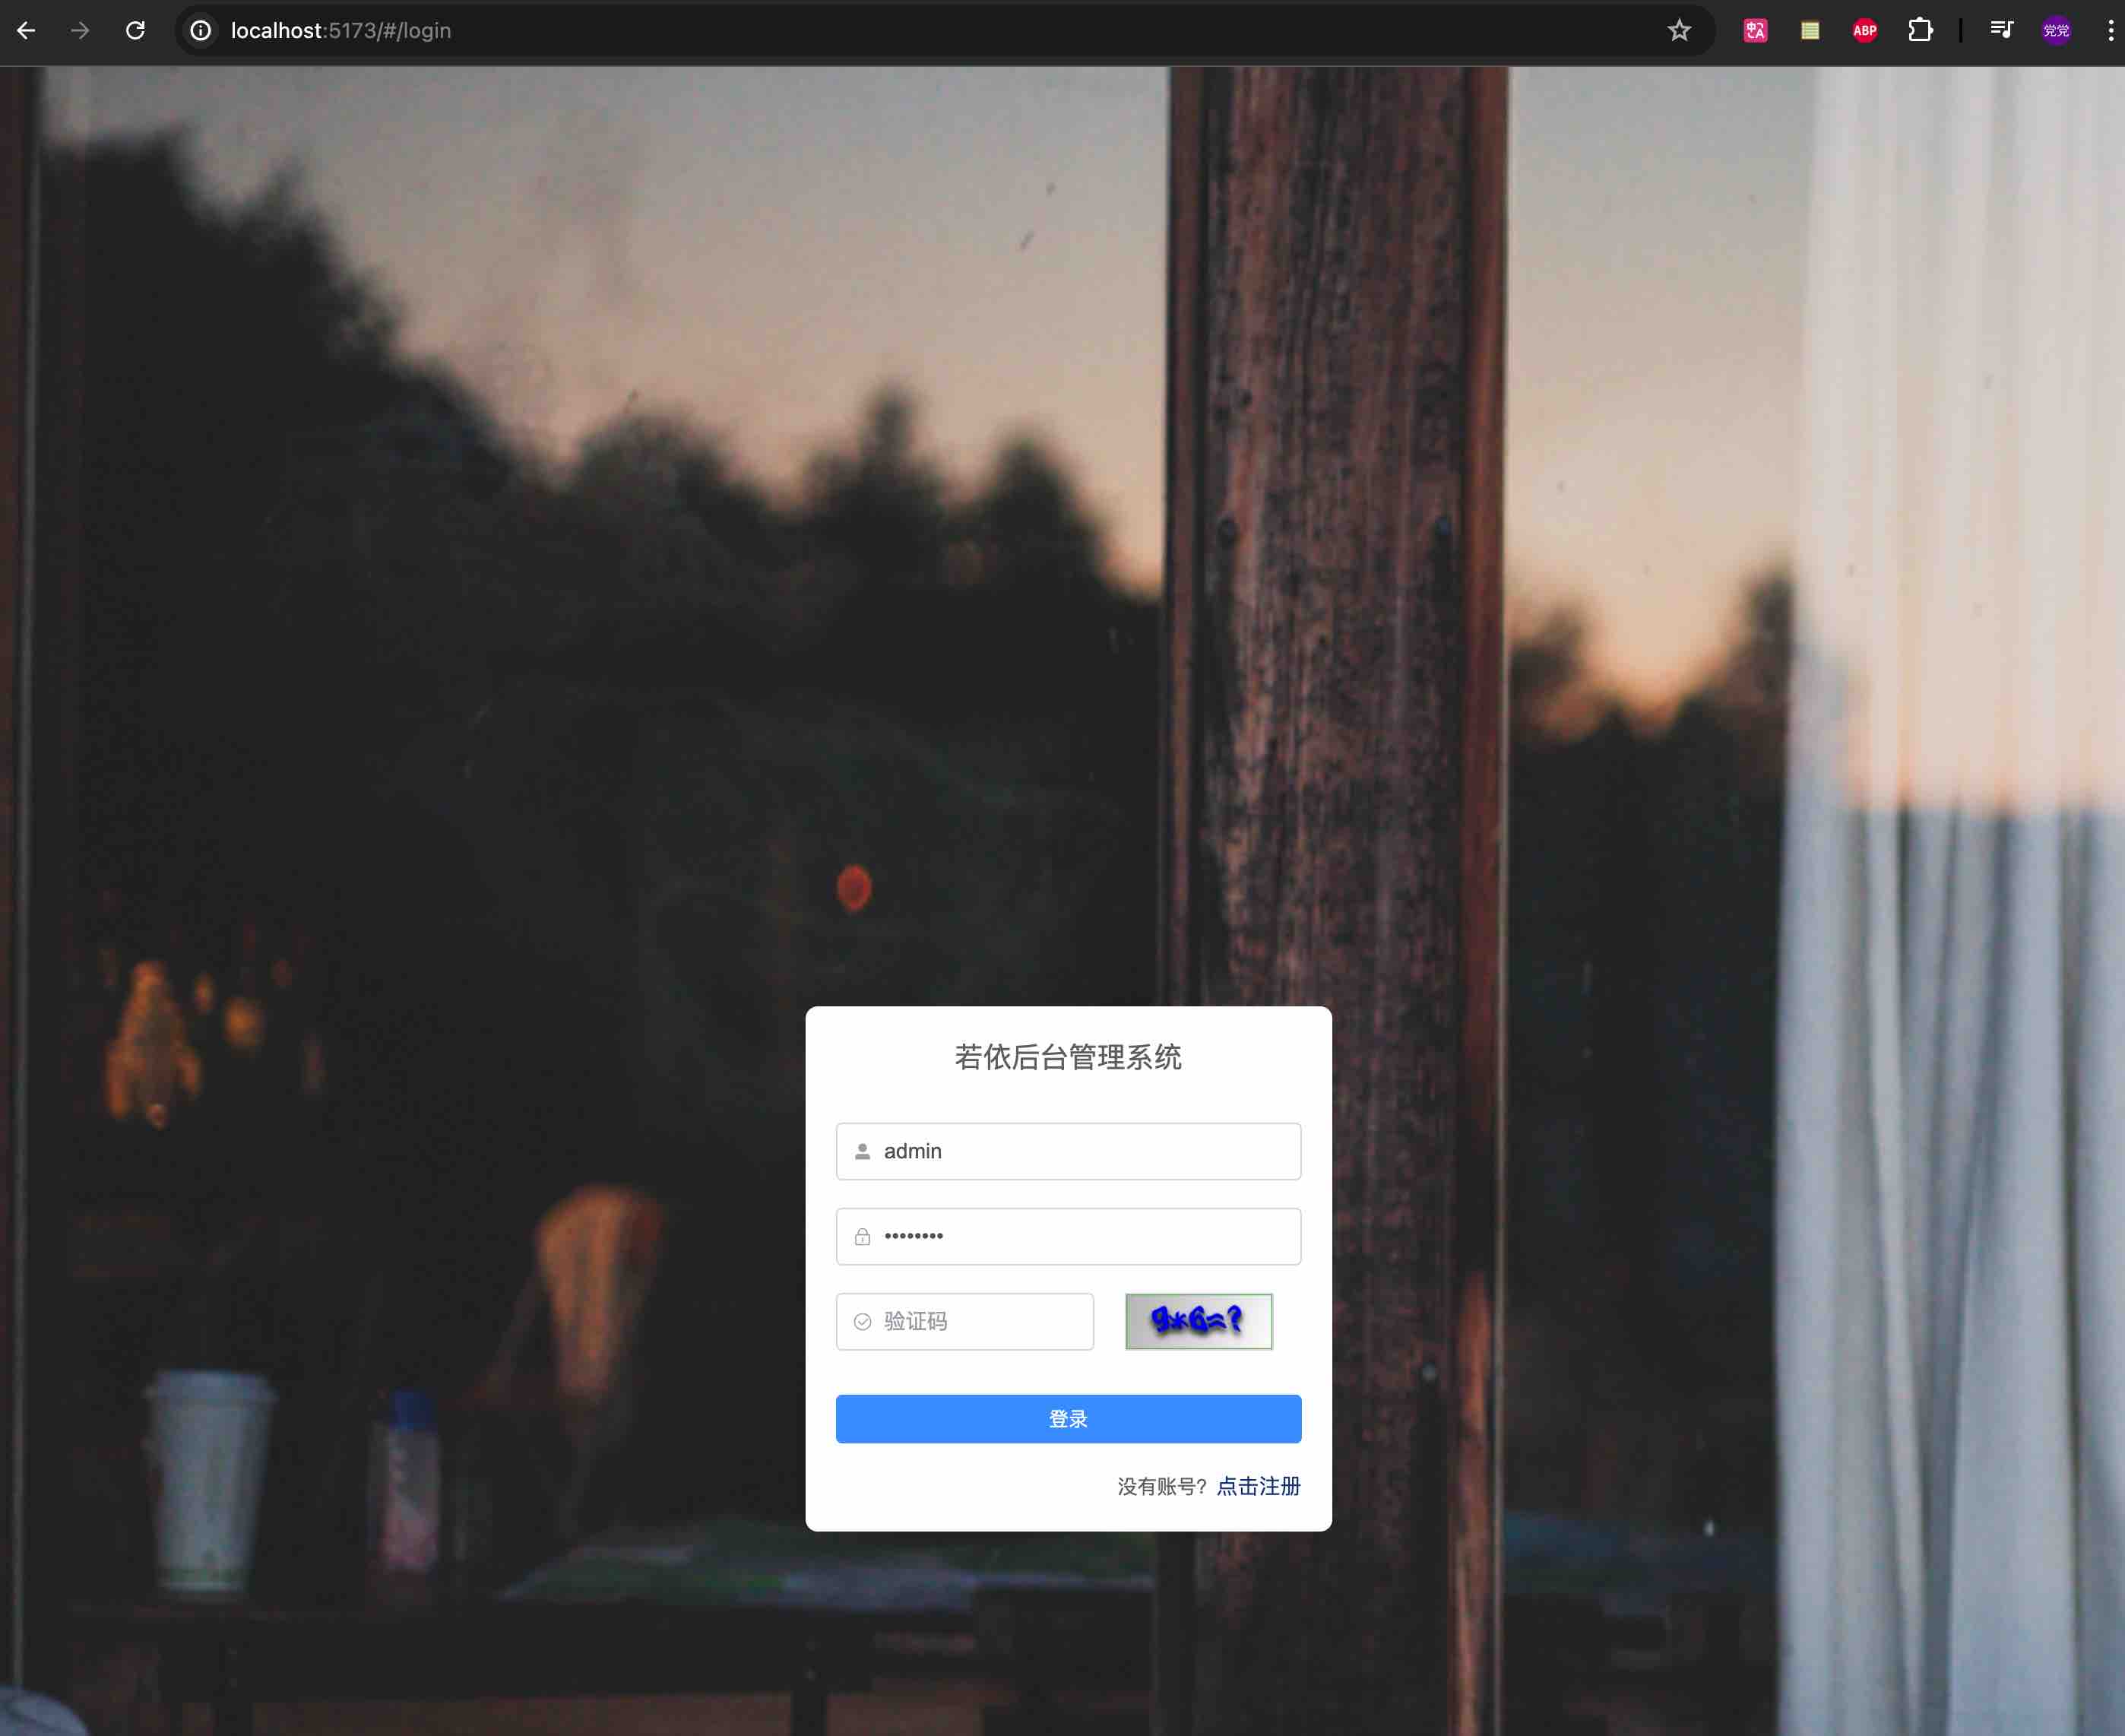
登录页样式
效果
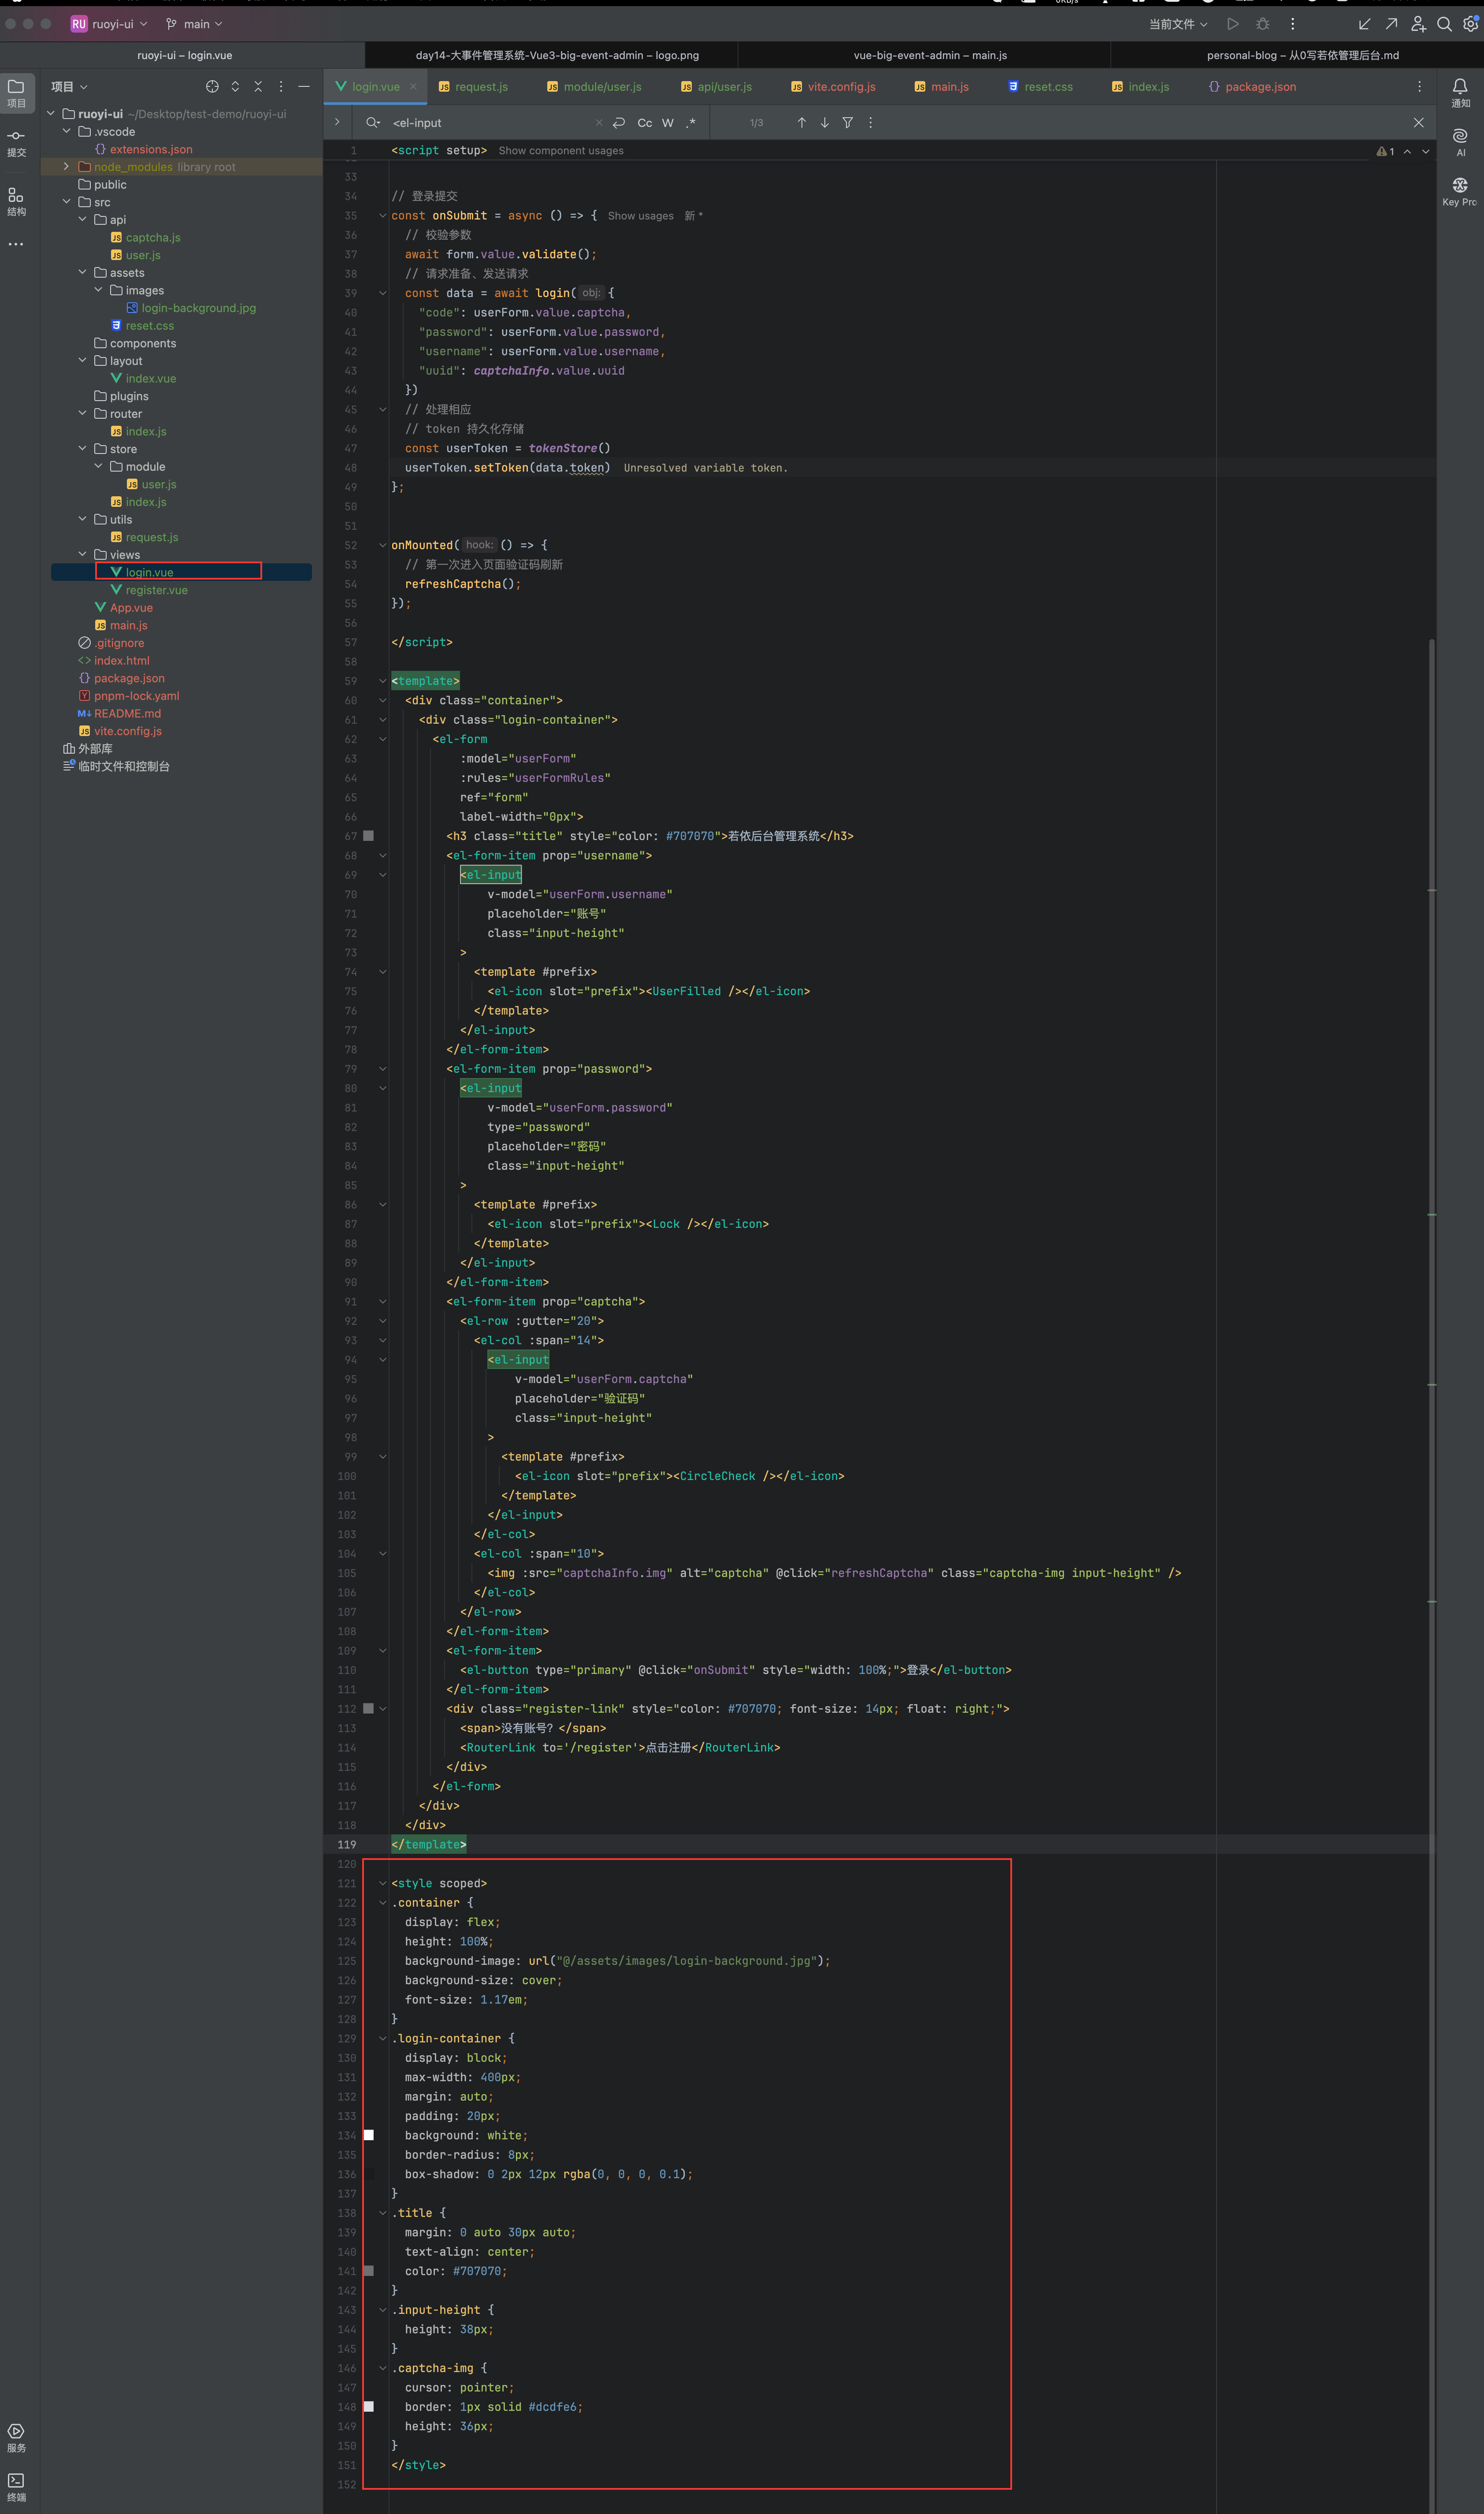
.container {
  display: flex;
  height: 100%;
  background-image: url("@/assets/images/login-background.jpg");
  background-size: cover;
  font-size: 1.17em;
}
.login-container {
  display: block;
  max-width: 400px;
  margin: auto;
  padding: 20px;
  background: white;
  border-radius: 8px;
  box-shadow: 0 2px 12px rgba(0, 0, 0, 0.1);
}
.title {
  margin: 0 auto 30px auto;
  text-align: center;
  color: #707070;
}
.input-height {
  height: 38px;
}
.captcha-img {
  cursor: pointer;
  border: 1px solid #dcdfe6;
  height: 36px;
}
主页
分析
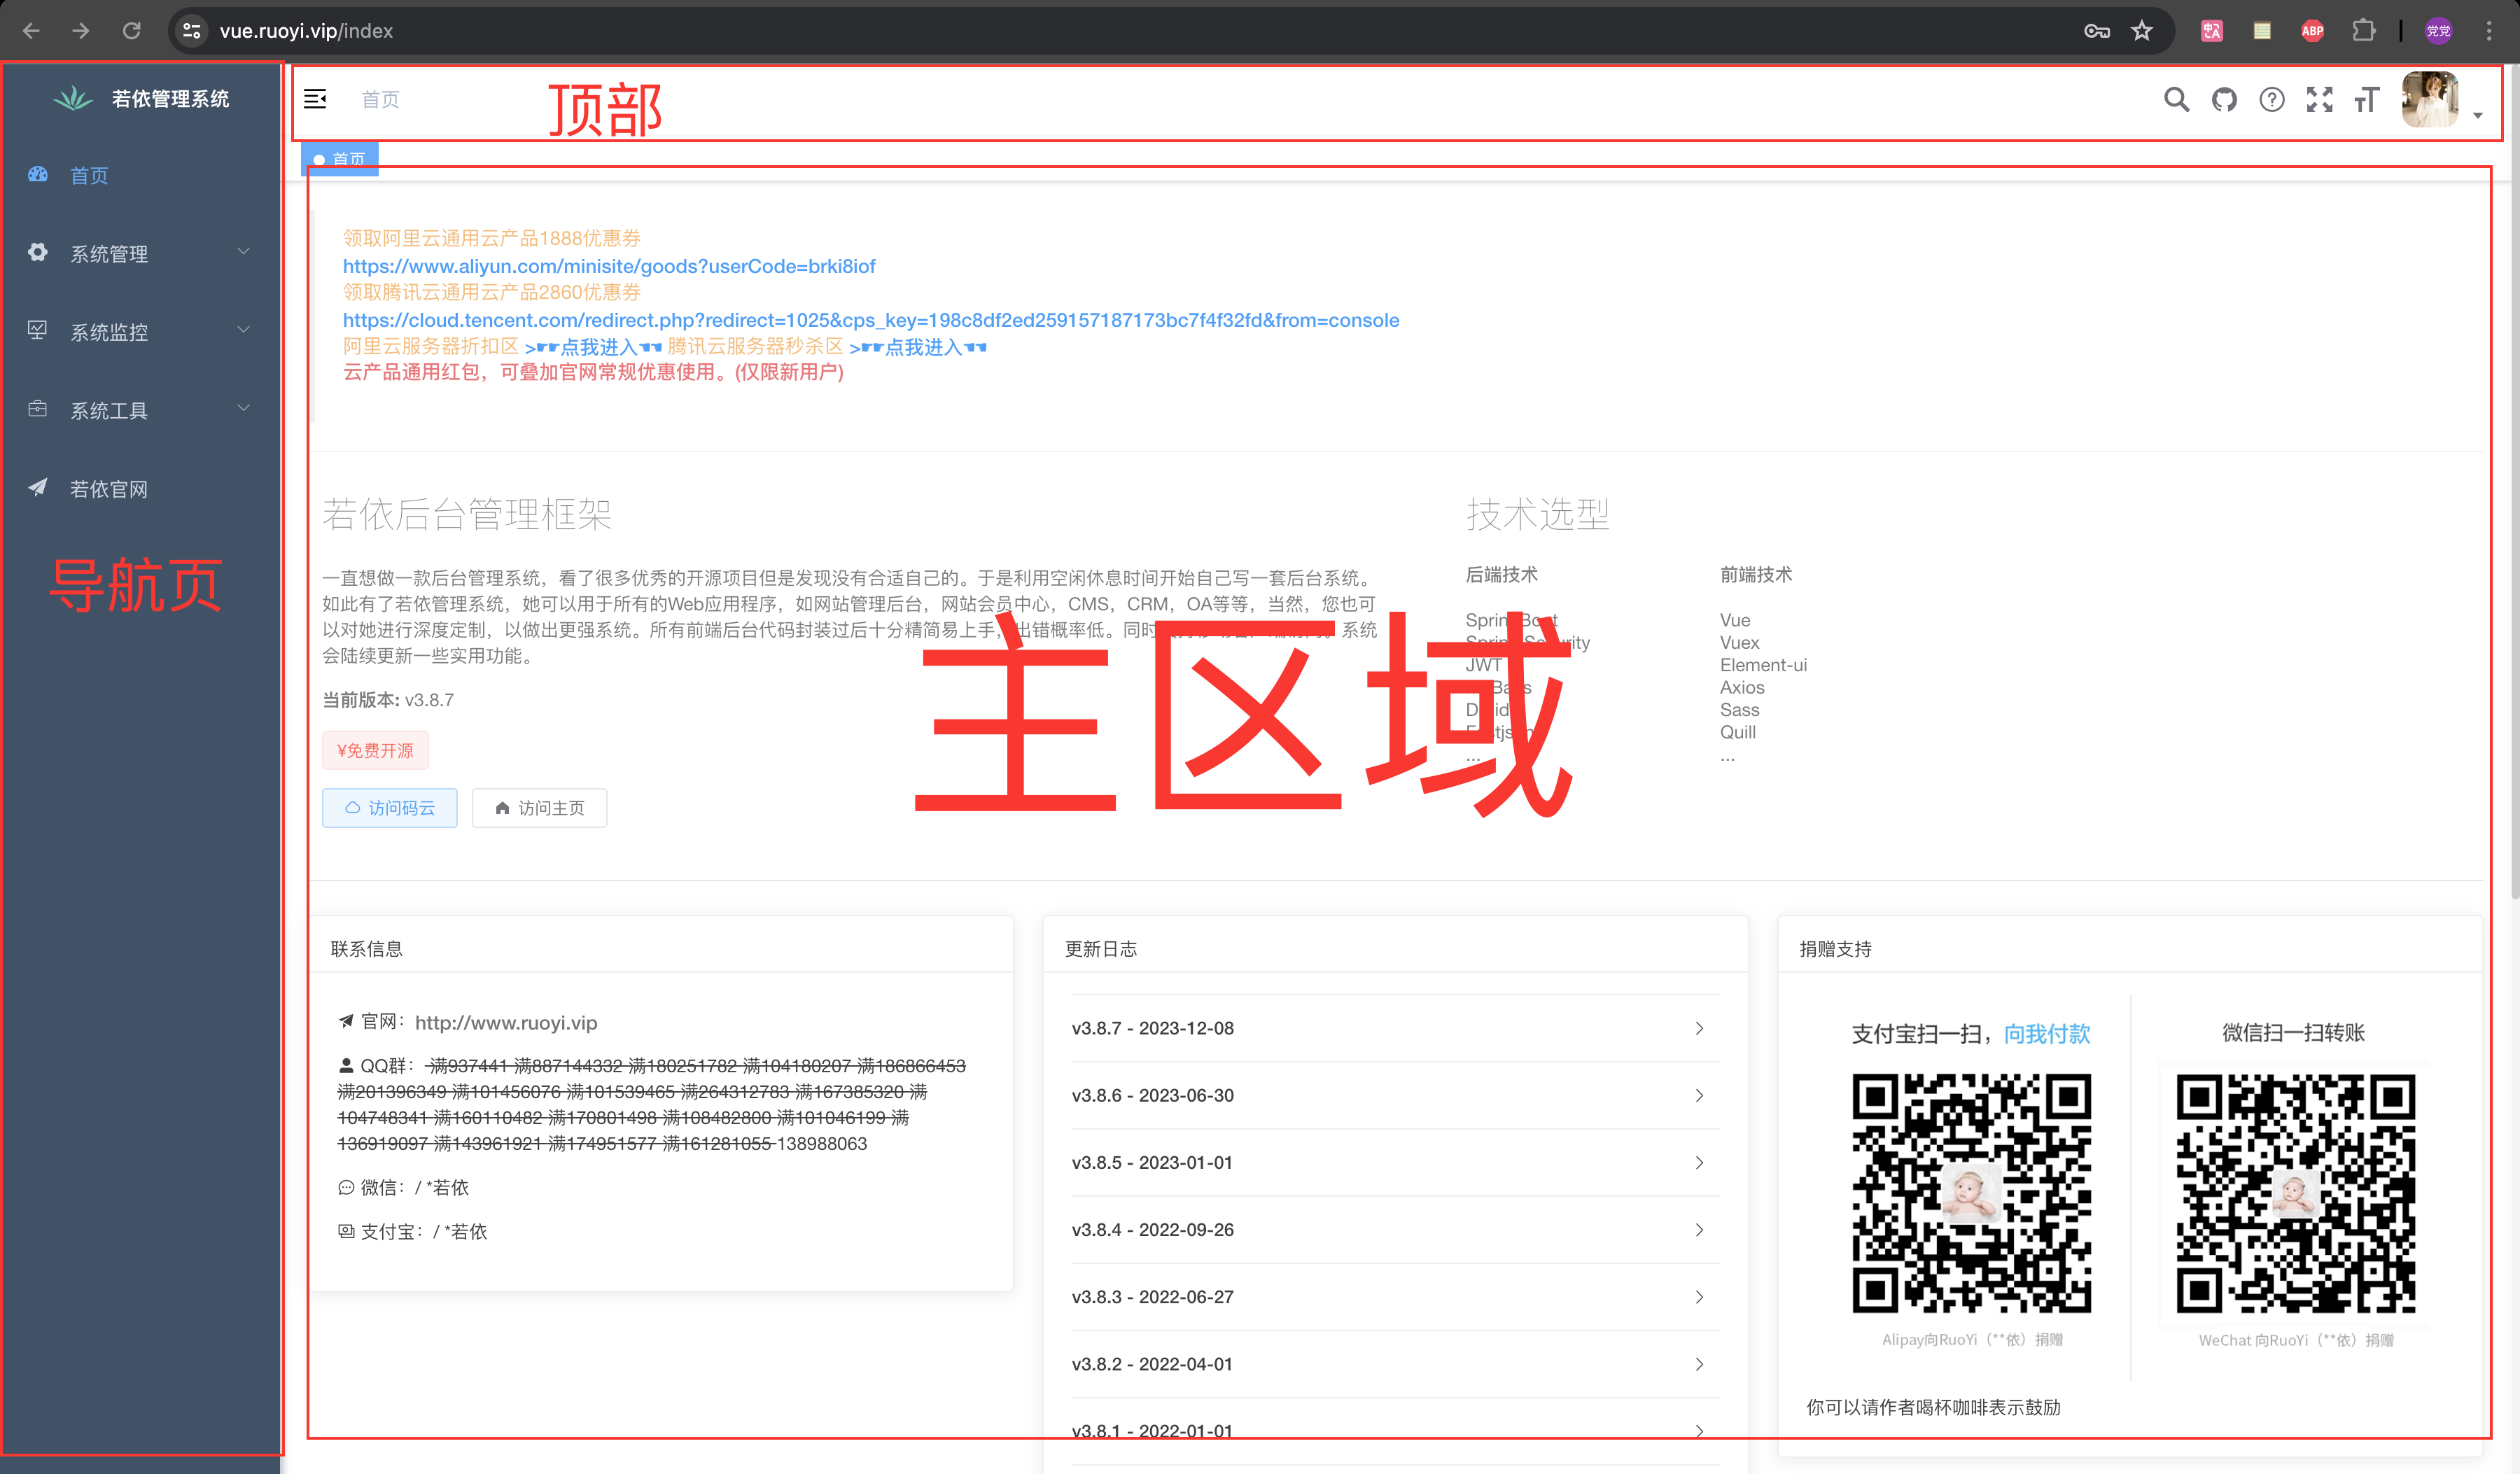
也就分三个区域,从 element-ui 中选择类似布局
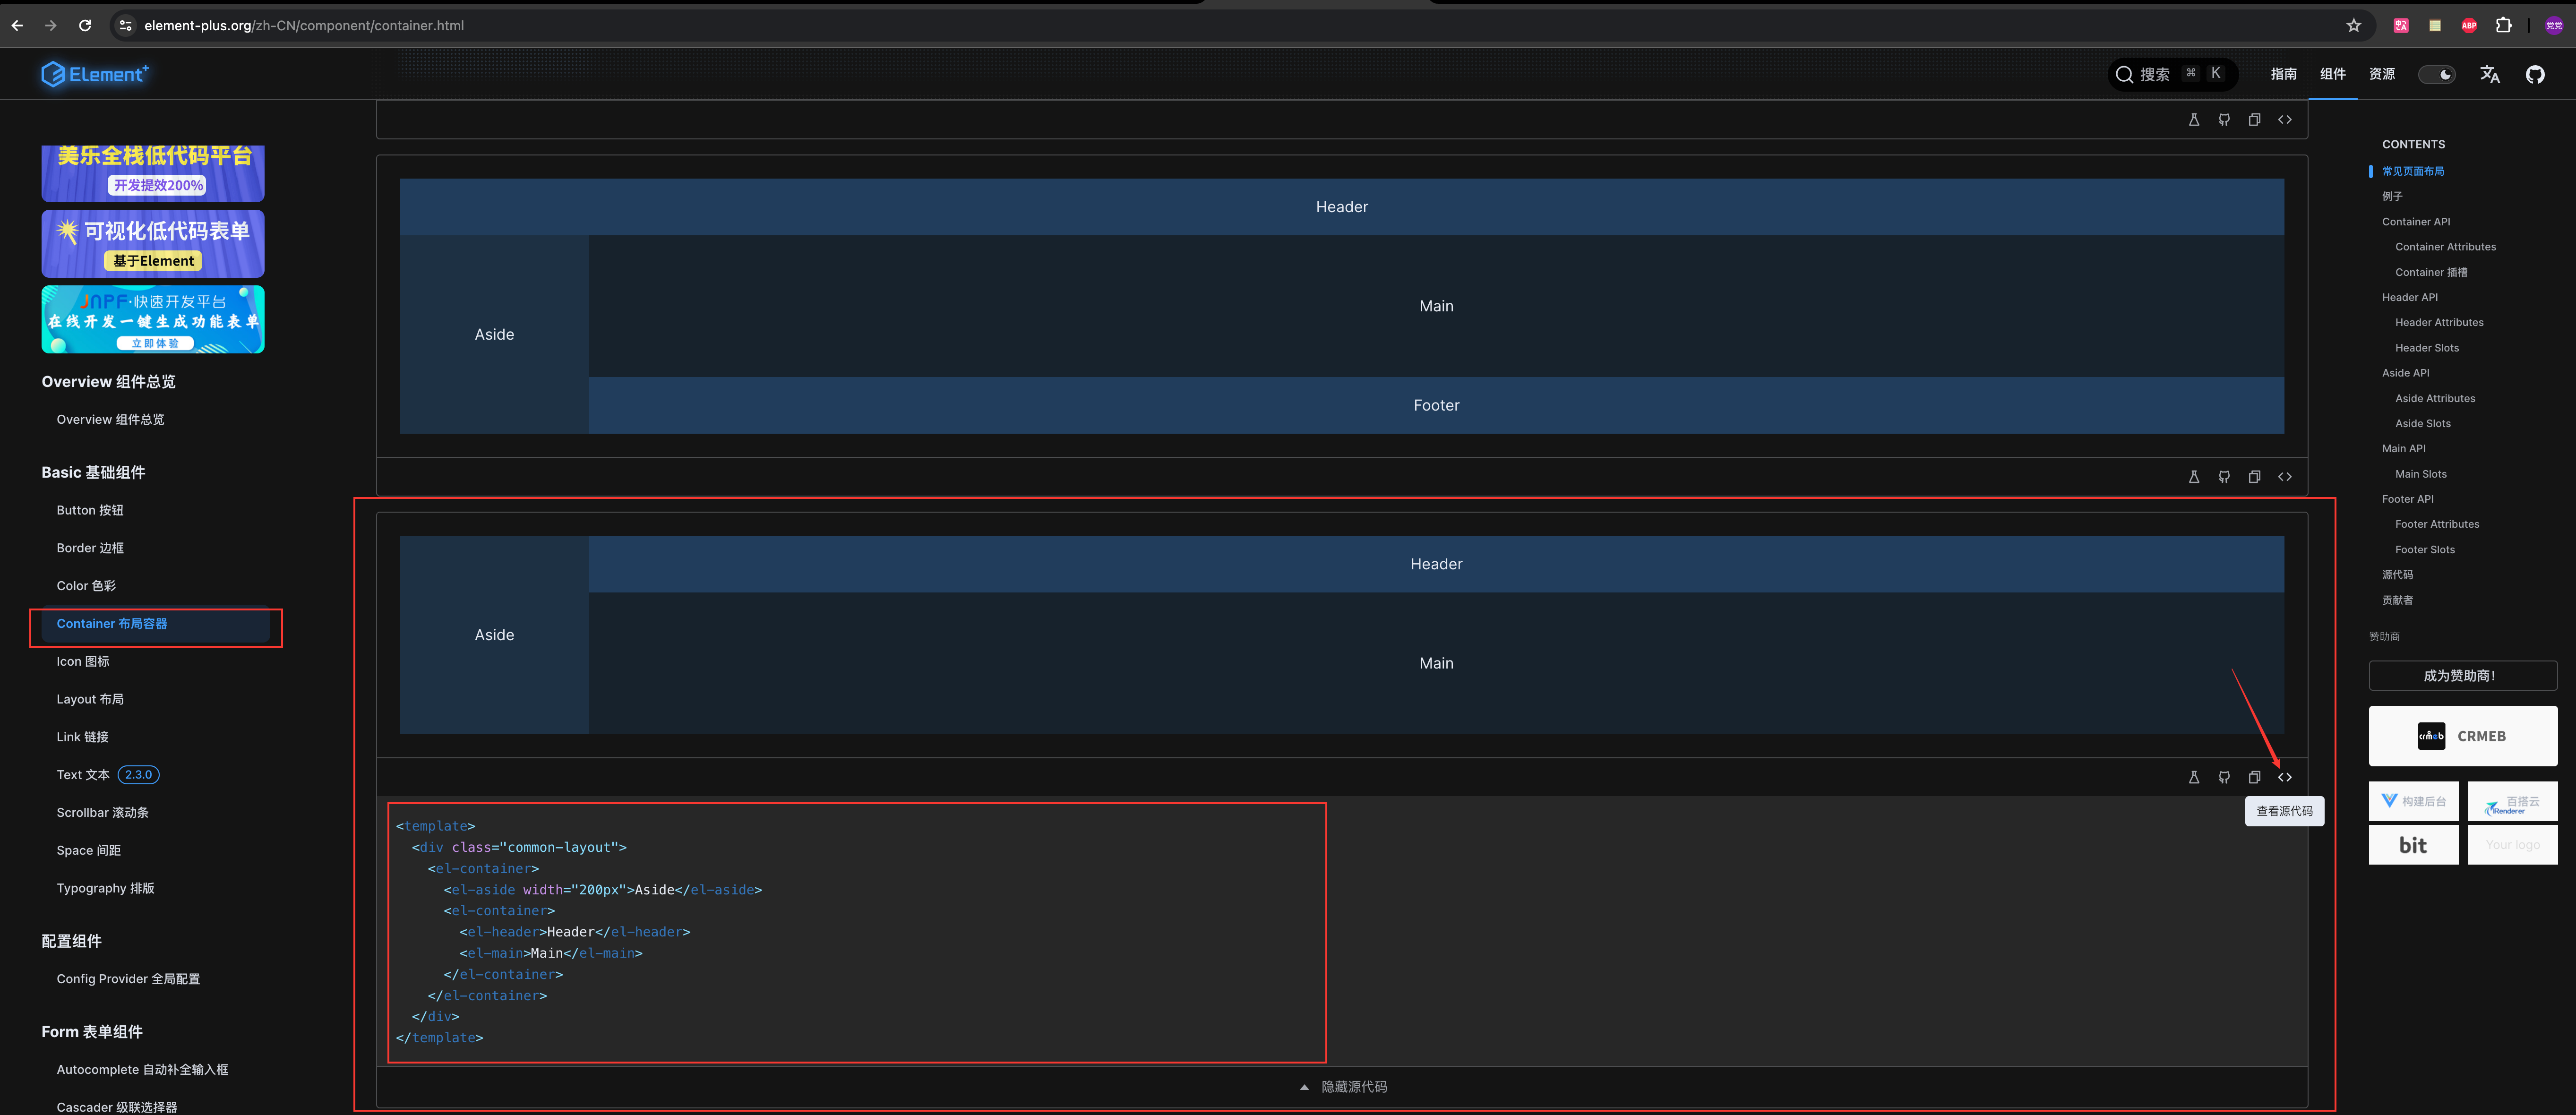
实现
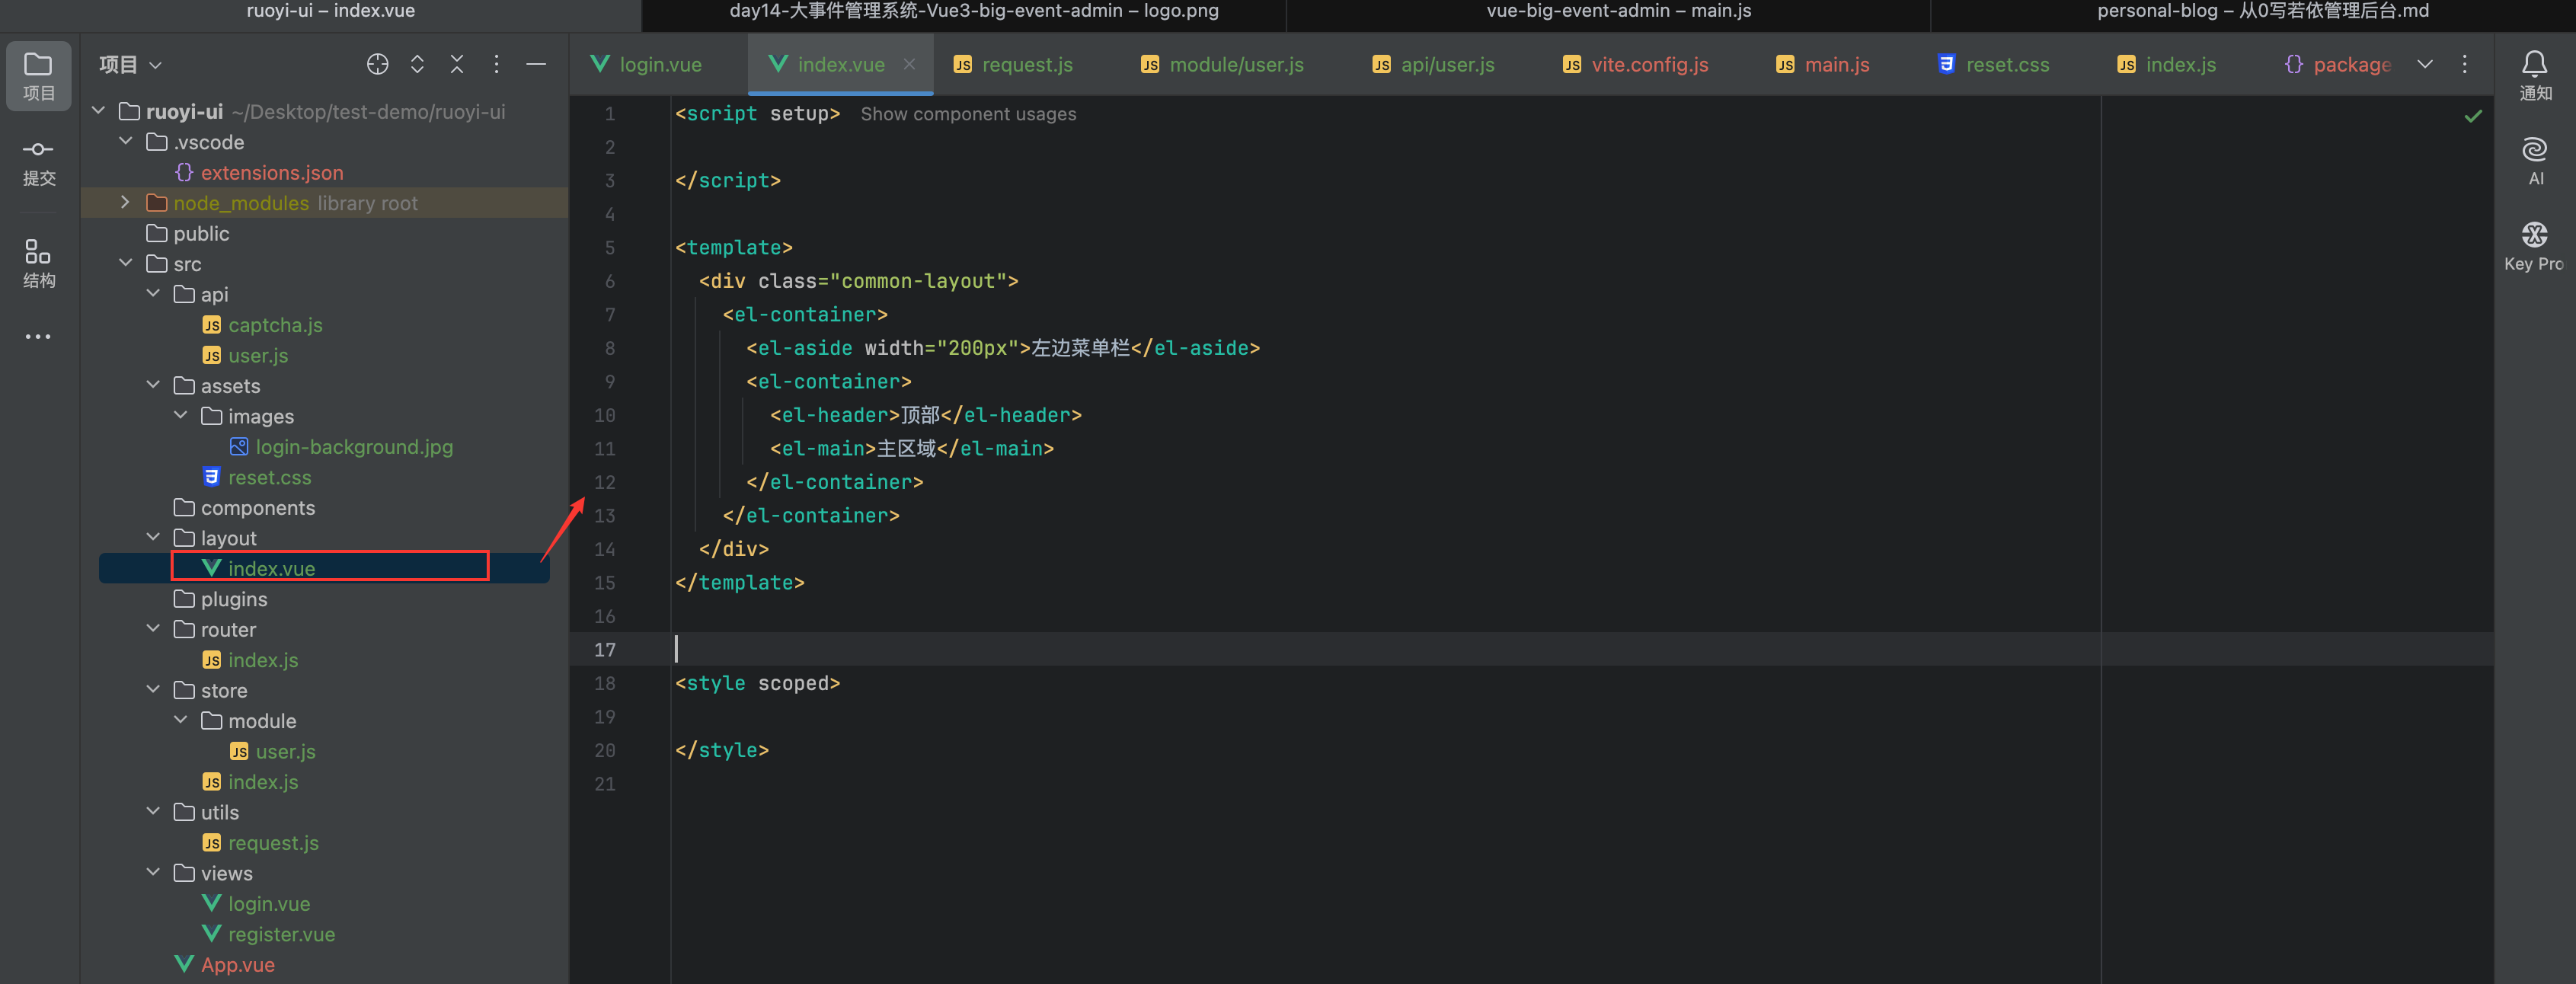
<script setup>

</script>

<template>
  <div class="common-layout">
    <el-container>
      <el-aside width="200px">左边菜单栏</el-aside>
      <el-container>
        <el-header>顶部</el-header>
        <el-main>主区域</el-main>
      </el-container>
    </el-container>
  </div>
</template>


<style scoped>

</style>
配置
router看一下效果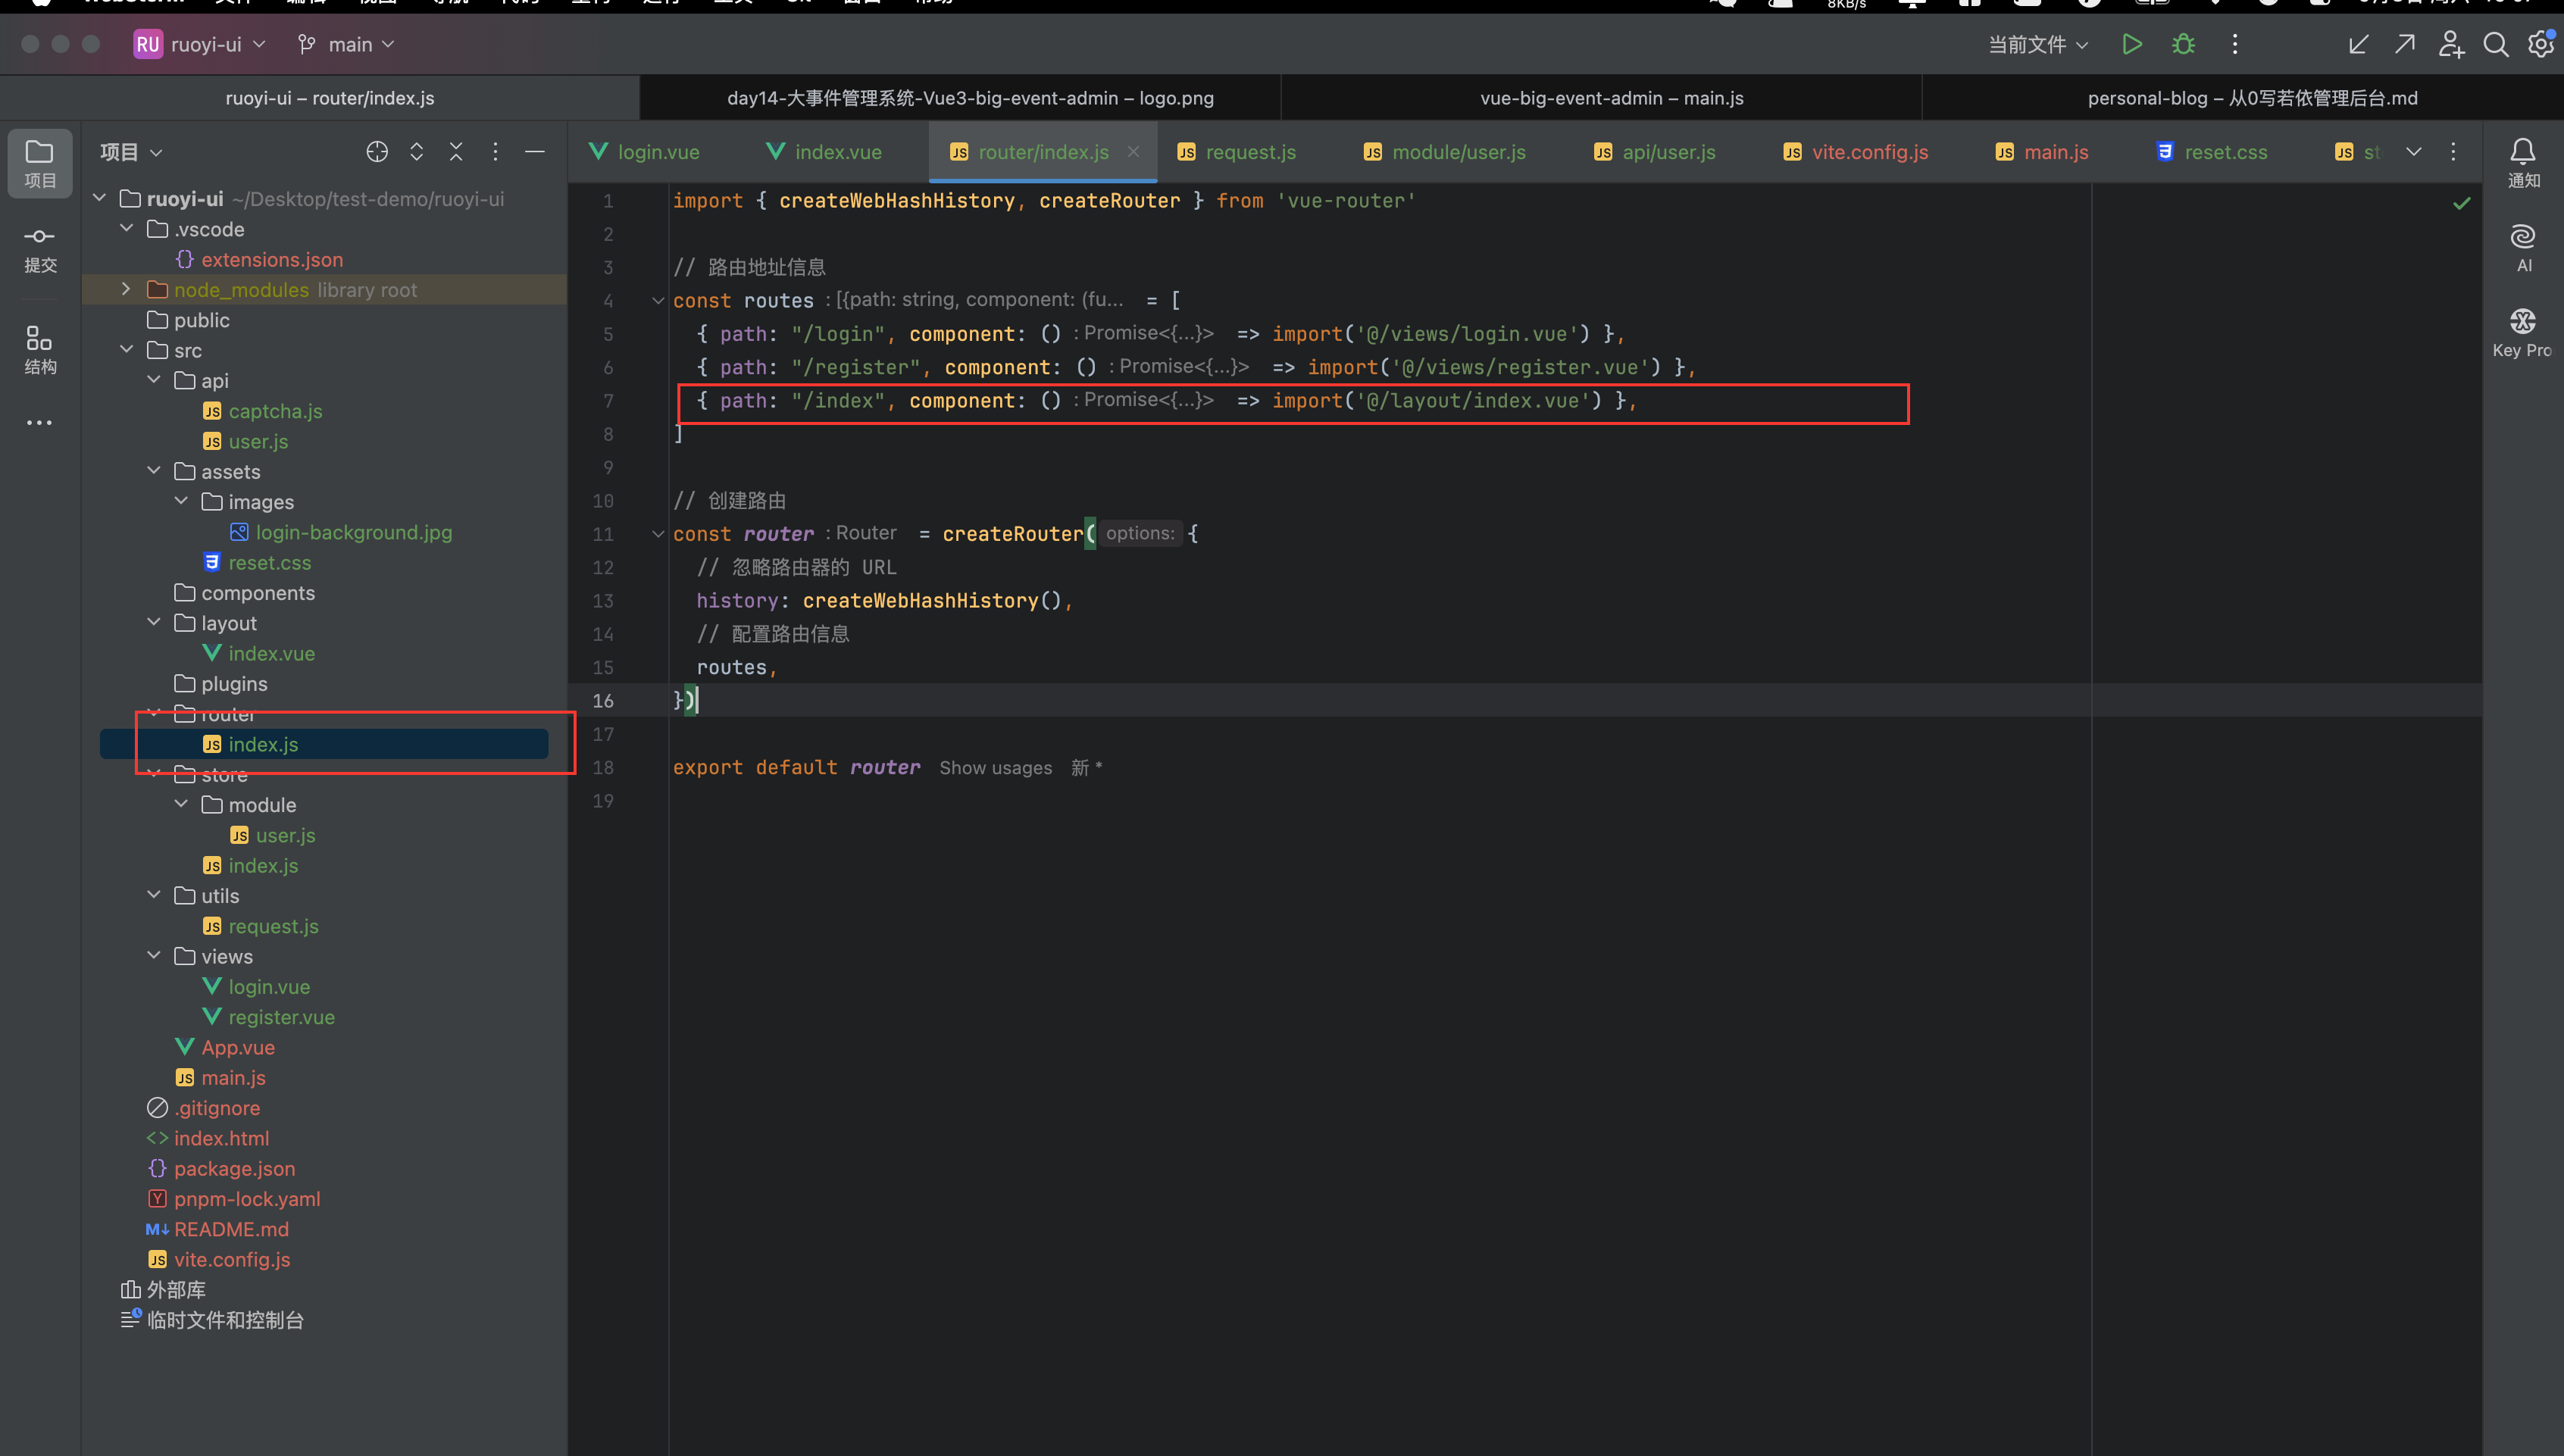
{ path: "/index", component: () => import('@/layout/index.vue') },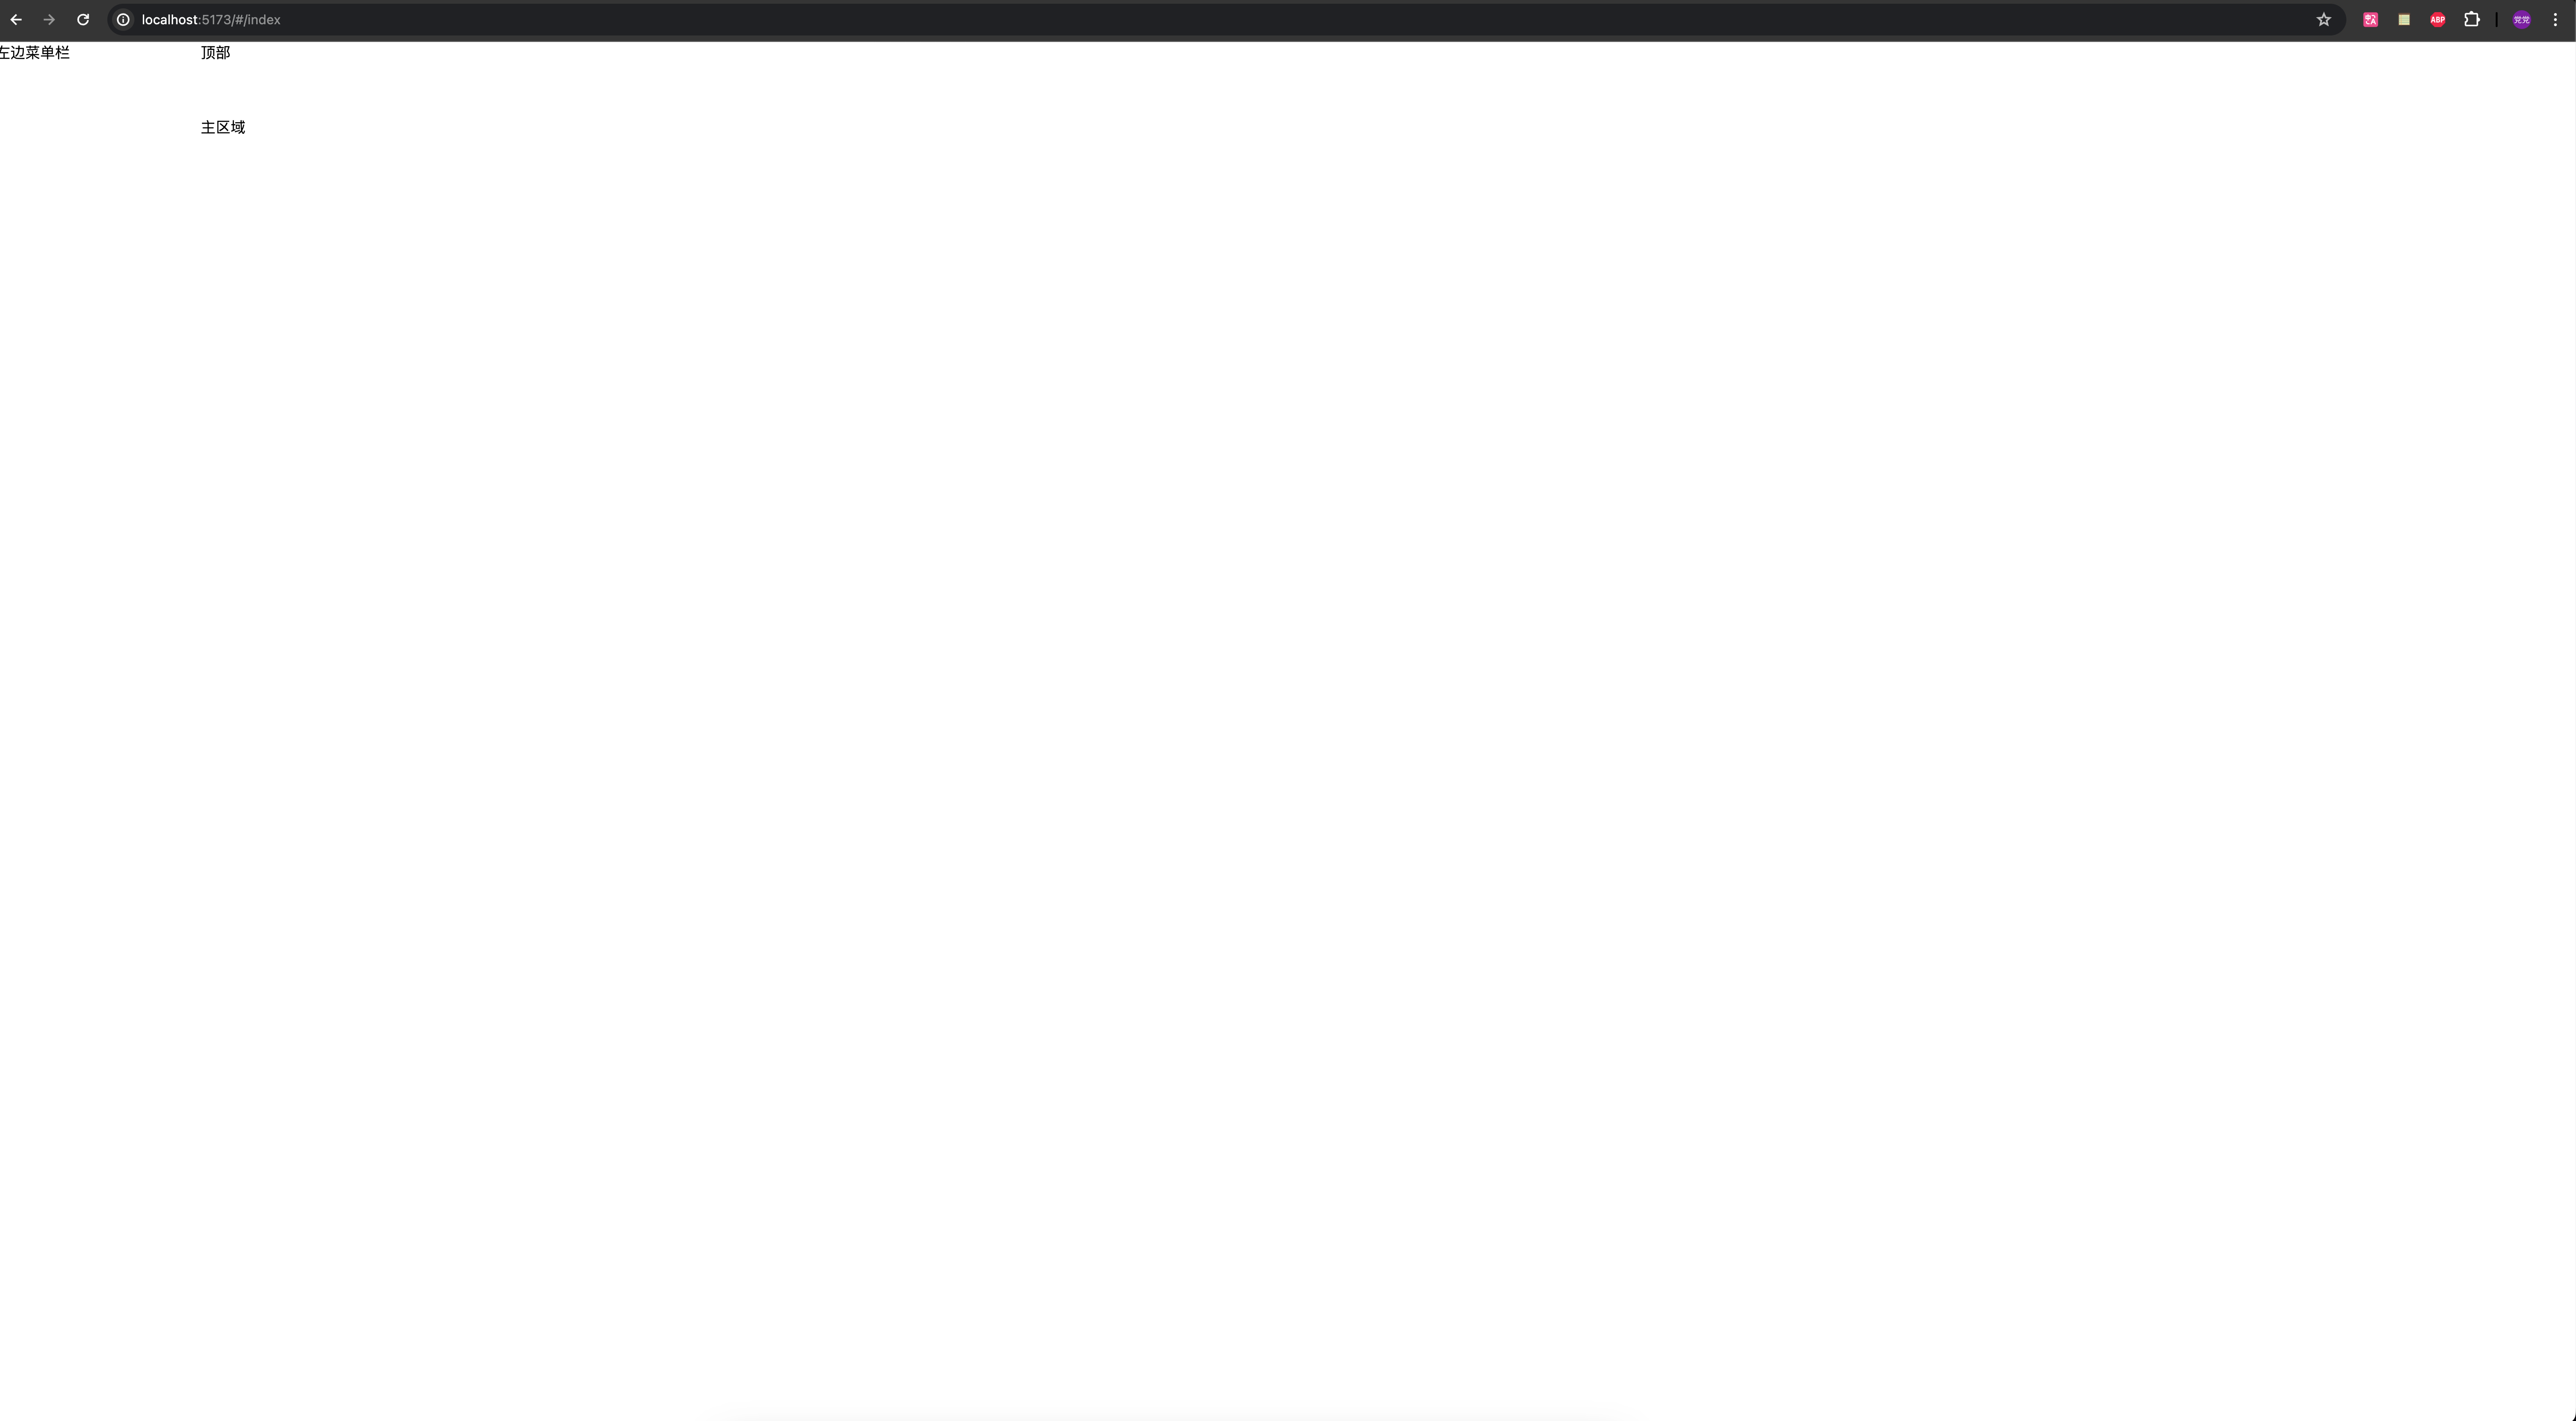
好像生效了,不明显,那就加个背景色
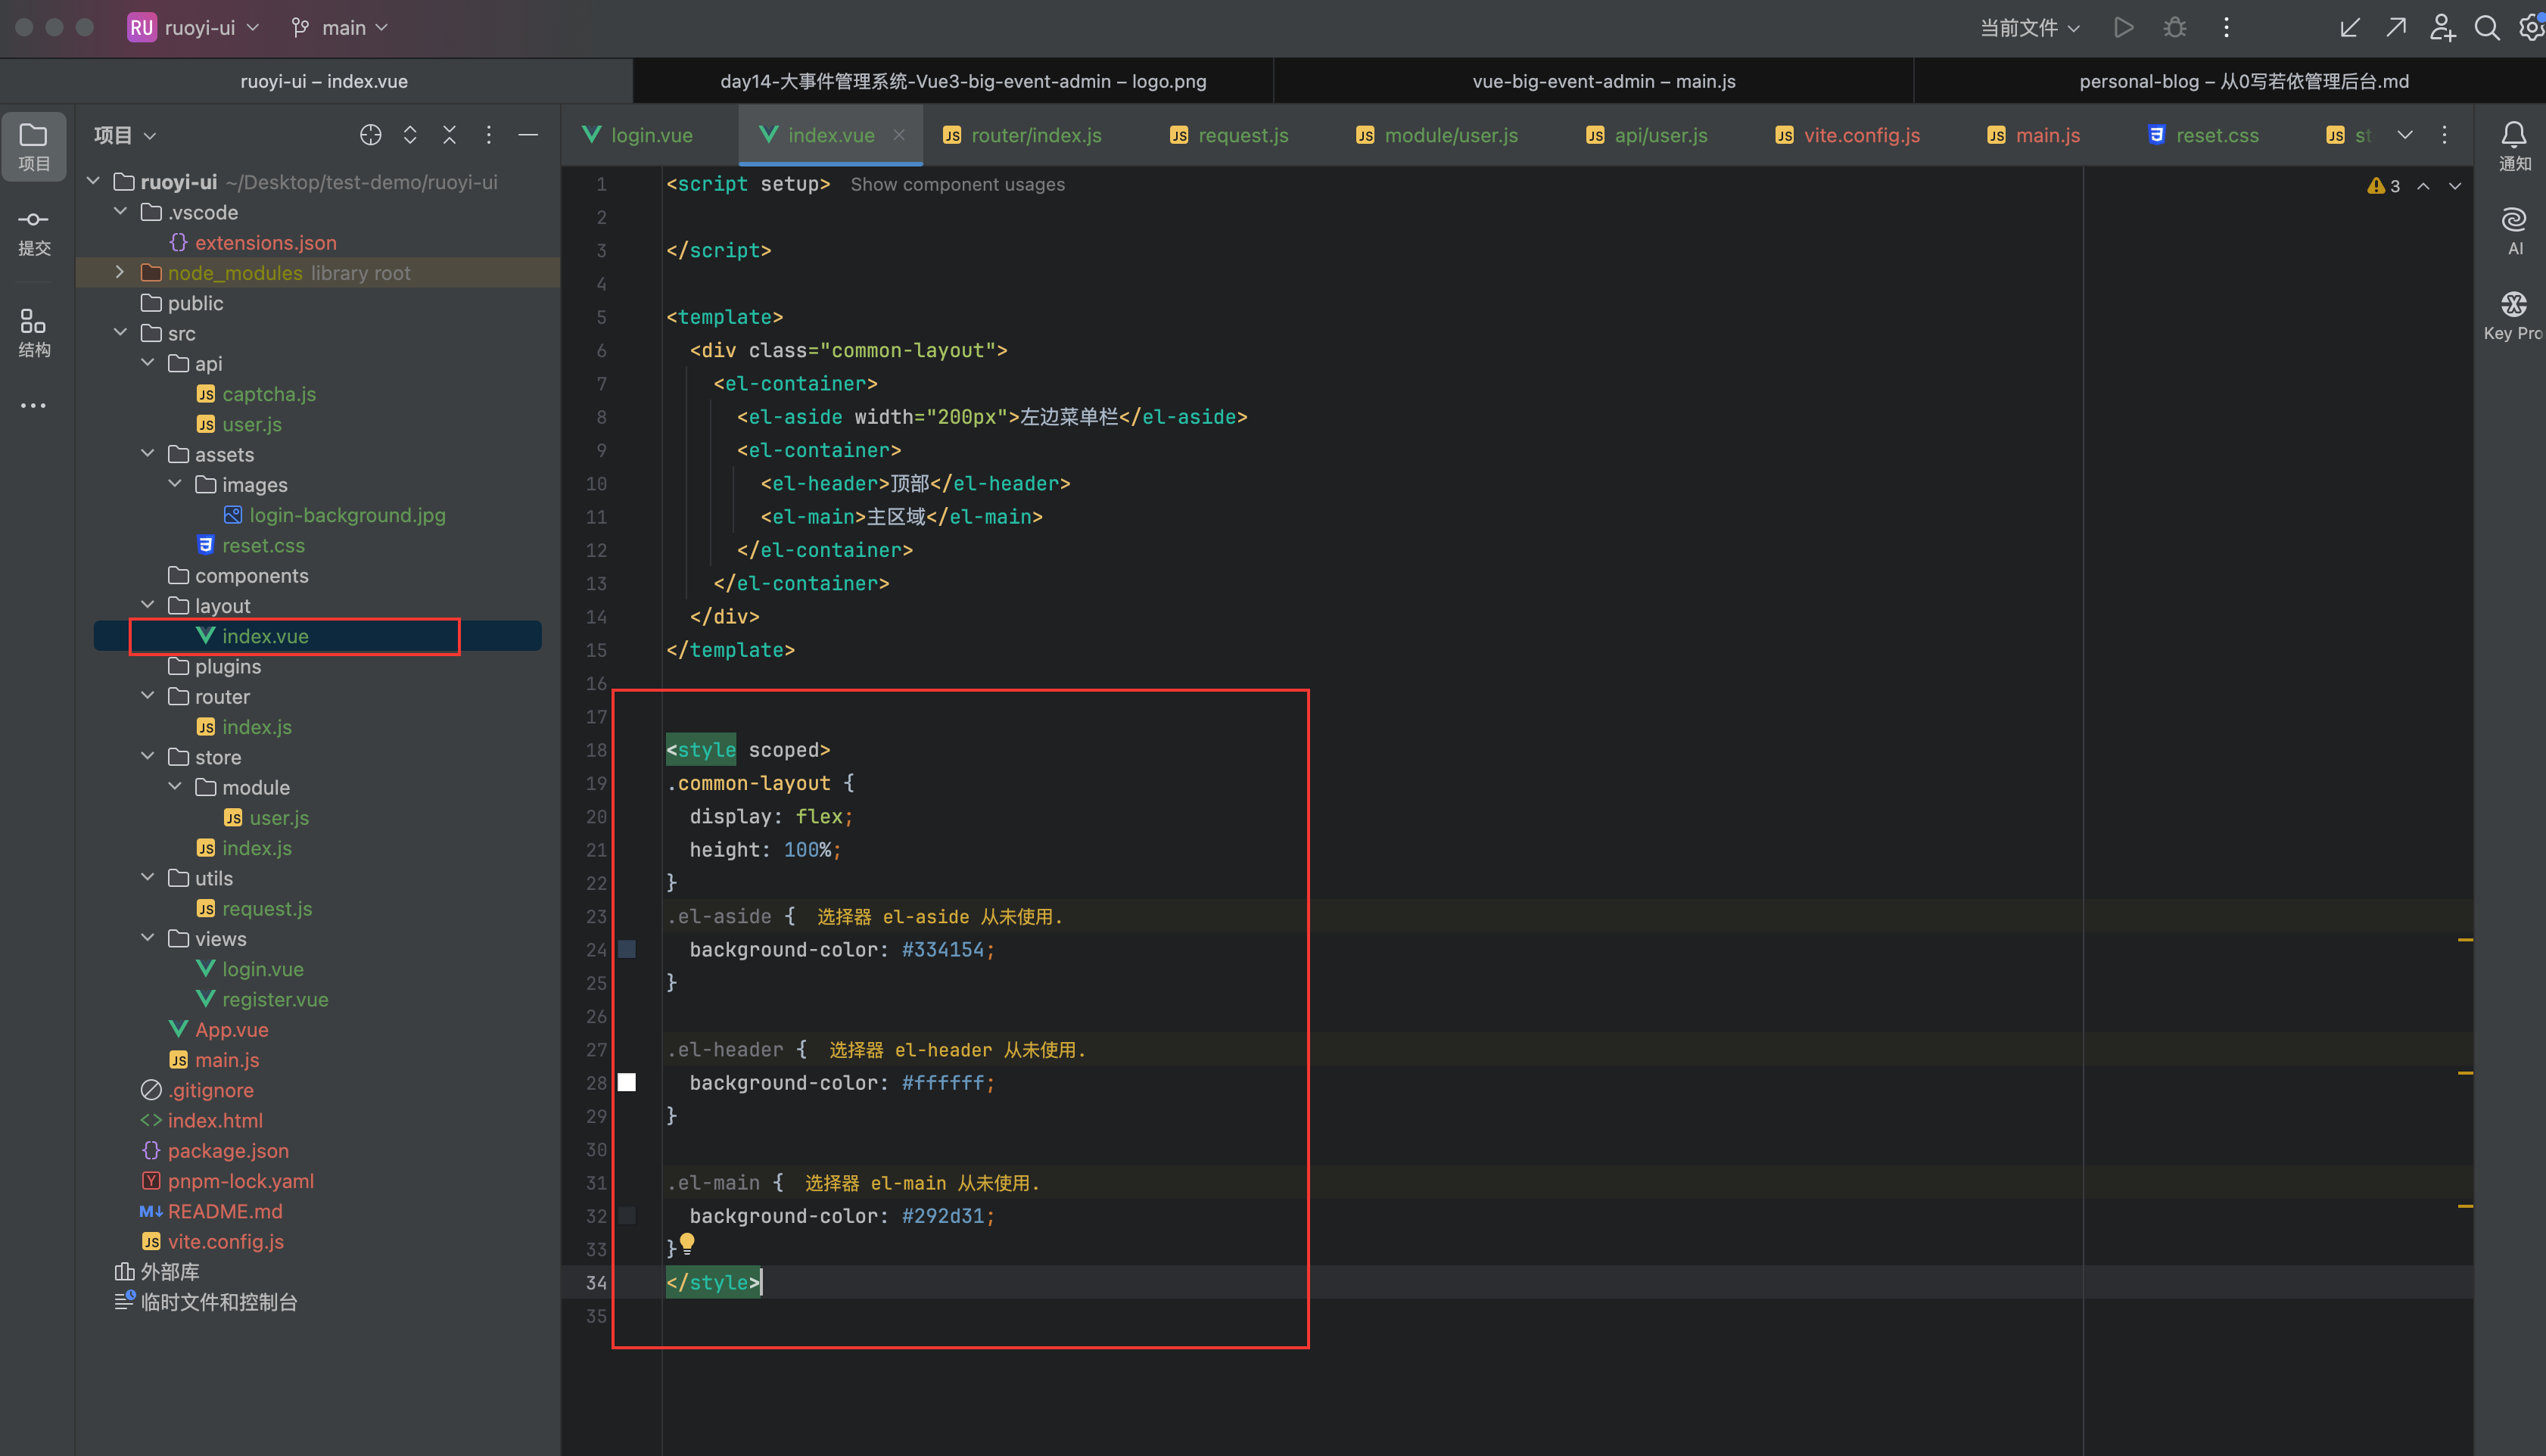
.common-layout {
  display: flex;
  height: 100%;
}
.el-aside {
  background-color: #334154;
}

.el-header {
  background-color: #ffffff;
}

.el-main {
  background-color: #292d31;
}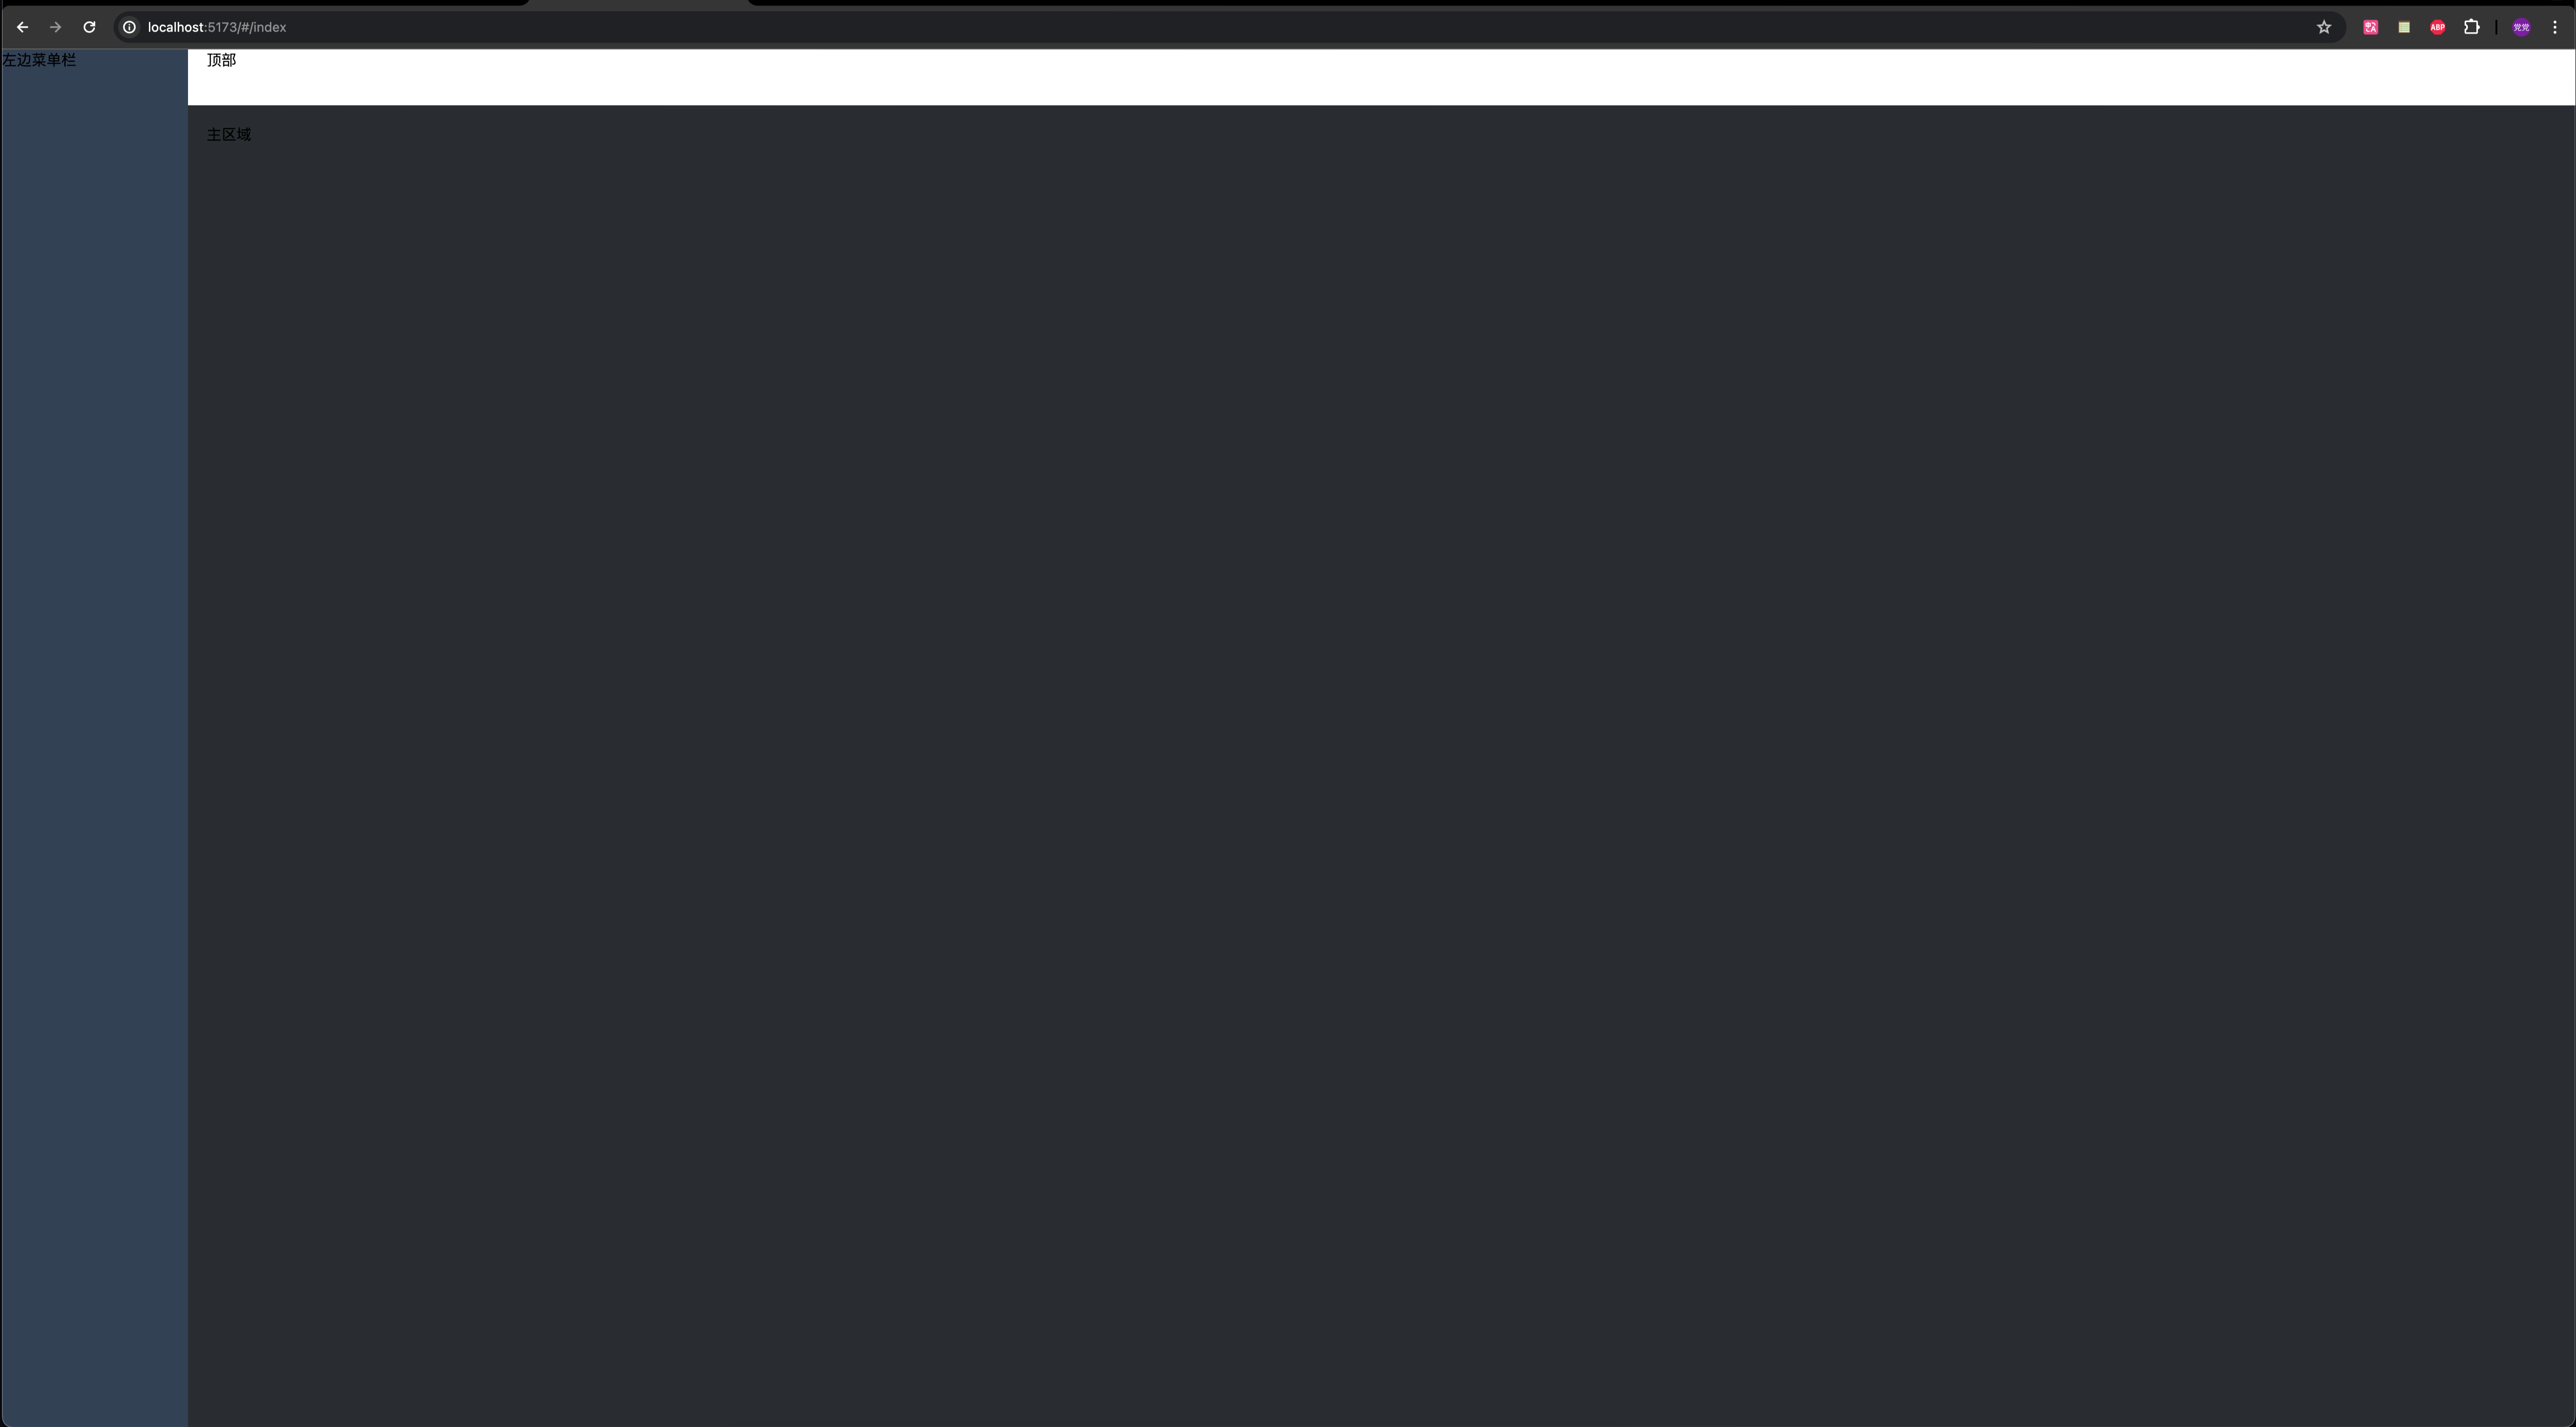
可以了。
侧边导航样式优化
菜单正常显示、并且菜单可以折叠
首先我们分析一下样式结构
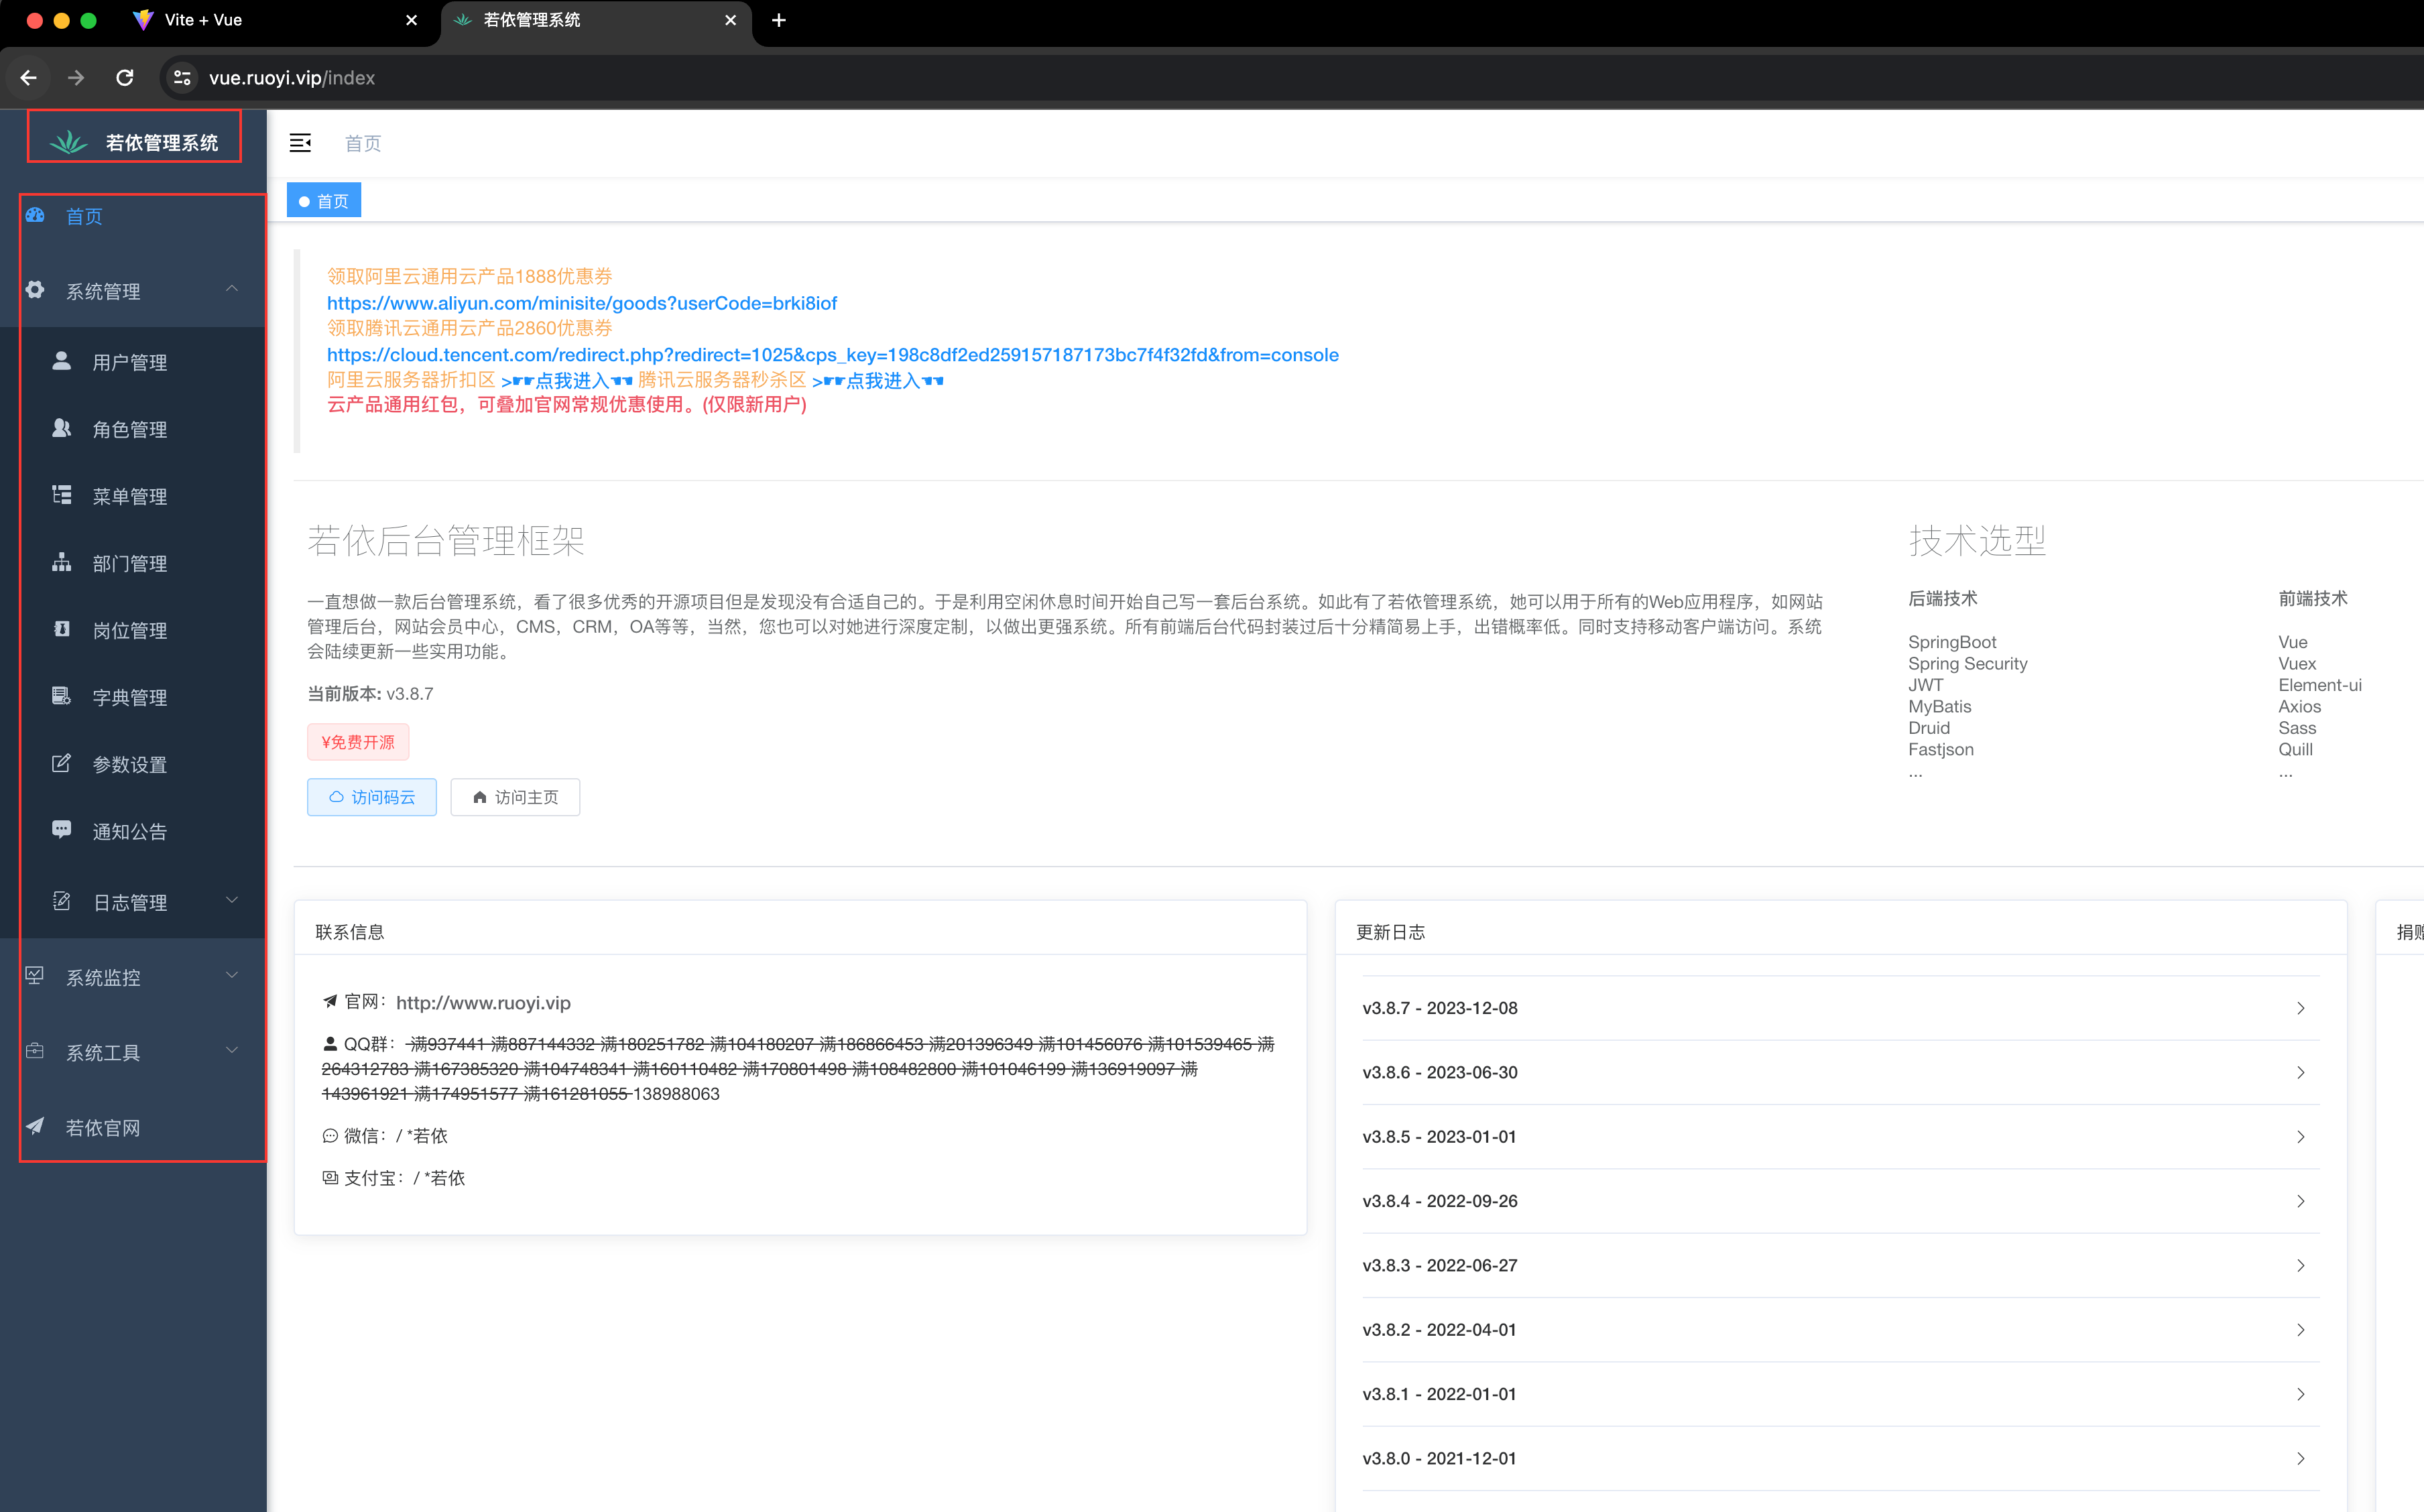
在没有看
ruoyi代码之前,我觉得菜单分两个部分上面的图标和若依管理系统与下面的菜单,但是我这样理解之后发现了一个问题,也就是菜单无法折叠,因为菜单折叠是在element-ui的菜单组件中才有的;因此我将侧边栏整体看成一个部分,单独对第一个菜单项做单独处理。先看一下我们需要的组件
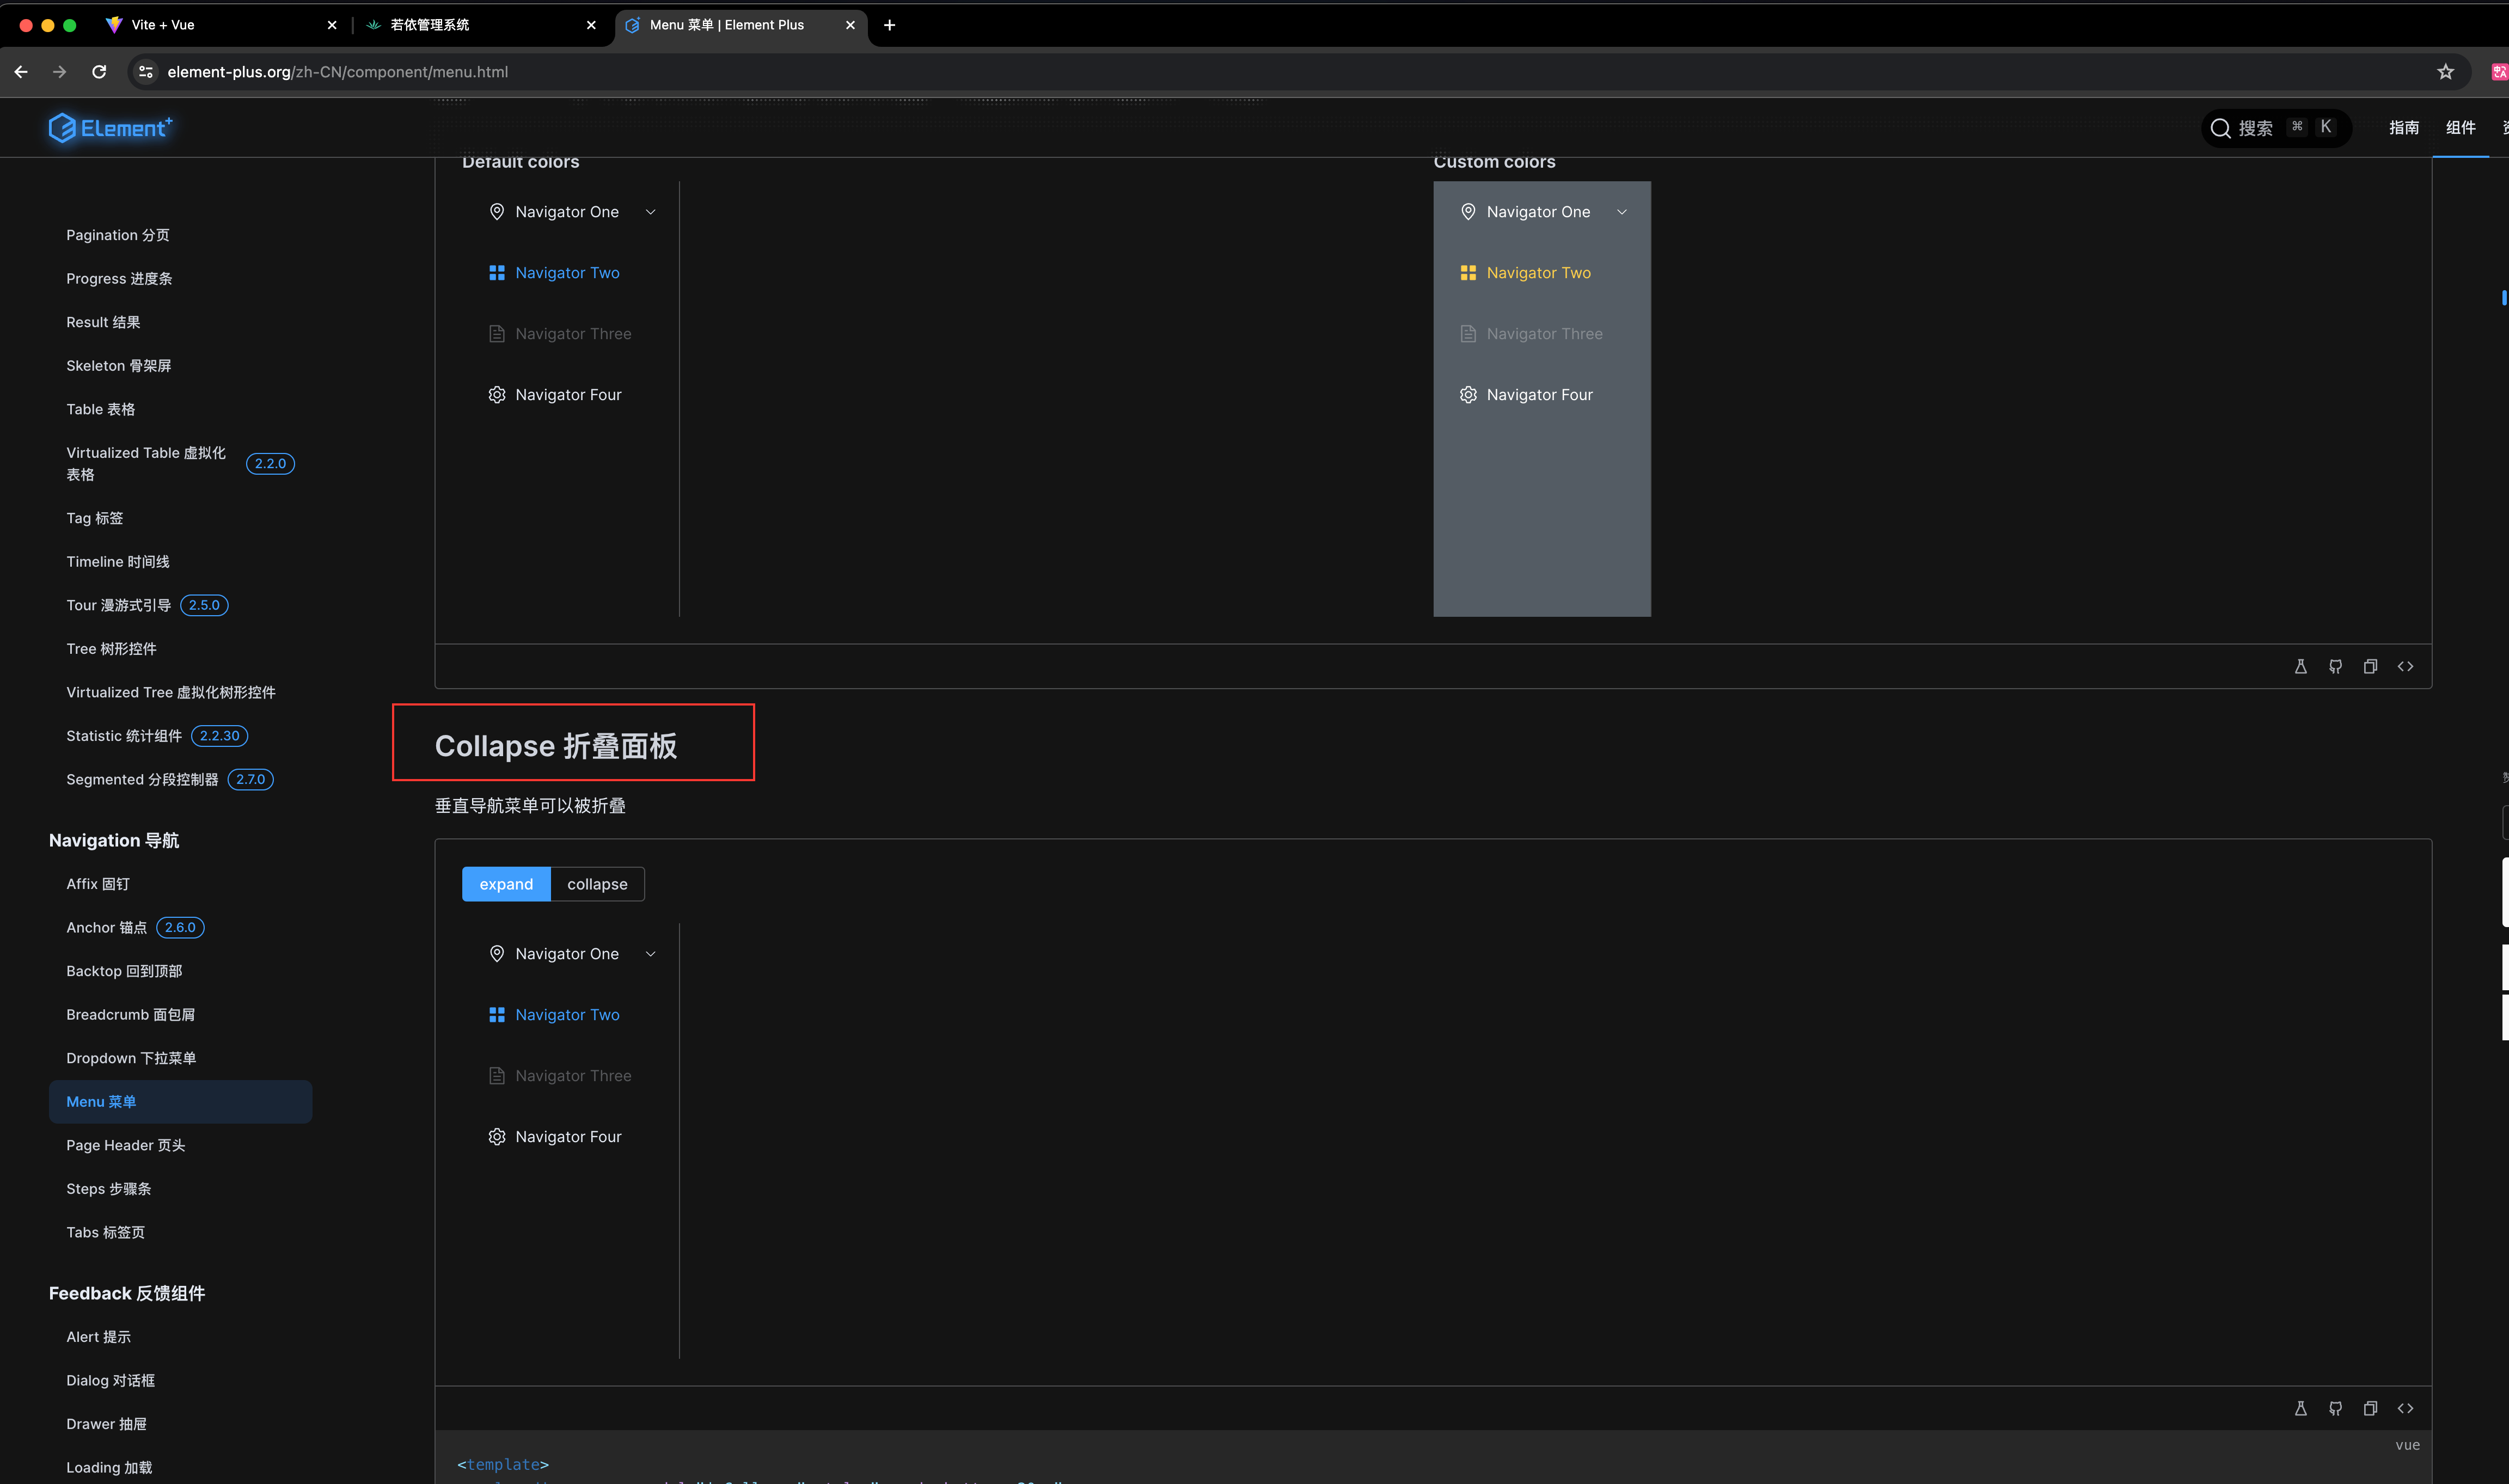
官网代码如下
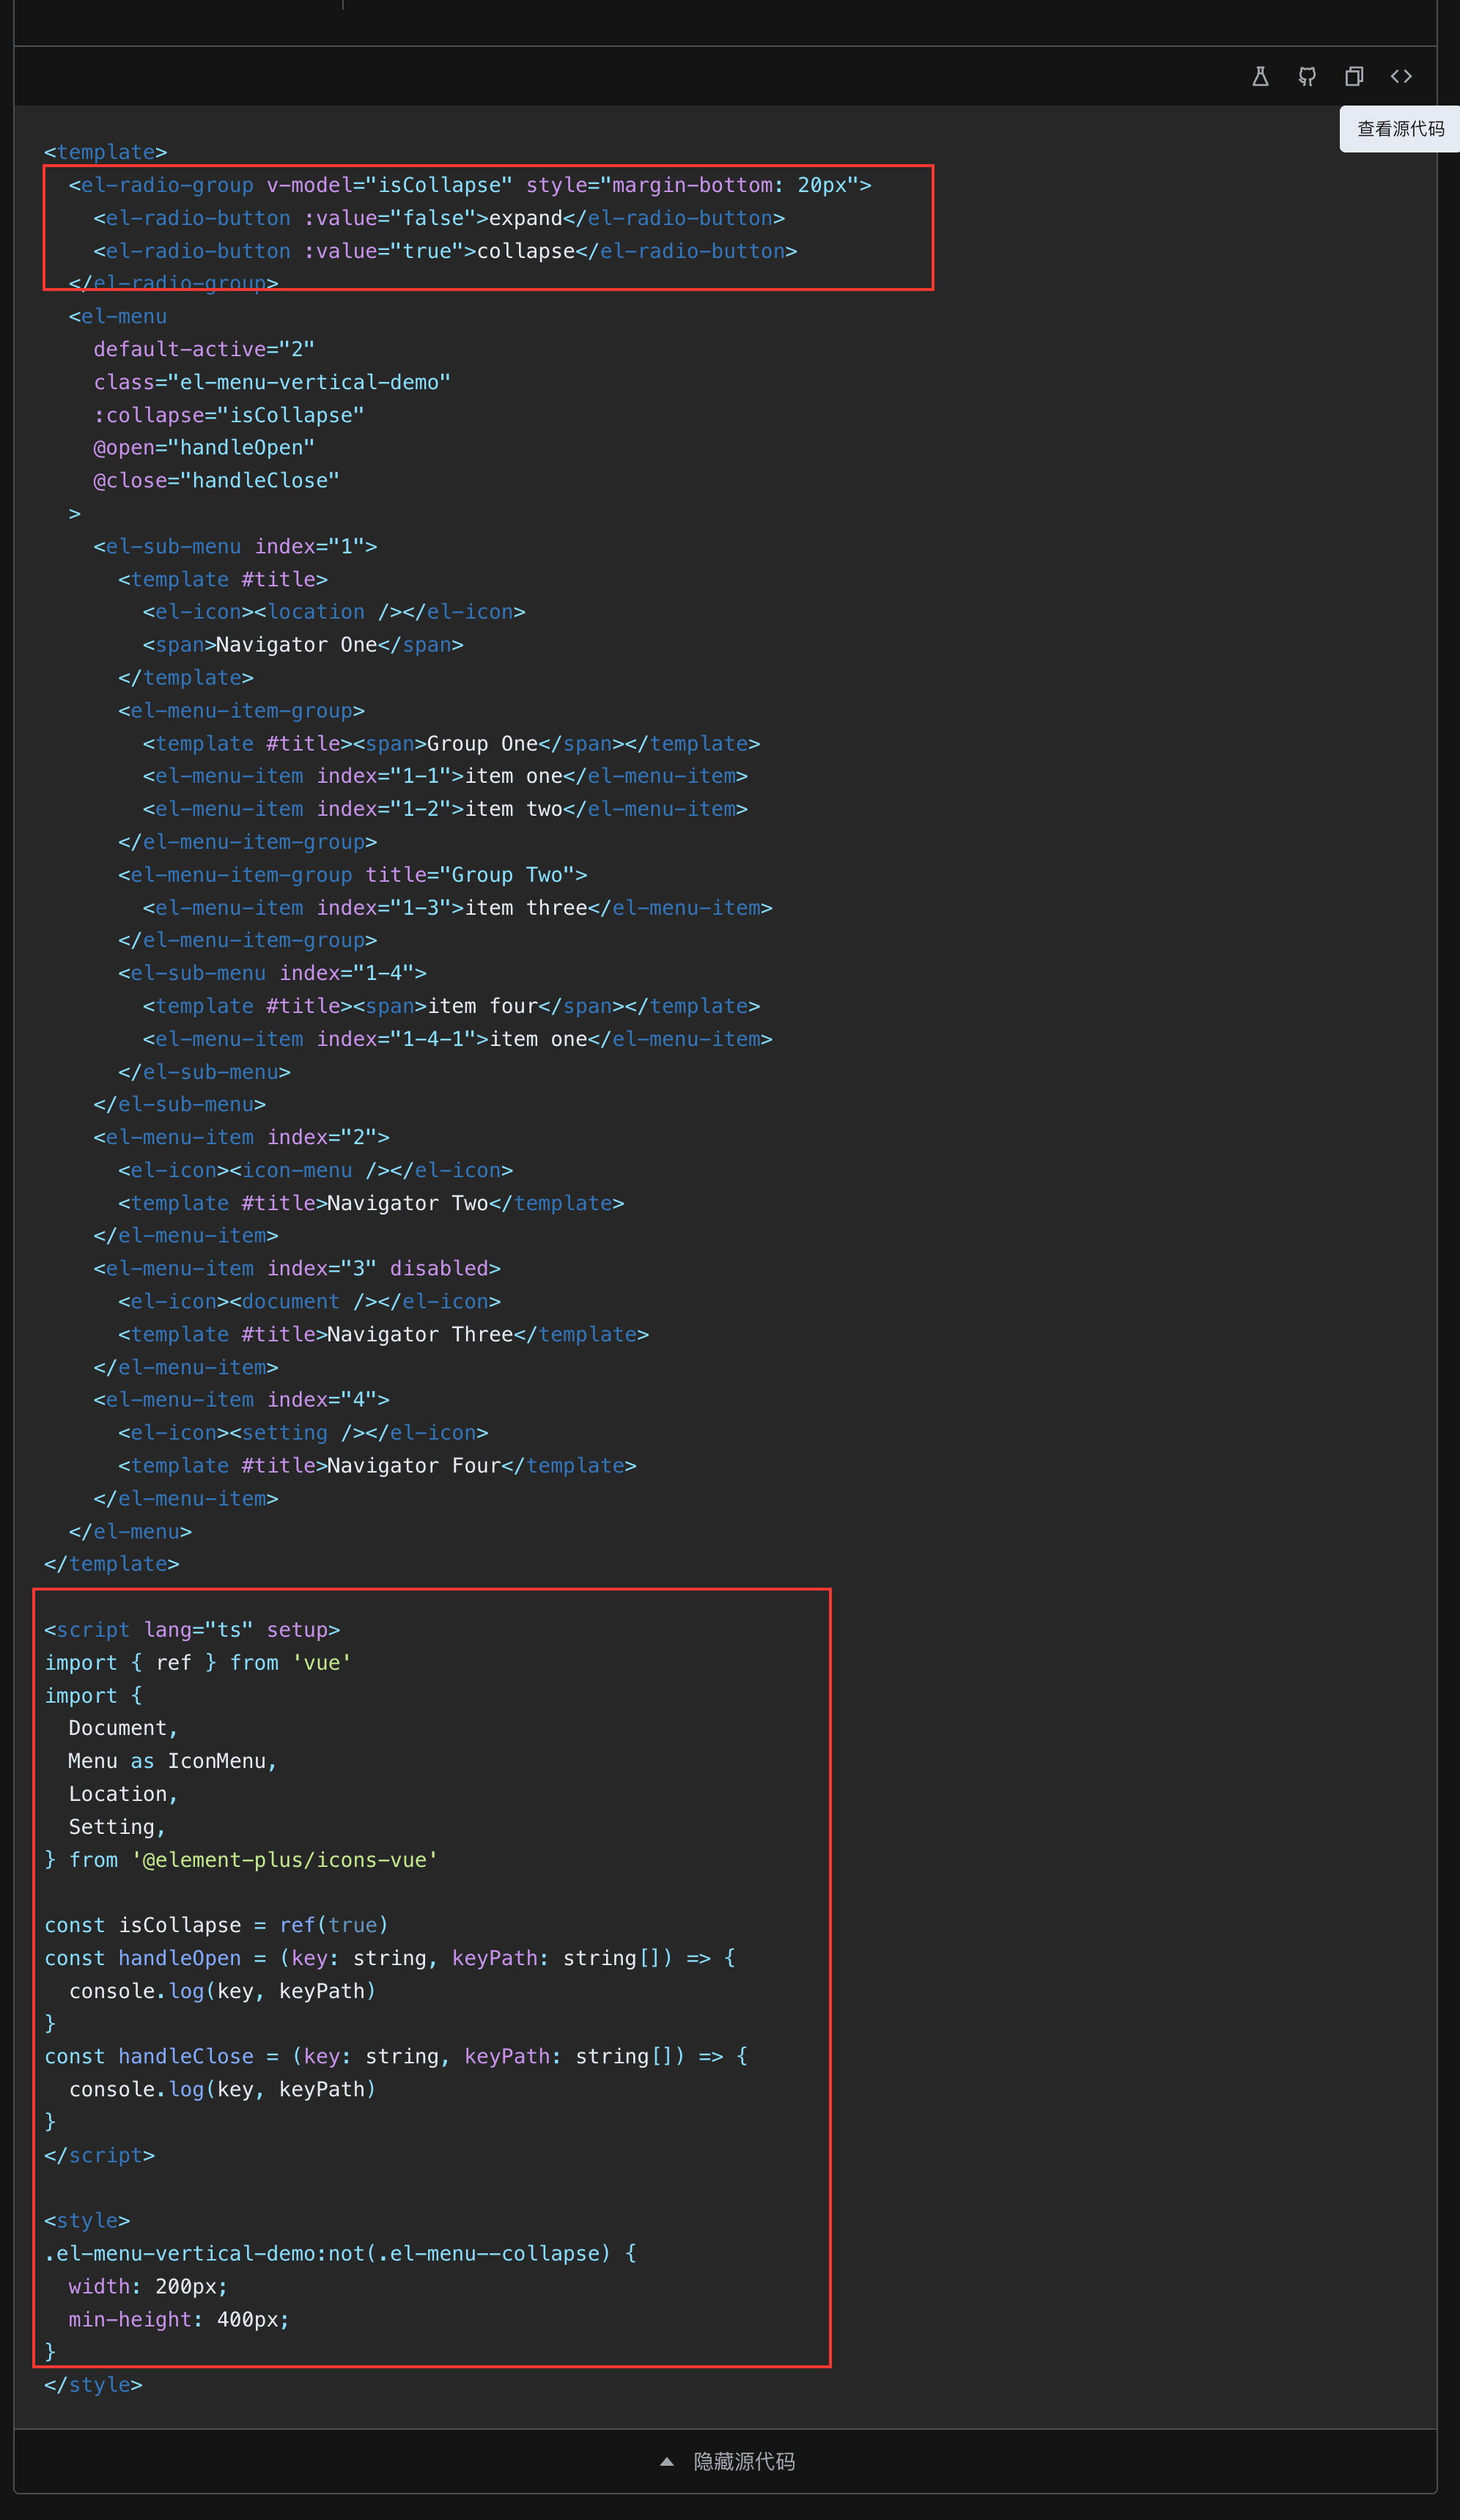
我们可以看到
是否折叠是根据isCollapse来判断的,我们触发是否折叠折叠的按钮是在另外一个页面,也就是主页面顶部,因此我们需要从另外一个页面触发侧边栏是否折叠。下面我直接给代码,你自己分析一下。sidebar.vue页面<template> <el-menu background-color="#304156" text-color="#85909f" default-active="1" class="sidebar-menu" :collapse="isCollapse" router > <!--顶部系统信息--> <el-menu-item index="/index" style="height: 56px; padding: 0 20px;"> <img src="@/assets/logo/logo.png" style="width: 32px; height: 32px; margin-right: 12px;" alt="logo图片"> <span style="font-size: 14px; color: #ffffff"> 若依管理系统 </span> </el-menu-item> <!--首页--> <el-menu-item index="/index"> <el-icon> <HomeFilled/> </el-icon> <span>首页</span> </el-menu-item> <!--系统管理--> <el-sub-menu index="/system"> <template #title> <el-icon> <Setting/> </el-icon> <span>系统管理</span> </template> <el-menu-item index="/system/user"> <el-icon> <User/> </el-icon> <span>用户管理</span></el-menu-item> <el-menu-item index="/system/role"> <el-icon> <UserFilled/> </el-icon> <span>角色管理</span></el-menu-item> <el-menu-item index="2-3"> <el-icon> <Menu/> </el-icon> <span>菜单管理</span></el-menu-item> <el-menu-item index="2-4"> <el-icon> <Share/> </el-icon> <span>部门管理</span></el-menu-item> <el-menu-item index="2-5"> <el-icon> <CirclePlusFilled/> </el-icon> <span>岗位管理</span></el-menu-item> <el-menu-item index="2-6"> <el-icon> <Notebook/> </el-icon> <span>字典管理</span></el-menu-item> <el-menu-item index="2-7"> <el-icon> <Document/> </el-icon> <span>参数设置</span></el-menu-item> <el-menu-item index="2-8"> <el-icon> <ChatDotRound/> </el-icon> <span>通知公告</span></el-menu-item> <el-sub-menu index="2-9"> <template #title> <el-icon> <Tickets/> </el-icon> <span>日志管理</span></template> <el-menu-item index="2-9-1"> <el-icon> <Memo/> </el-icon> <span>操作日志</span></el-menu-item> <el-menu-item index="2-9-2"> <el-icon> <DataLine/> </el-icon> <span>登录日志</span></el-menu-item> </el-sub-menu> </el-sub-menu> <!--系统监控--> <el-sub-menu index="3"> <template #title> <el-icon><Monitor /></el-icon> <span>系统监控</span> </template> <el-menu-item index="3-1"> <el-icon><DataLine /></el-icon> <span>在线用户</span></el-menu-item> <el-menu-item index="3-2"> <el-icon><Postcard /></el-icon> <span>定时任务</span></el-menu-item> <el-menu-item index="3-3"> <el-icon><TrendCharts /></el-icon> <span>数据监控</span></el-menu-item> <el-menu-item index="3-4"> <el-icon> <Share/> </el-icon> <span>缓存监控</span></el-menu-item> <el-menu-item index="3-5"> <el-icon> <CirclePlusFilled/> </el-icon> <span>缓存列表</span></el-menu-item> </el-sub-menu> </el-menu> </template> <script lang="ts" setup> import { Document, Setting, HomeFilled, User, UserFilled, Share, CirclePlusFilled, Notebook, ChatDotRound, Tickets, Memo, DataLine, Menu, Monitor, Postcard, TrendCharts, } from '@element-plus/icons-vue' import { defineProps } from 'vue'; // 是否菜单塌陷 true:塌陷,false:不塌陷 const props = defineProps({ isCollapse: { type: Boolean, required: true } }) </script> <style lang="scss"> .el-menu-vertical-demo:not(.el-menu--collapse) { width: 200px; min-height: 400px; } .sidebar-menu { height: 100%; border: 0; } span { font-size: 13px; } .logo-container { display: flex; width: 100%; height: 50px; align-items: center; justify-content: center; } .logo-container img { width: 32px; height: 32px; margin-right: 12px; } </style>这里我先配置前几个页面的跳转链接,方便后面测试。
index.vue主页面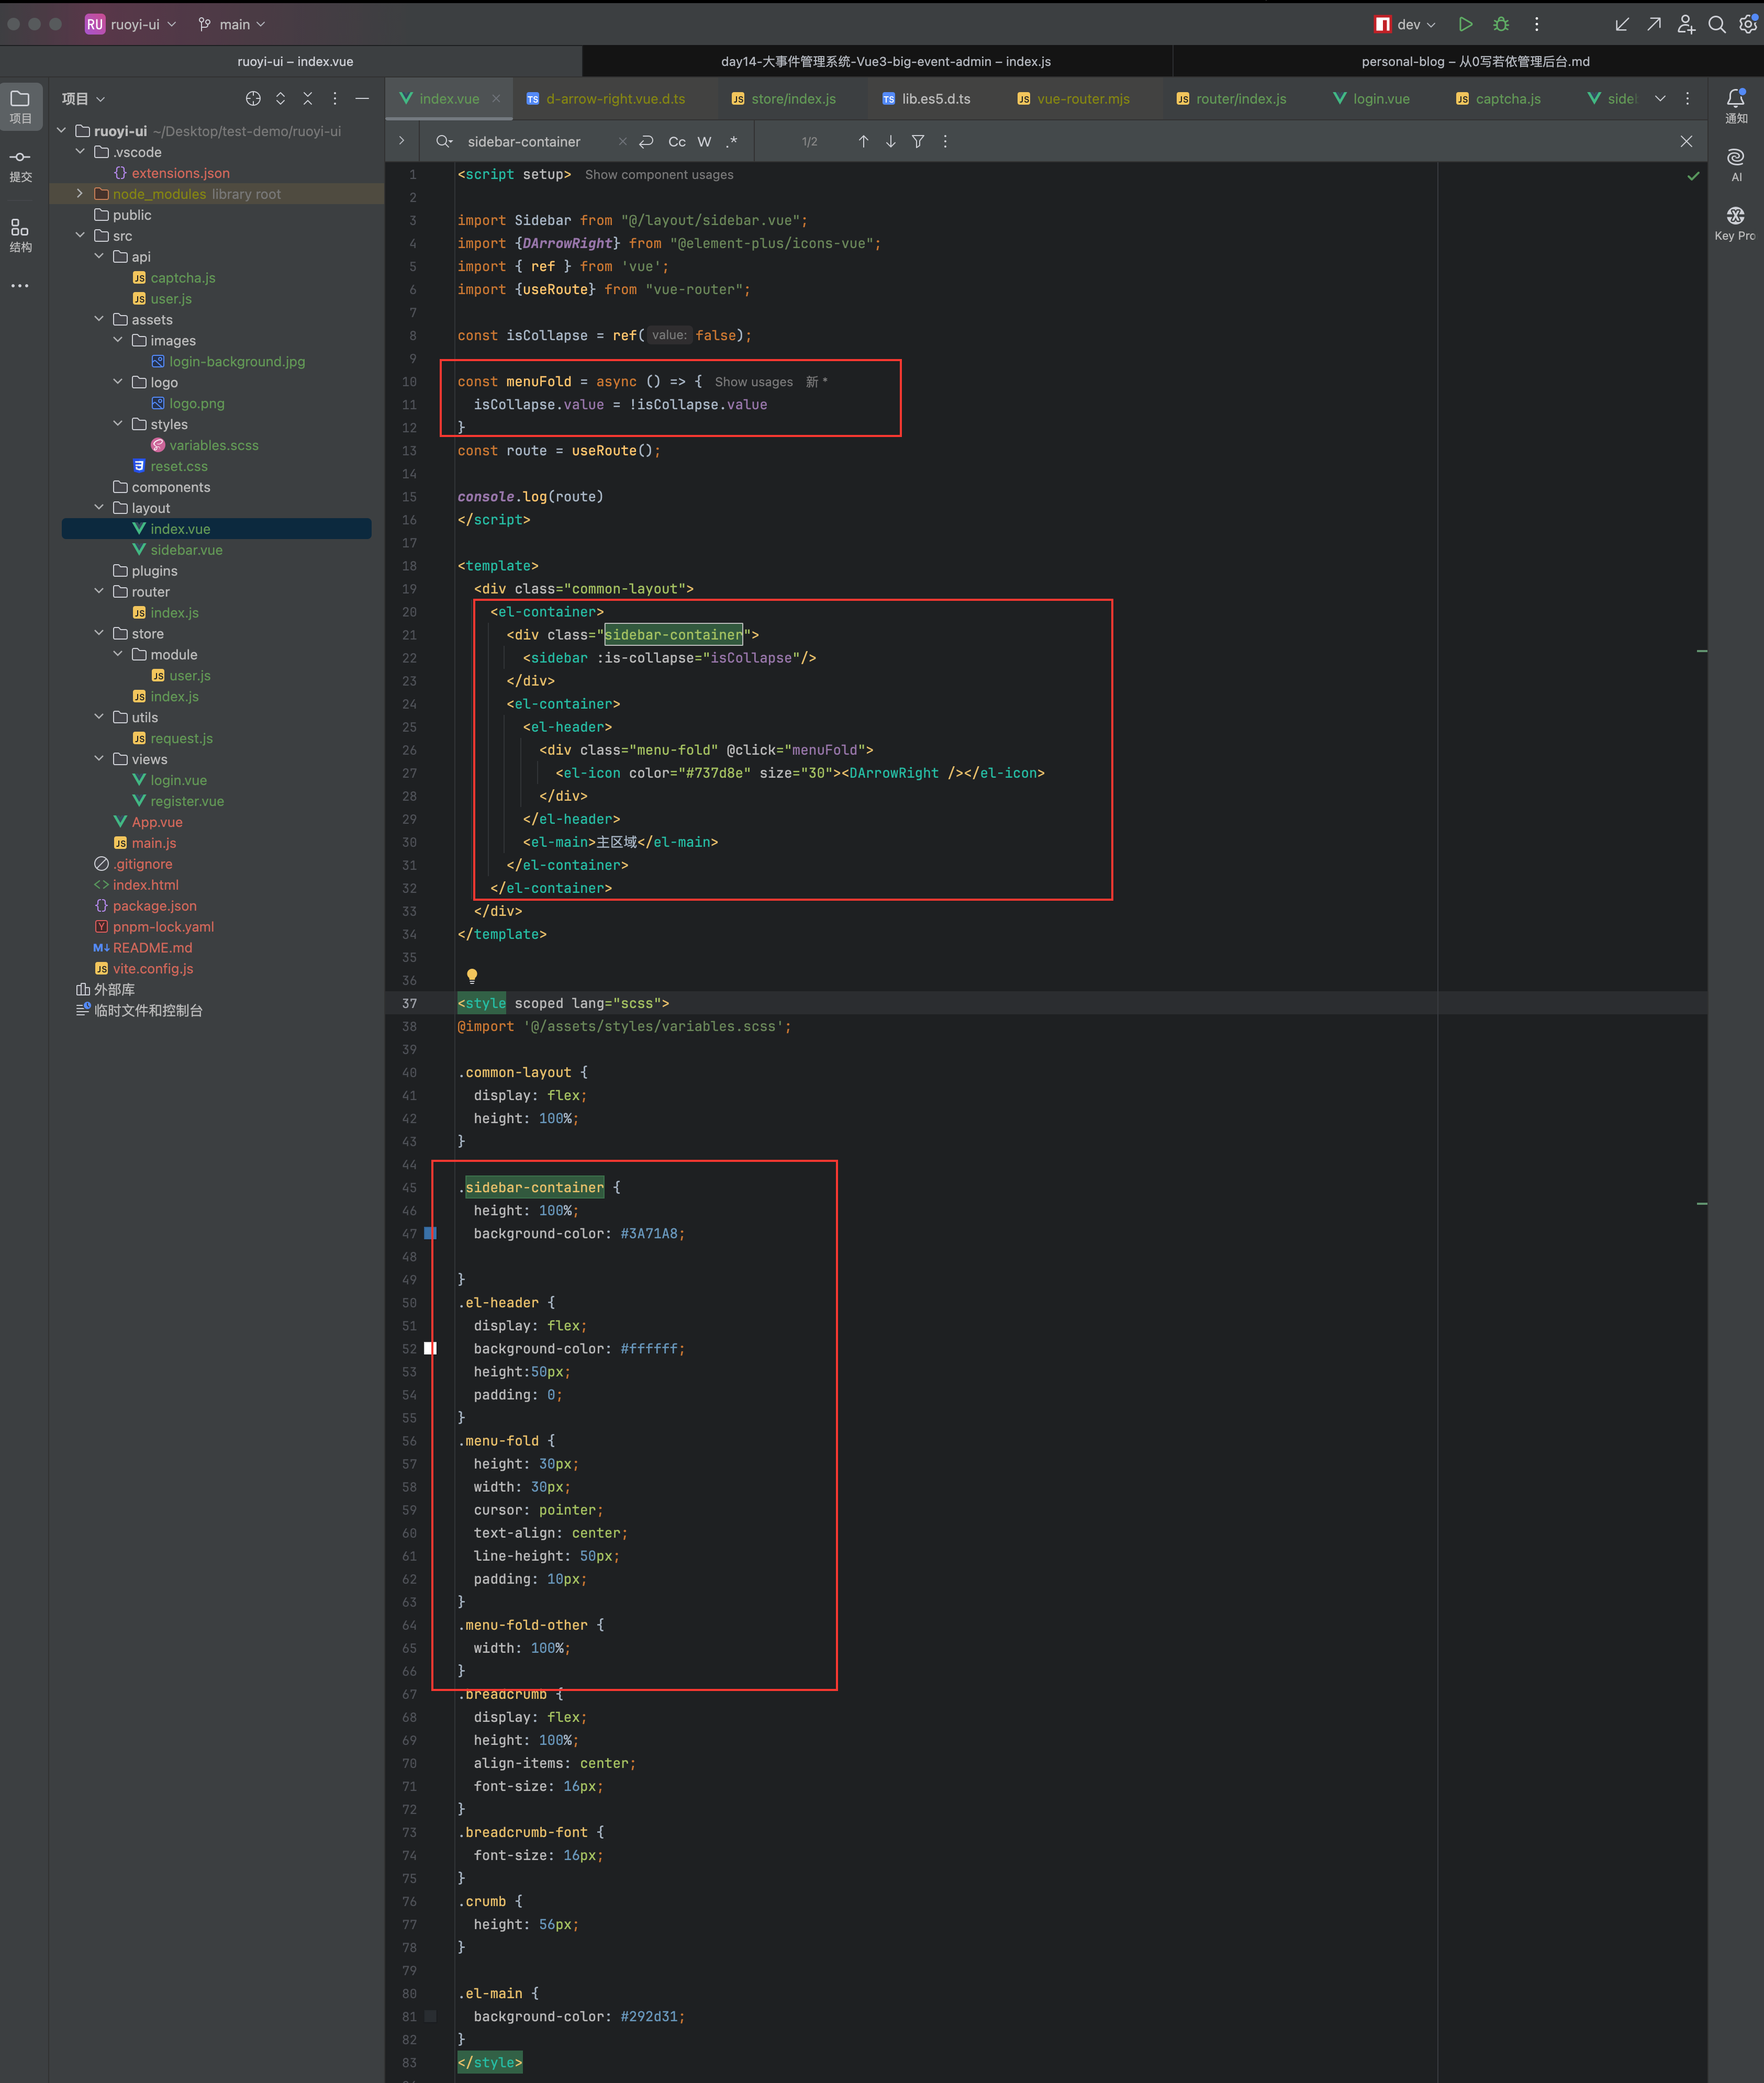
<script setup>

import Sidebar from "@/layout/sidebar.vue";
import {DArrowRight} from "@element-plus/icons-vue";
import { ref } from 'vue';
import {useRoute} from "vue-router";

const isCollapse = ref(false);

const menuFold = async () => {
  isCollapse.value = !isCollapse.value
}
const route = useRoute();

console.log(route)
</script>

<template>
  <div class="common-layout">
    <el-container>
      <div class="sidebar-container">
        <sidebar :is-collapse="isCollapse"/>
      </div>
      <el-container>
        <el-header>
          <div class="menu-fold" @click="menuFold">
            <el-icon color="#737d8e" size="30"><DArrowRight /></el-icon>
          </div>
        </el-header>
        <el-main>主区域</el-main>
      </el-container>
    </el-container>
  </div>
</template>


<style scoped lang="scss">
@import '@/assets/styles/variables.scss';

.common-layout {
  display: flex;
  height: 100%;
}

.sidebar-container {
  height: 100%;
  background-color: #3A71A8;

}
.el-header {
  display: flex;
  background-color: #ffffff;
  height:50px;
  padding: 0;
}
.menu-fold {
  height: 30px;
  width: 30px;
  cursor: pointer;
  text-align: center;
  line-height: 50px;
  padding: 10px;
}
.menu-fold-other {
  width: 100%;
}
.breadcrumb {
  display: flex;
  height: 100%;
  align-items: center;
  font-size: 16px;
}
.breadcrumb-font {
  font-size: 16px;
}
.crumb {
  height: 56px;
}

.el-main {
  background-color: #292d31;
}
</style>
效果
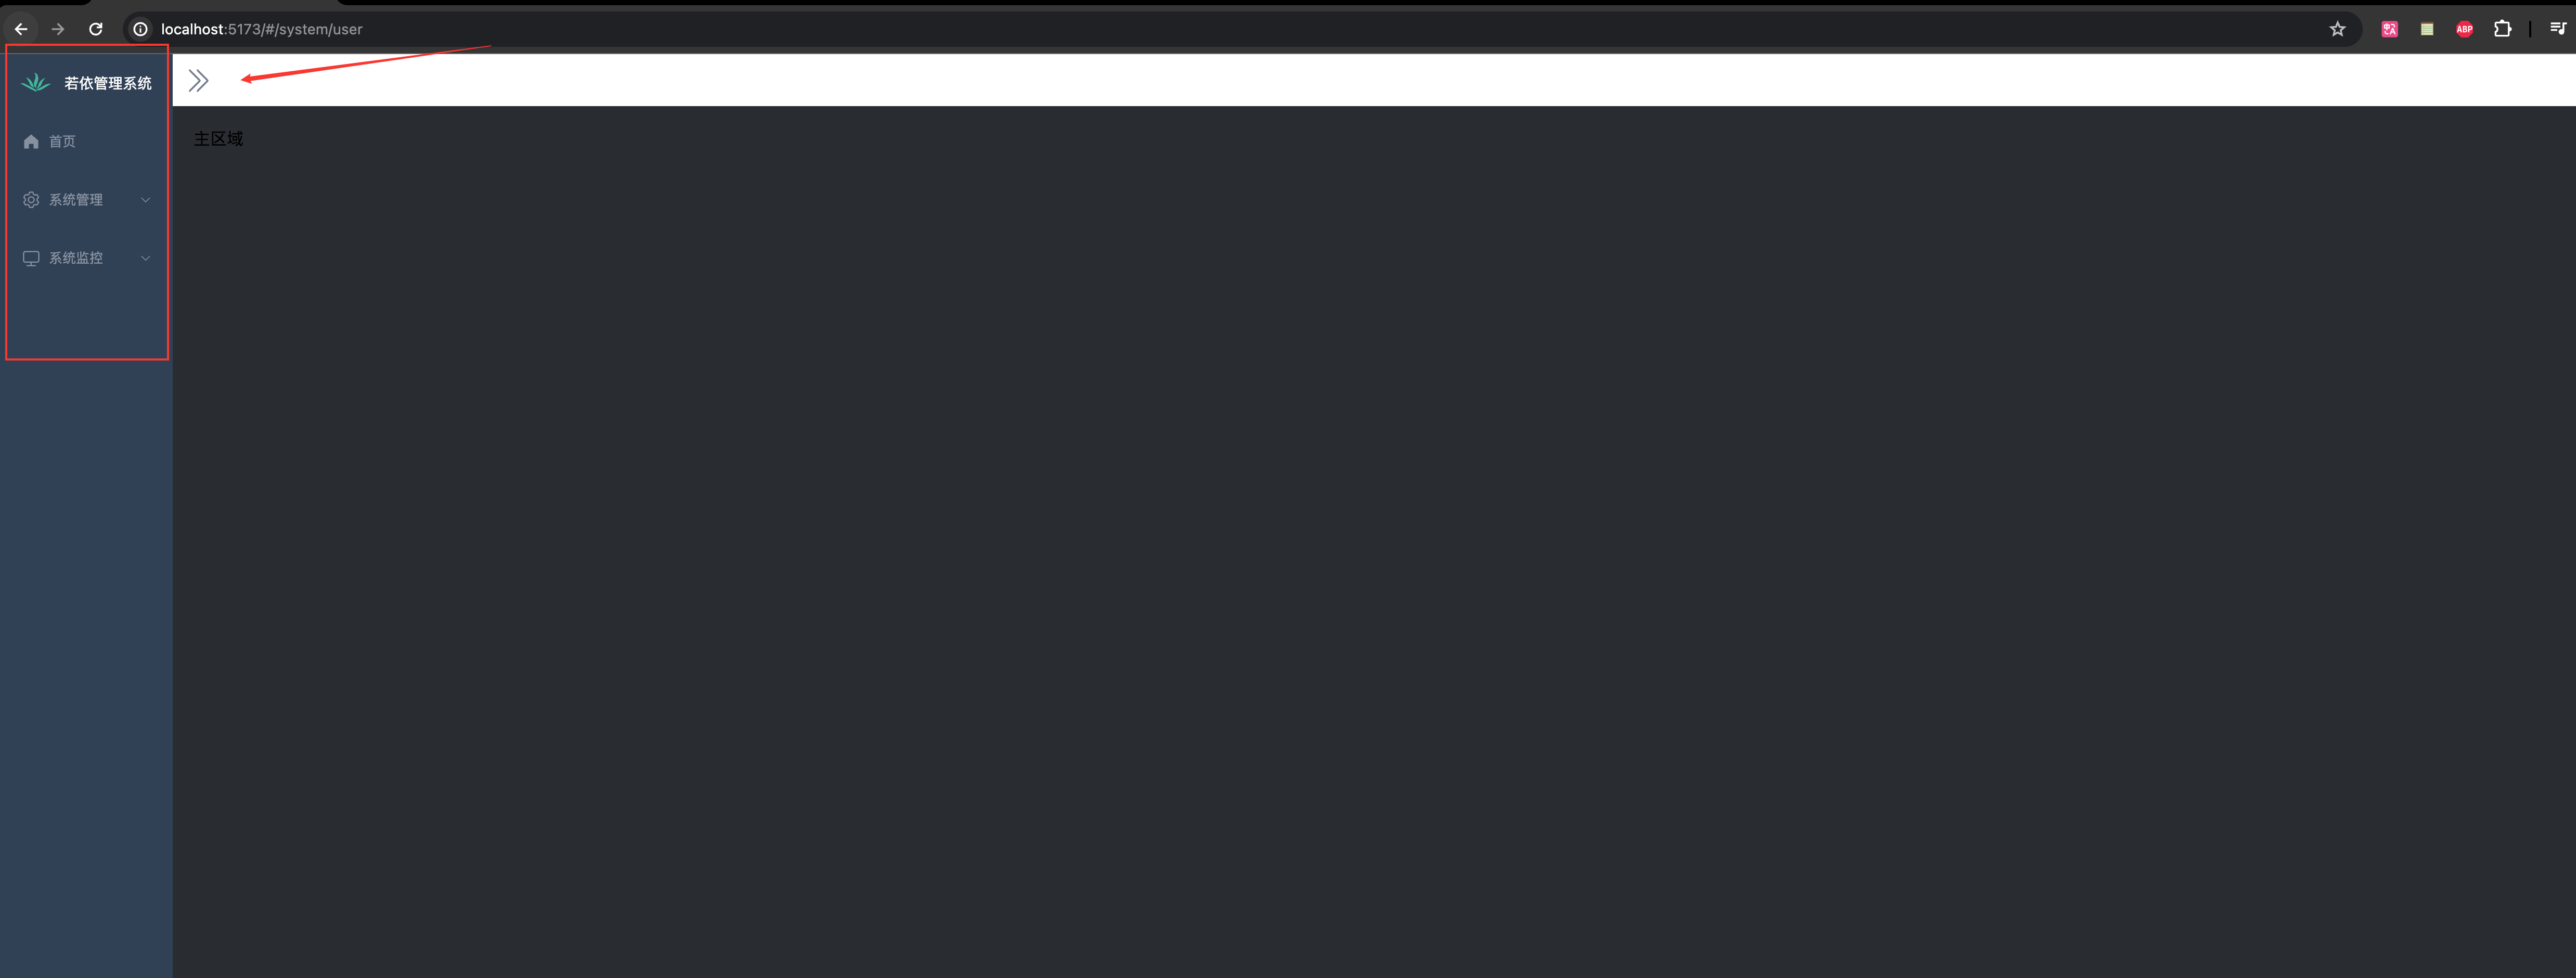
进一步优化(页面顶部需要菜单路径)
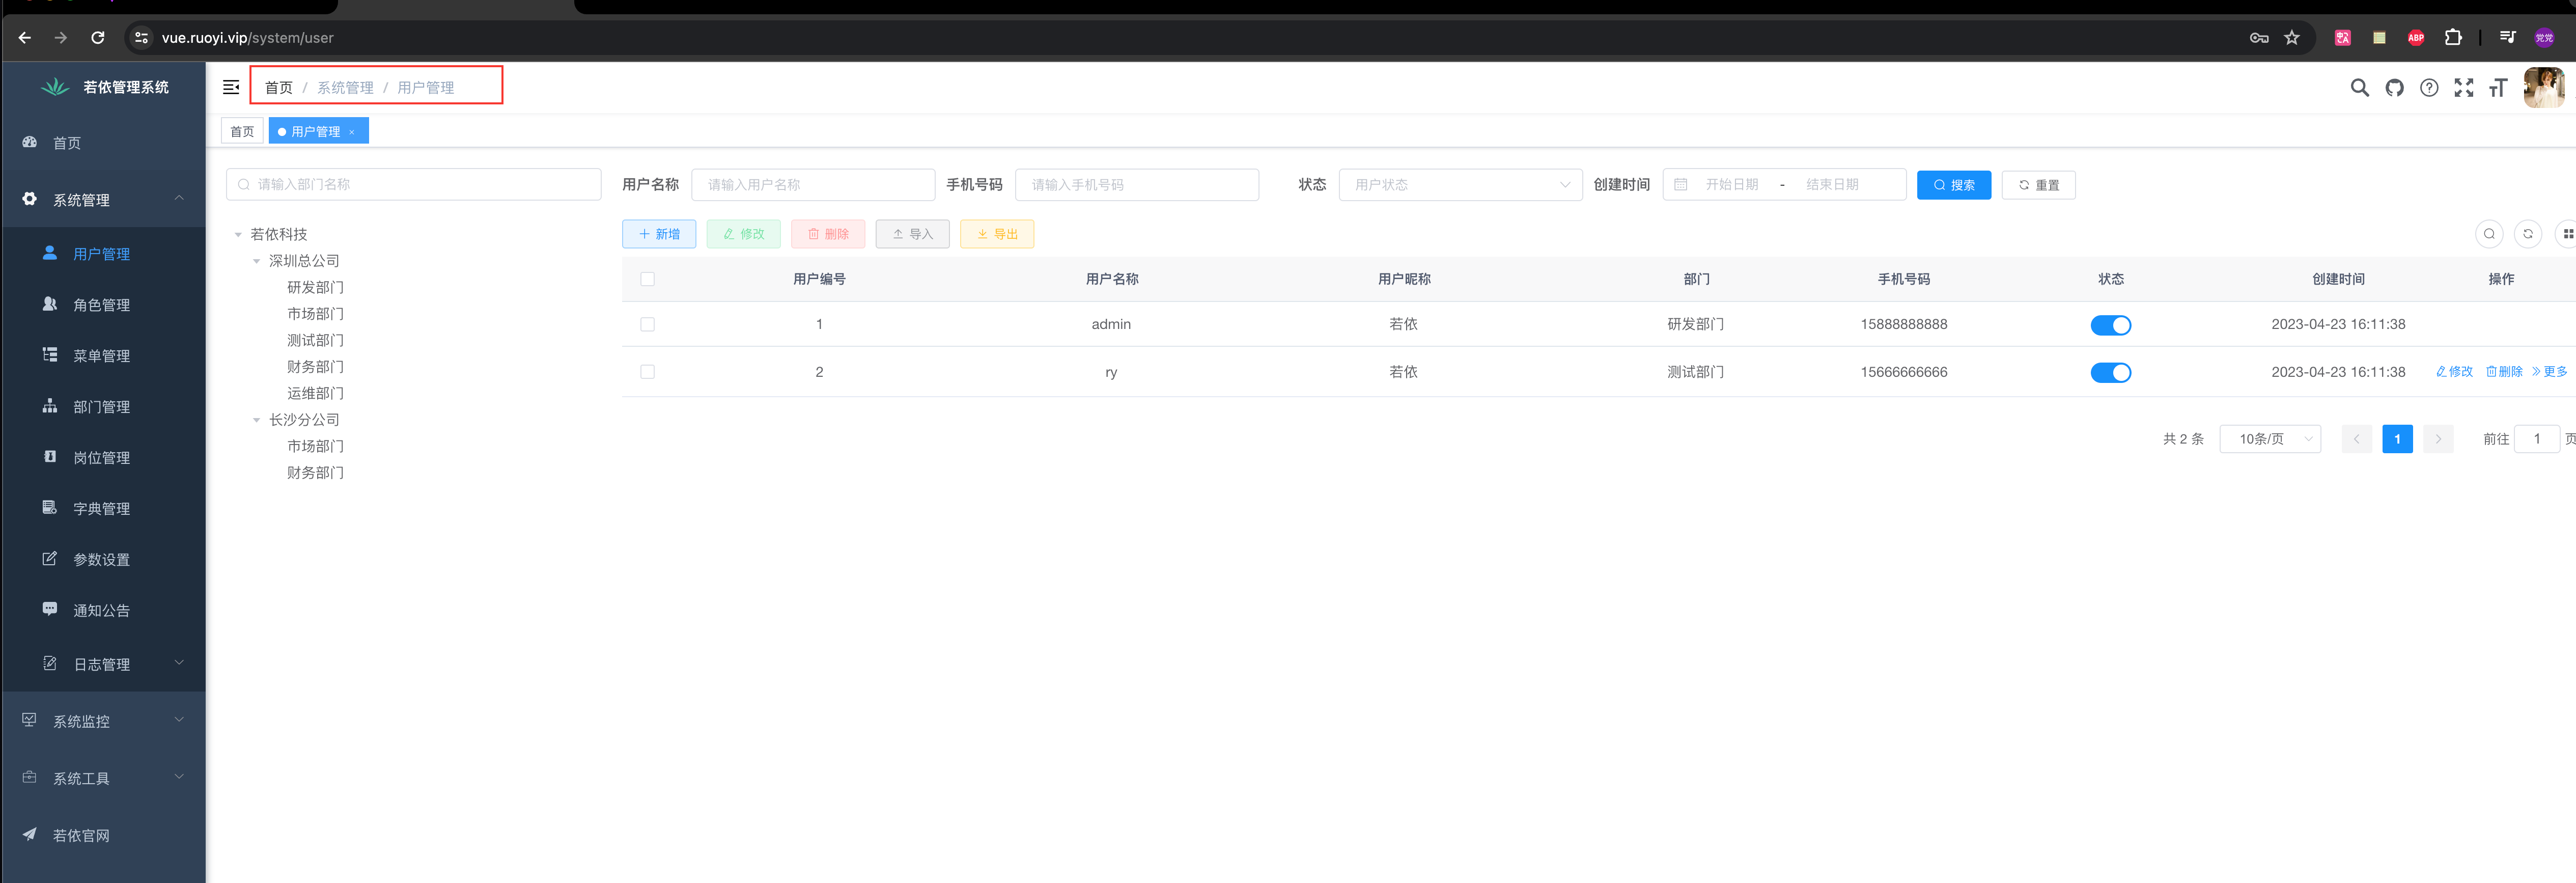
这里我们需要做两点:1、菜单绑定路由(确定点击菜单可以跳转正确的页面),2、点击菜单在主页面可以获取路由信息(这样才可渲染菜单路径)
菜单绑定路由(调整路由页面):
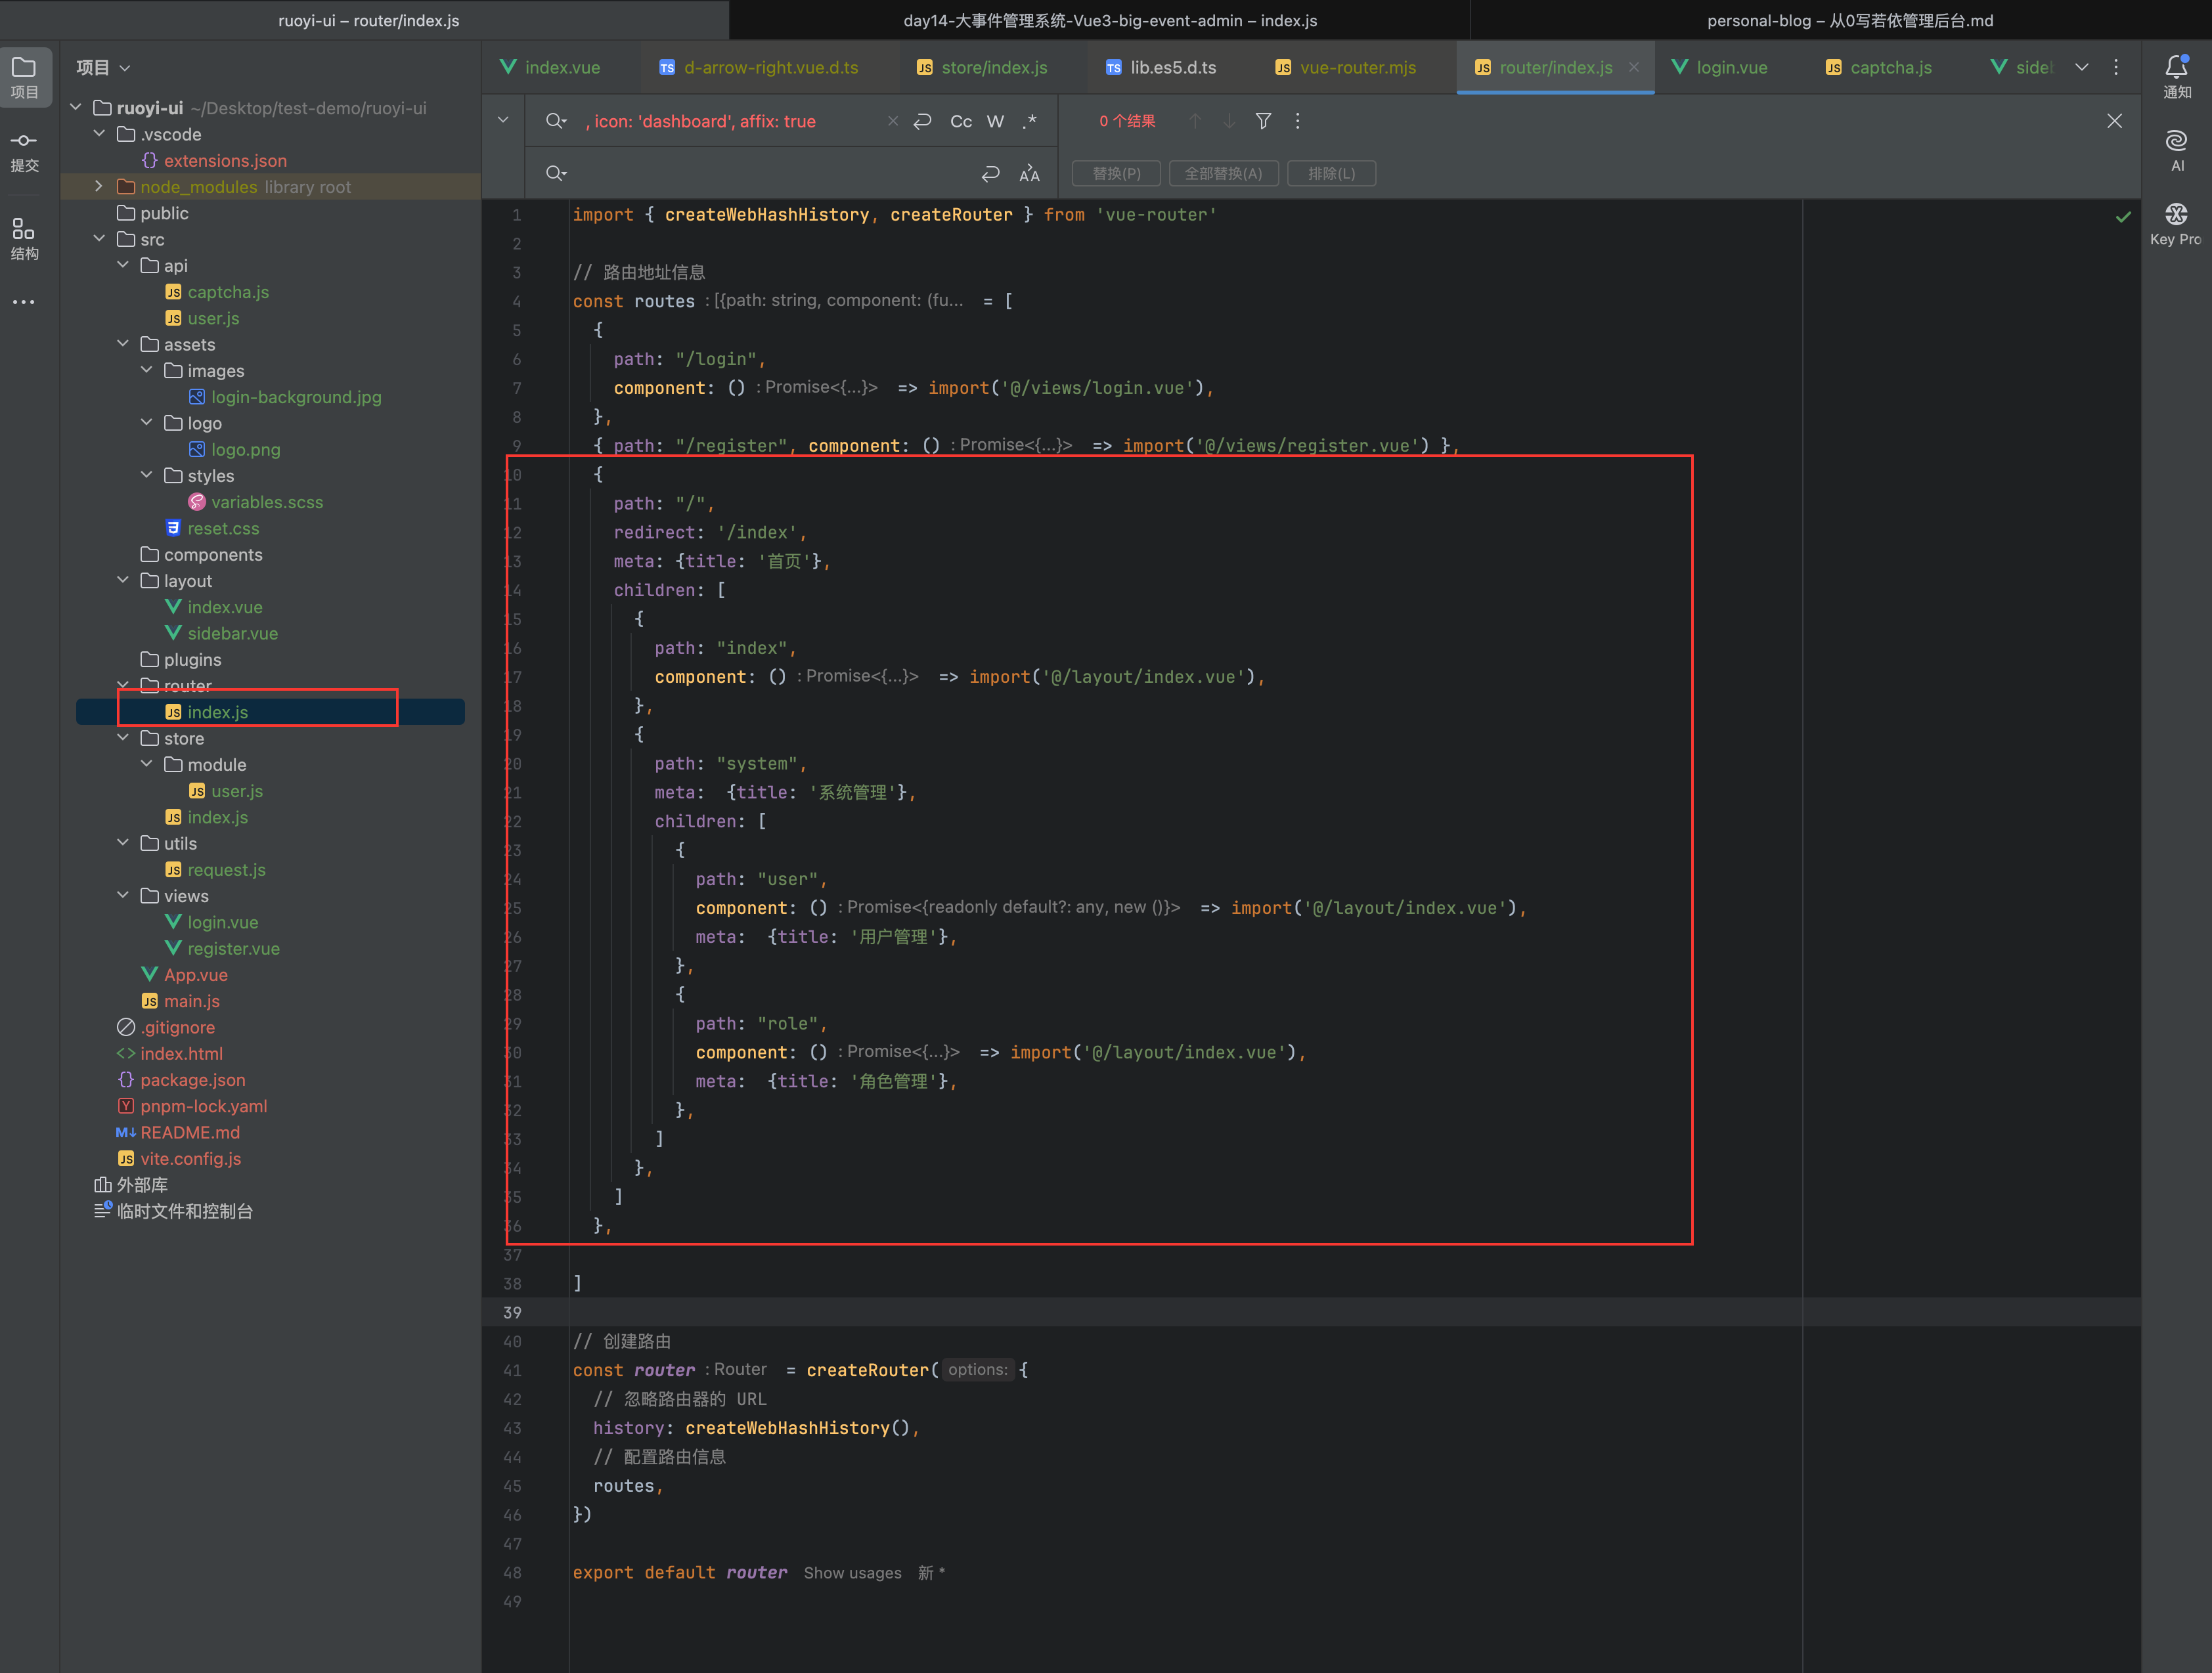
{
        path: "/",
        redirect: '/index',
        meta: {title: '首页'},
        children: [
            {
                path: "index",
                component: () => import('@/layout/index.vue'),
            },
            {
                path: "system",
                meta:  {title: '系统管理'},
                children: [
                    {
                        path: "user",
                        component: () => import('@/layout/user.vue'),
                        meta:  {title: '用户管理'},
                    },
                    {
                        path: "role",
                        component: () => import('@/layout/index.vue'),
                        meta:  {title: '角色管理'},
                    },
                ]
            },
        ]
    },
注意一下:我这样配置路由是有问题的,在
path:"/"这里并没有配置component,在点击用户管理的时候就会导致直接在一个新的新页面打开了 user 页面,因此我们需要调整一下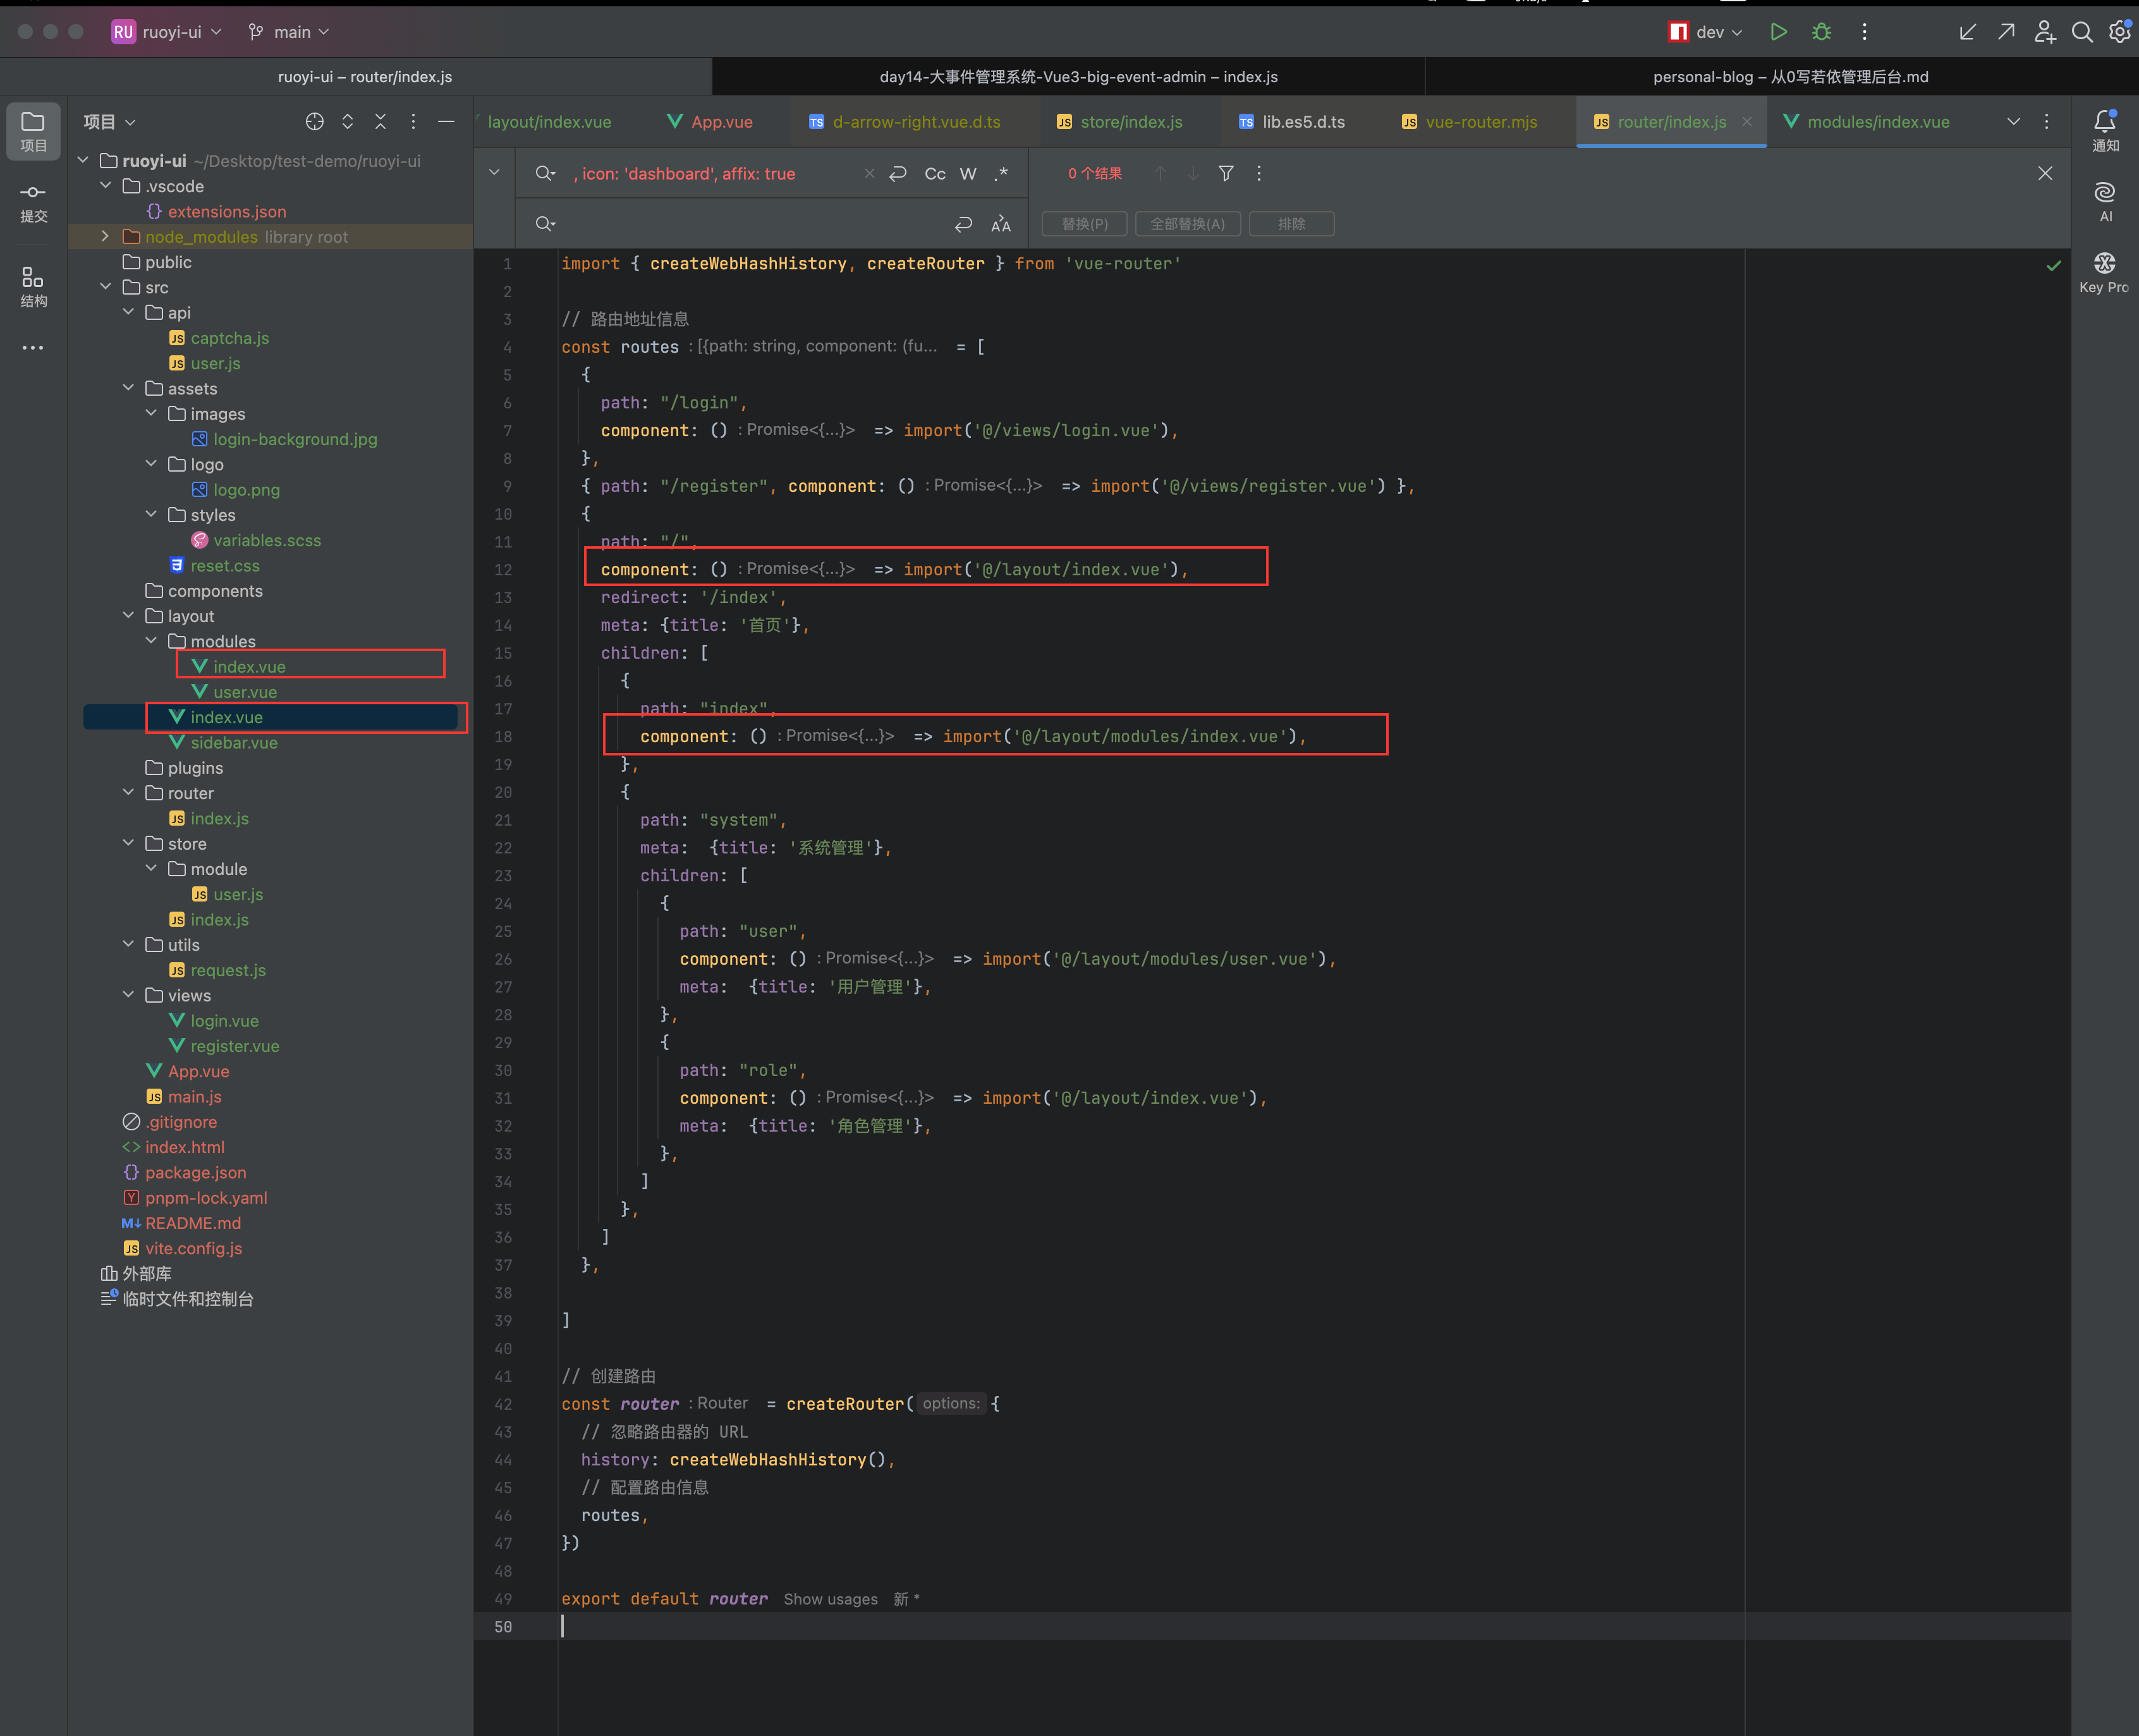
import { createWebHashHistory, createRouter } from 'vue-router'

// 路由地址信息
const routes = [
    {
        path: "/login",
        component: () => import('@/views/login.vue'),
    },
    { path: "/register", component: () => import('@/views/register.vue') },
    {
        path: "/",
        component: () => import('@/layout/index.vue'),
        redirect: '/index',
        meta: {title: '首页'},
        children: [
            {
                path: "index",
                component: () => import('@/layout/modules/index.vue'),
            },
            {
                path: "system",
                meta:  {title: '系统管理'},
                children: [
                    {
                        path: "user",
                        component: () => import('@/layout/modules/user.vue'),
                        meta:  {title: '用户管理'},
                    },
                    {
                        path: "role",
                        component: () => import('@/layout/index.vue'),
                        meta:  {title: '角色管理'},
                    },
                ]
            },
        ]
    },

]

// 创建路由
const router = createRouter({
    // 忽略路由器的 URL
    history: createWebHashHistory(),
    // 配置路由信息
    routes,
})

export default router
我们调整一下主页面
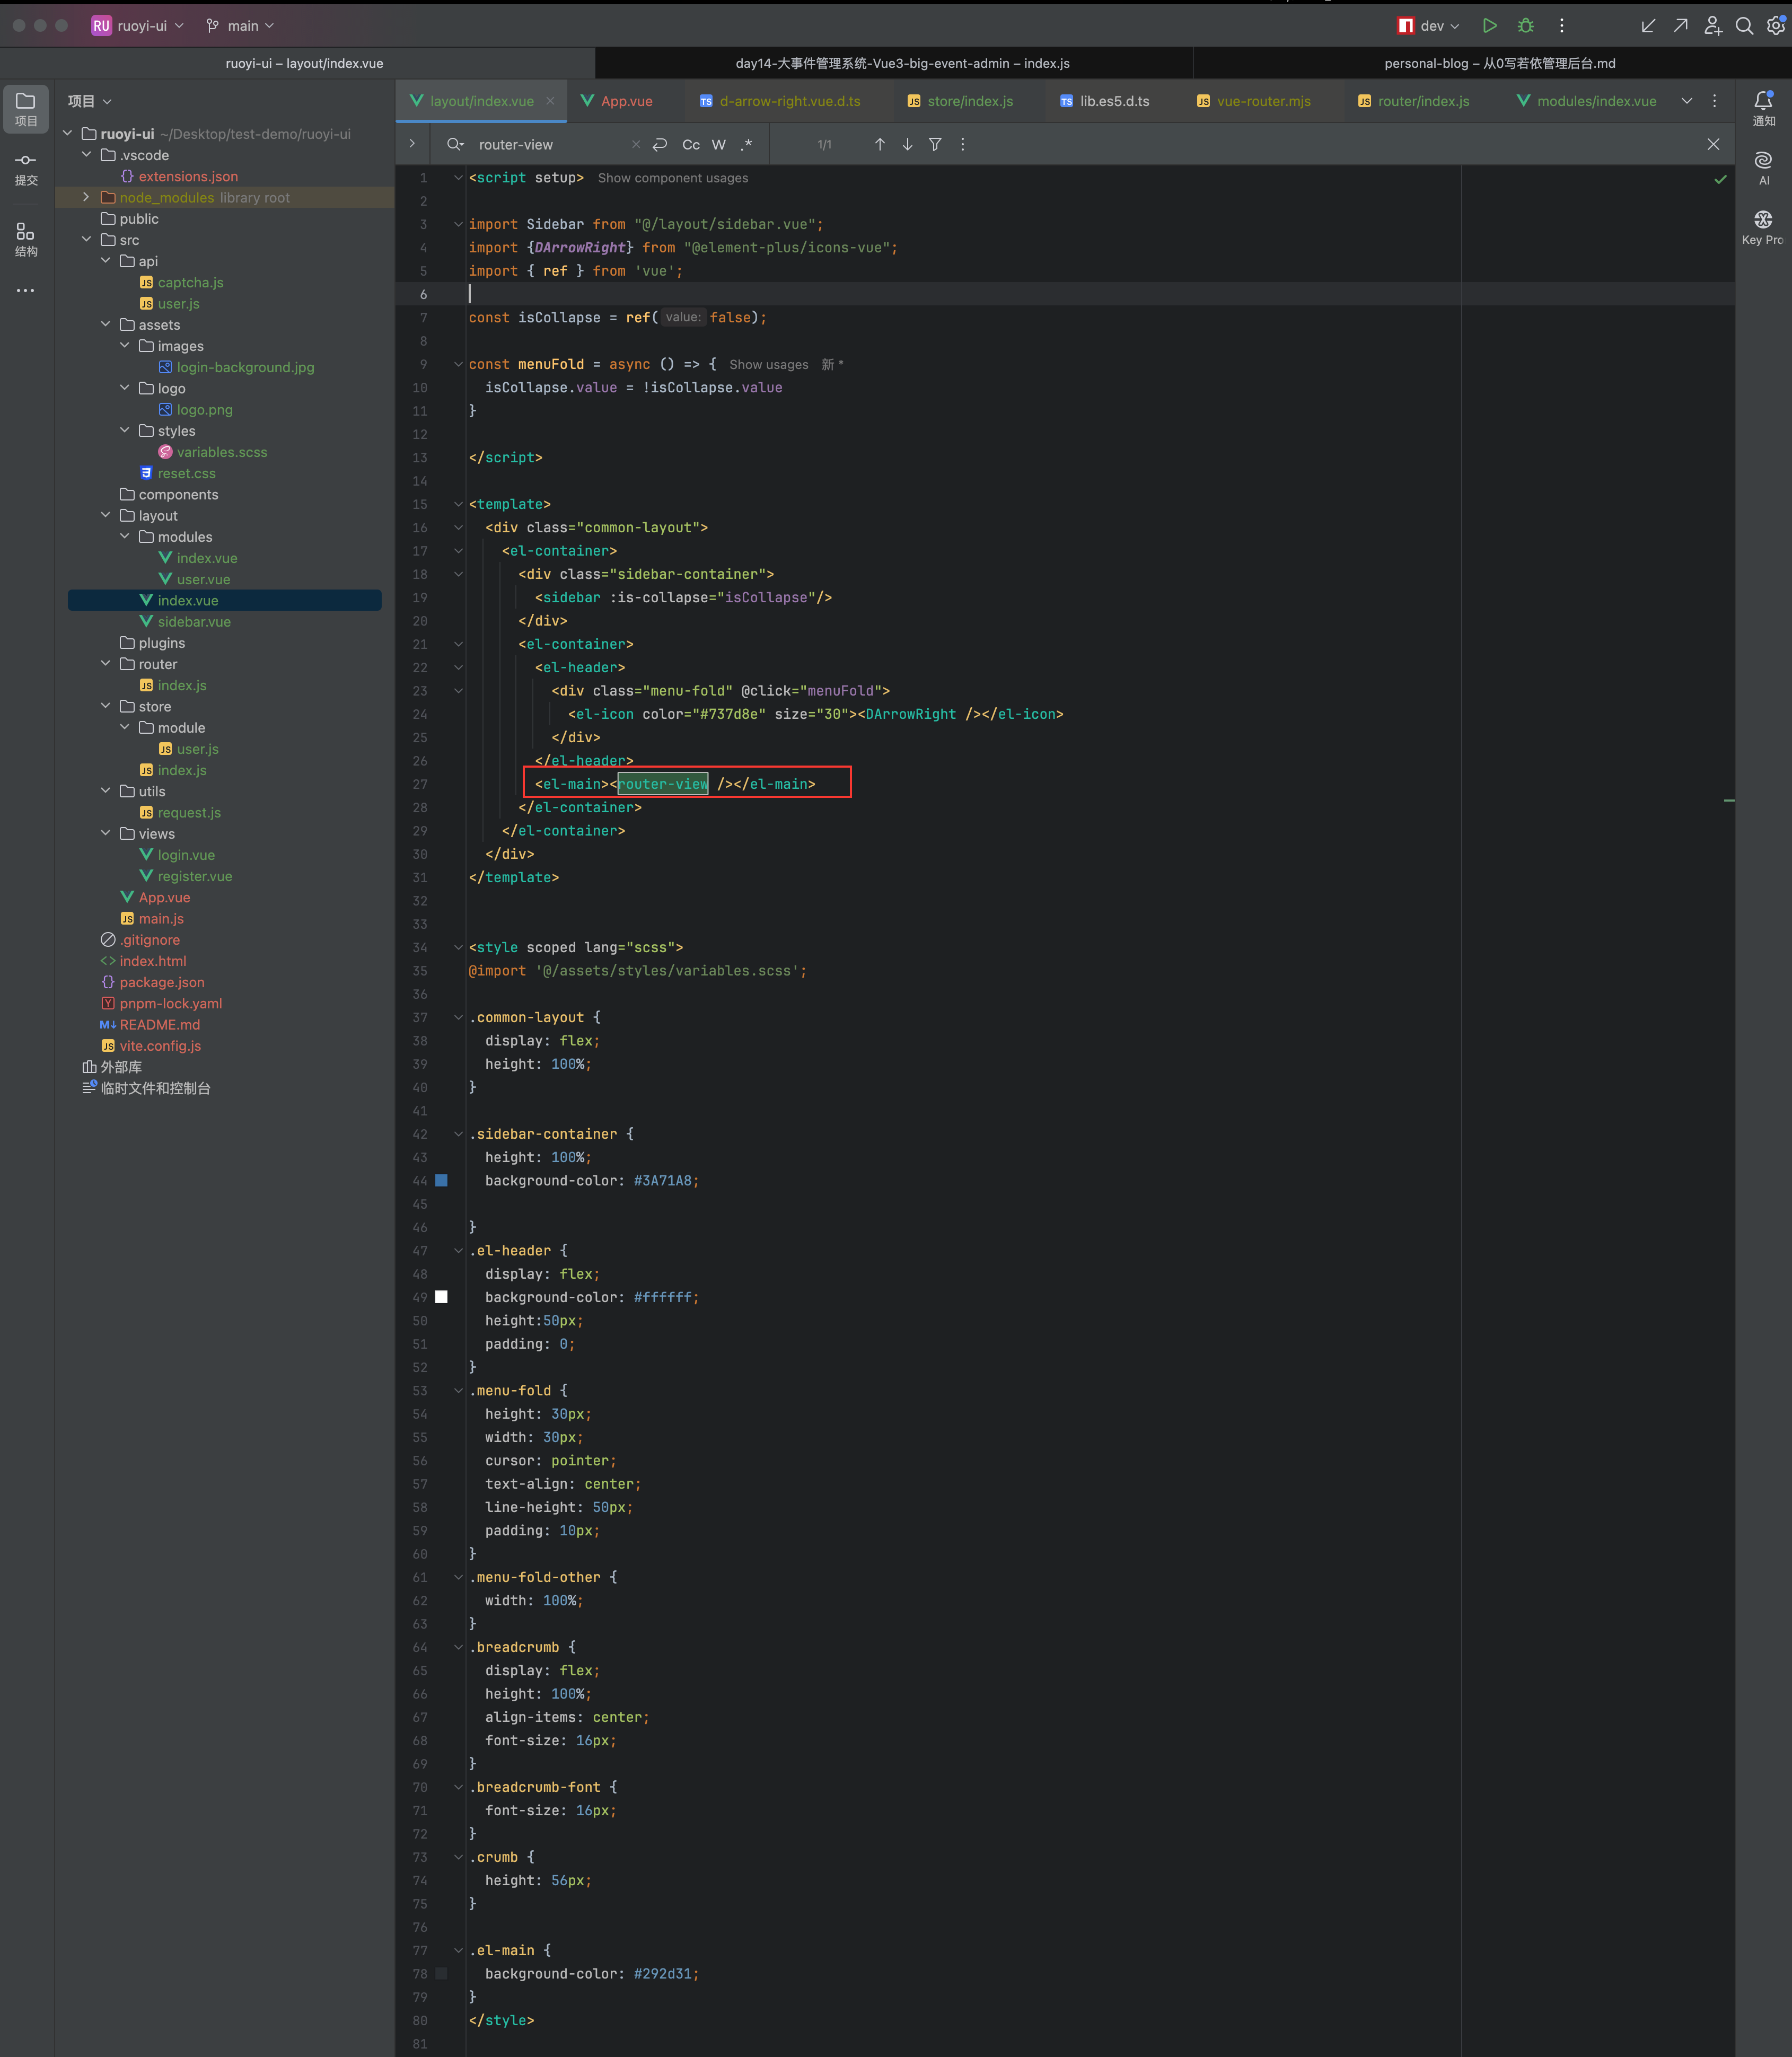
这样就可以正确显示,效果
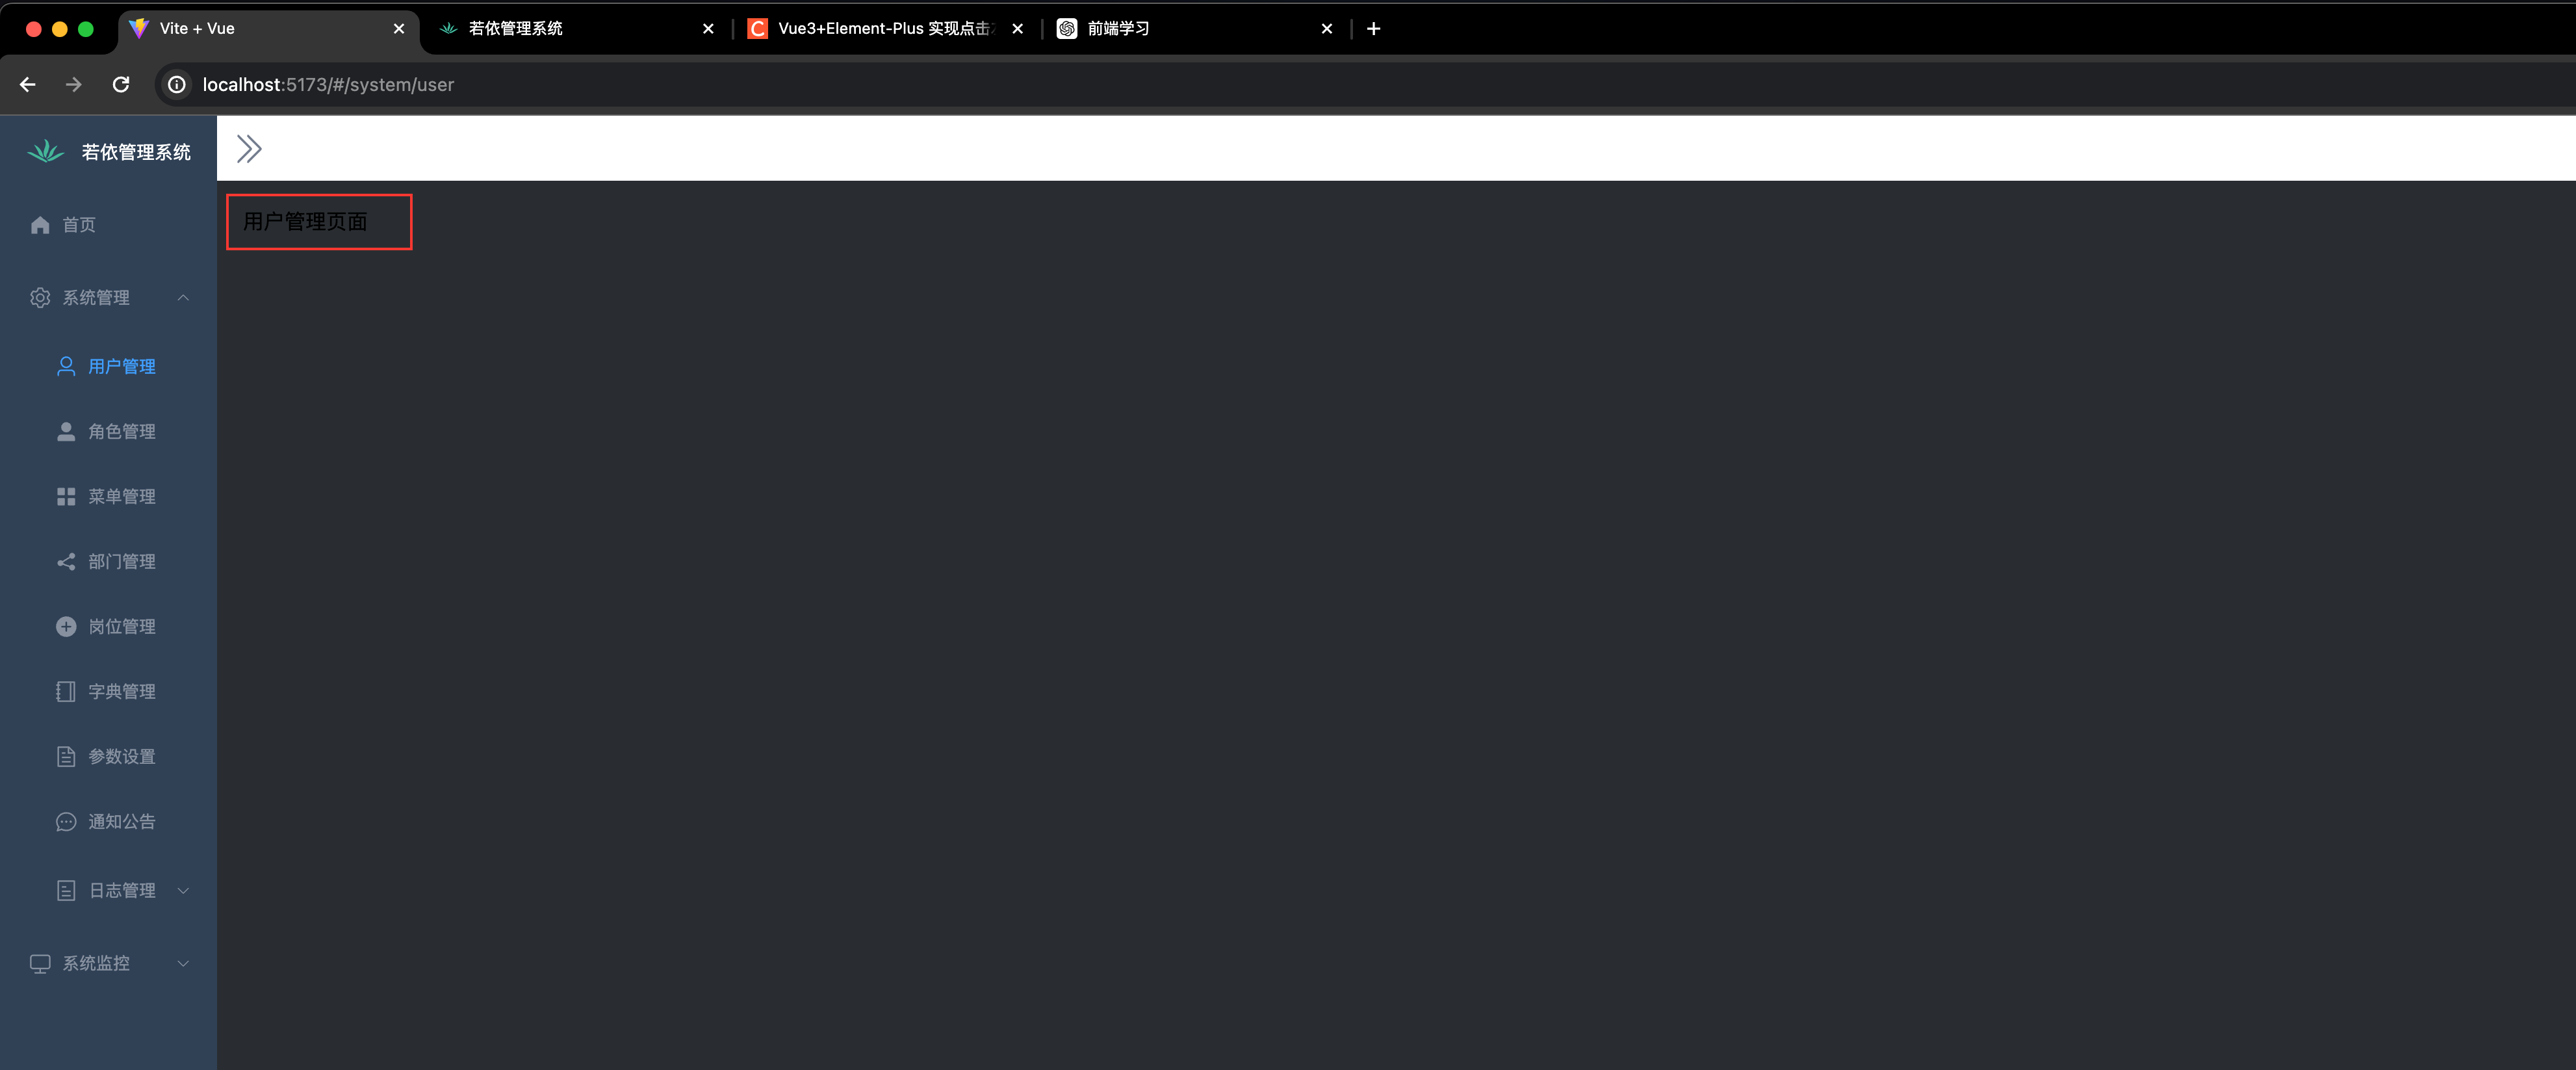
路由菜单优化
为什么要做优化呢?
因为我发现关于
菜单的名称在两个地方router/index.js和layout.sidebar.vue都存在;同样的菜单名称,配置两个地方相对来说,调整起来不是很方便,不容易维护,那我们就调整一下。思路:在
router/index.js配置完,layout.sidebar.vue去获取这些菜单,自动生成树形结构的菜单。首先,路由定义
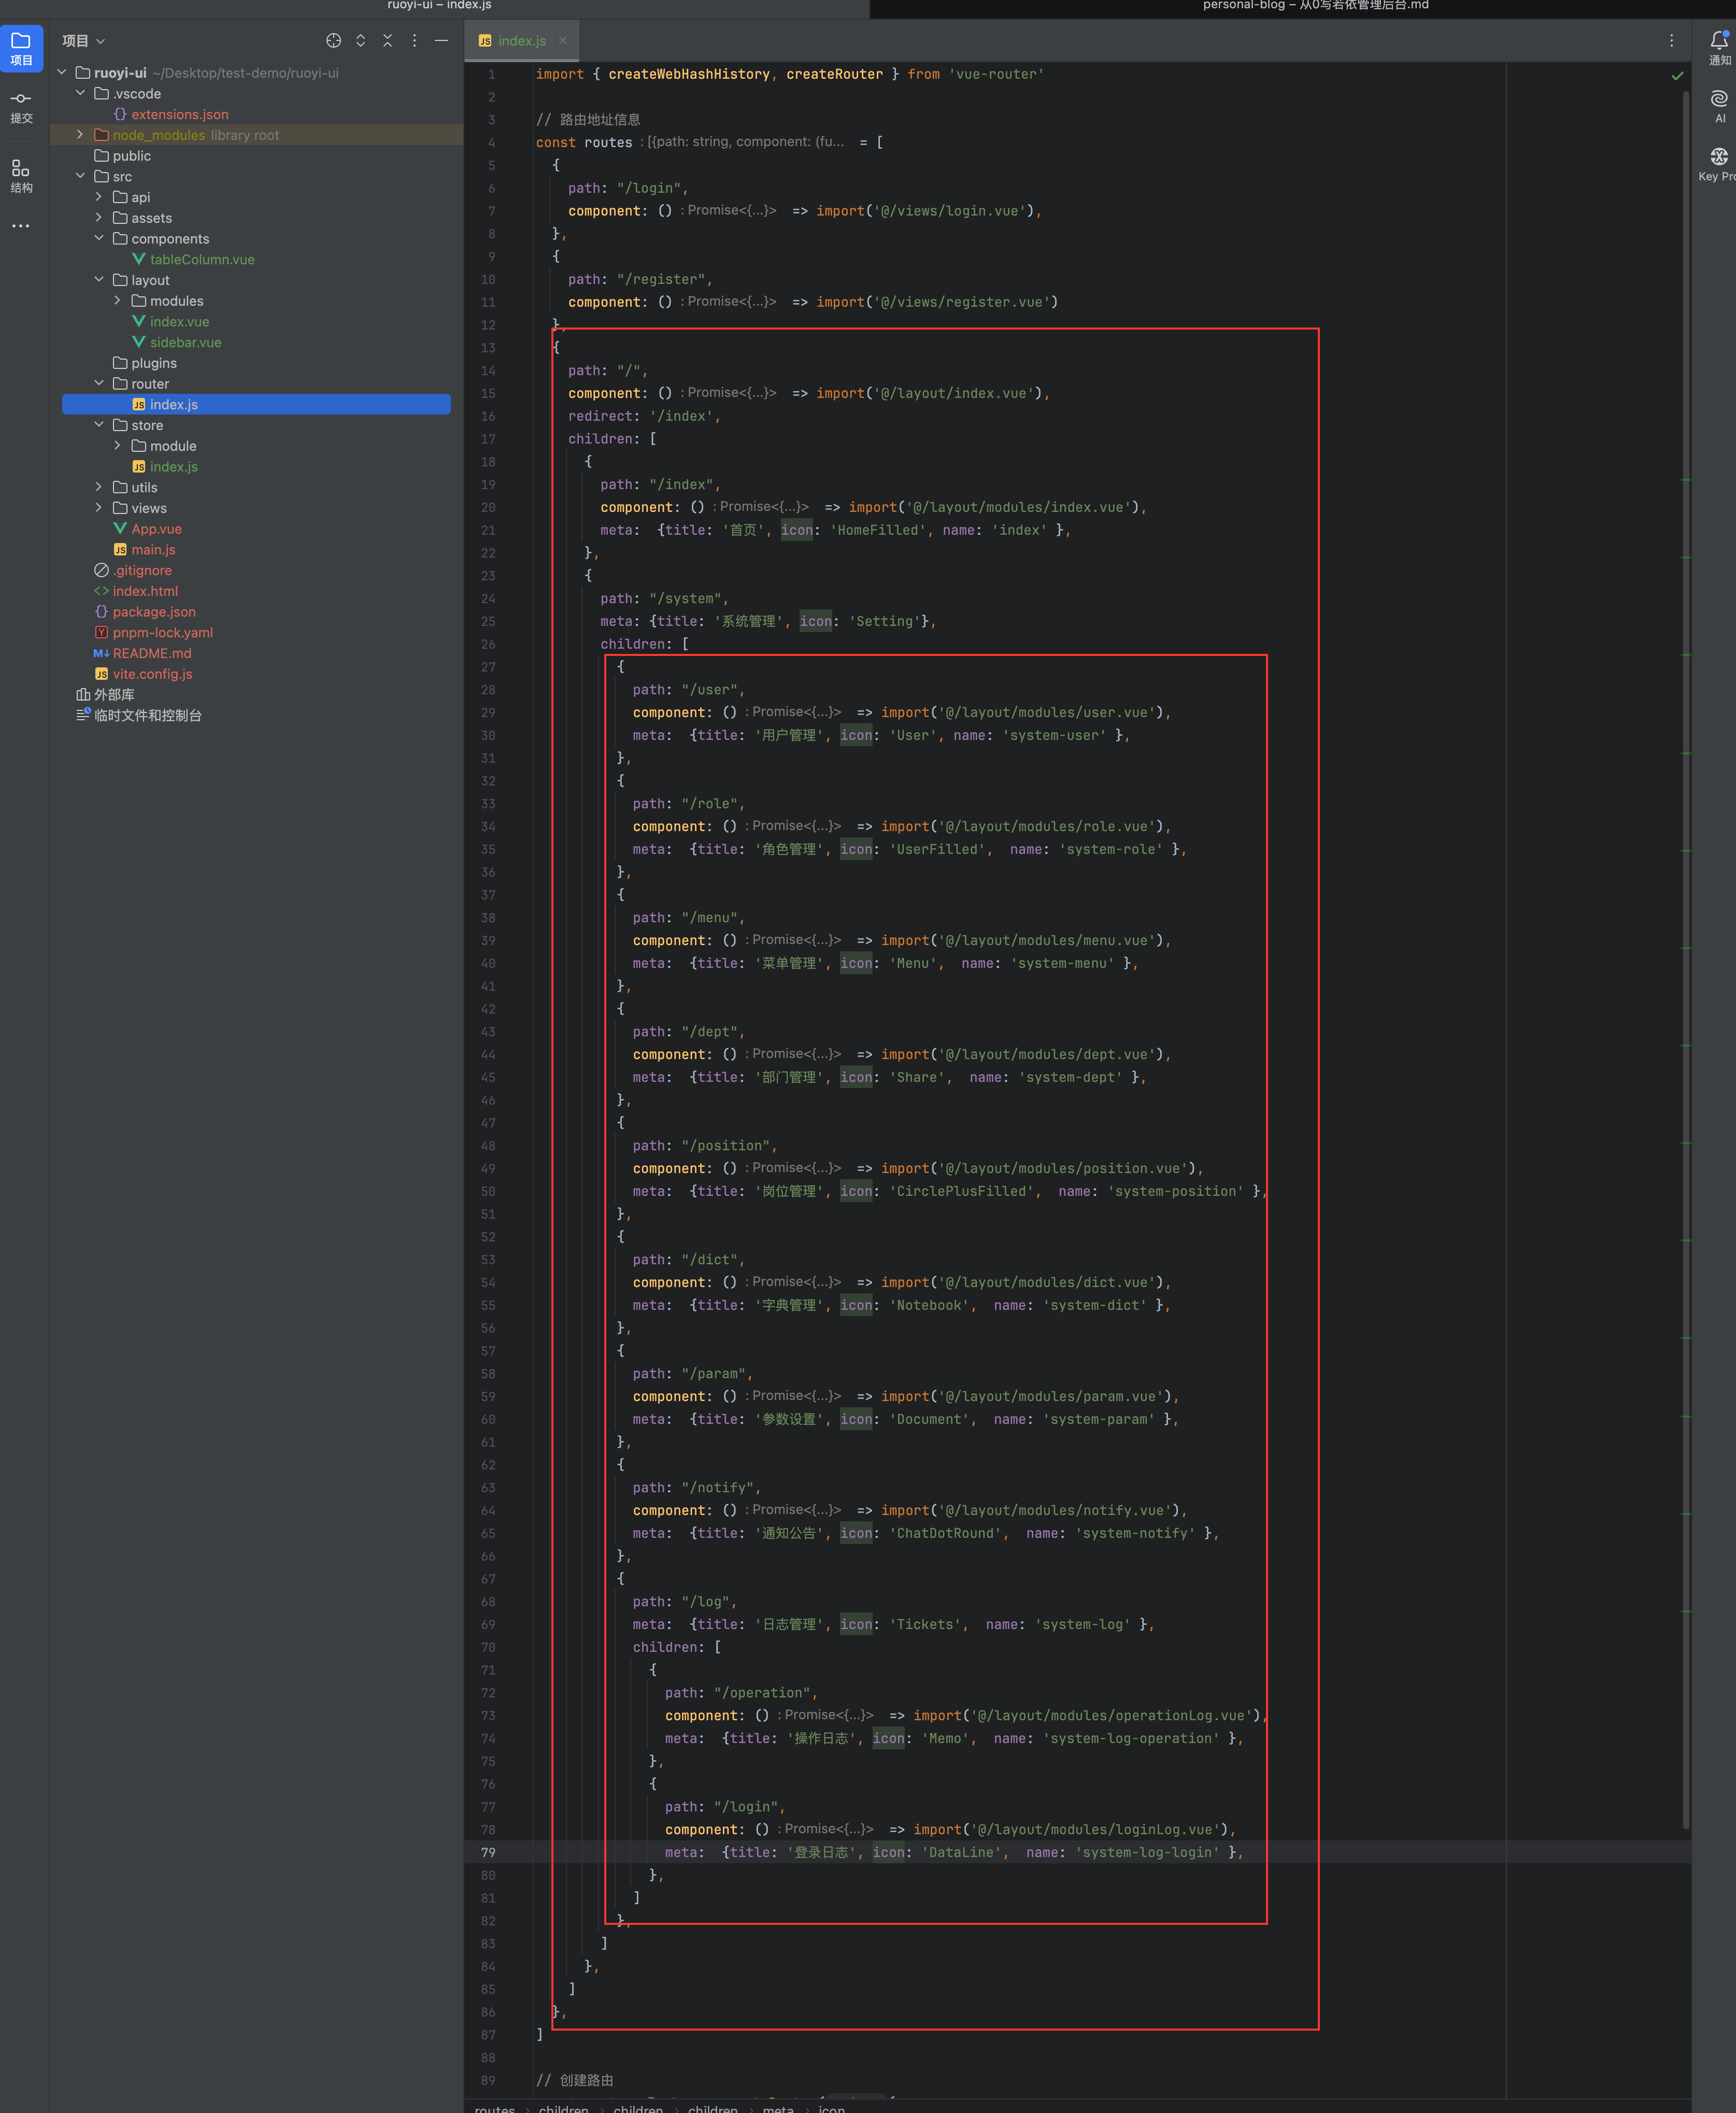
import { createWebHashHistory, createRouter } from 'vue-router'

// 路由地址信息
const routes = [
    {
        path: "/login",
        component: () => import('@/views/login.vue'),
    },
    {
        path: "/register",
        component: () => import('@/views/register.vue')
    },
    {
        path: "/",
        component: () => import('@/layout/index.vue'),
        redirect: '/index',
        children: [
            {
                path: "/index",
                component: () => import('@/layout/modules/index.vue'),
                meta:  {title: '首页', icon: 'HomeFilled', name: 'index' },
            },
            {
                path: "/system",
                meta: {title: '系统管理', icon: 'Setting'},
                children: [
                    {
                        path: "/user",
                        component: () => import('@/layout/modules/user.vue'),
                        meta:  {title: '用户管理', icon: 'User', name: 'system-user' },
                    },
                    {
                        path: "/role",
                        component: () => import('@/layout/modules/role.vue'),
                        meta:  {title: '角色管理', icon: 'UserFilled',  name: 'system-role' },
                    },
                    {
                        path: "/menu",
                        component: () => import('@/layout/modules/menu.vue'),
                        meta:  {title: '菜单管理', icon: 'Menu',  name: 'system-menu' },
                    },
                    {
                        path: "/dept",
                        component: () => import('@/layout/modules/dept.vue'),
                        meta:  {title: '部门管理', icon: 'Share',  name: 'system-dept' },
                    },
                    {
                        path: "/position",
                        component: () => import('@/layout/modules/position.vue'),
                        meta:  {title: '岗位管理', icon: 'CirclePlusFilled',  name: 'system-position' },
                    },
                    {
                        path: "/dict",
                        component: () => import('@/layout/modules/dict.vue'),
                        meta:  {title: '字典管理', icon: 'Notebook',  name: 'system-dict' },
                    },
                    {
                        path: "/param",
                        component: () => import('@/layout/modules/param.vue'),
                        meta:  {title: '参数设置', icon: 'Document',  name: 'system-param' },
                    },
                    {
                        path: "/notify",
                        component: () => import('@/layout/modules/notify.vue'),
                        meta:  {title: '通知公告', icon: 'ChatDotRound',  name: 'system-notify' },
                    },
                    {
                        path: "/log",
                        meta:  {title: '日志管理', icon: 'Tickets',  name: 'system-log' },
                        children: [
                            {
                                path: "/operation",
                                component: () => import('@/layout/modules/operationLog.vue'),
                                meta:  {title: '操作日志', icon: 'Memo',  name: 'system-log-operation' },
                            },
                            {
                                path: "/login",
                                component: () => import('@/layout/modules/loginLog.vue'),
                                meta:  {title: '登录日志', icon: 'DataLine',  name: 'system-log-login' },
                            },
                        ]
                    },
                ]
            },
        ]
    },
]

// 创建路由
const router = createRouter({
    // 忽略路由器的 URL
    history: createWebHashHistory(),
    // 配置路由信息
    routes,
})

export default router
我们需要注意一下每个菜单配置都有一个
meta字段,里面有三个参数title:菜单名称、icon:菜单图标和name:页面名称然后,关键创建一下这些新的页面
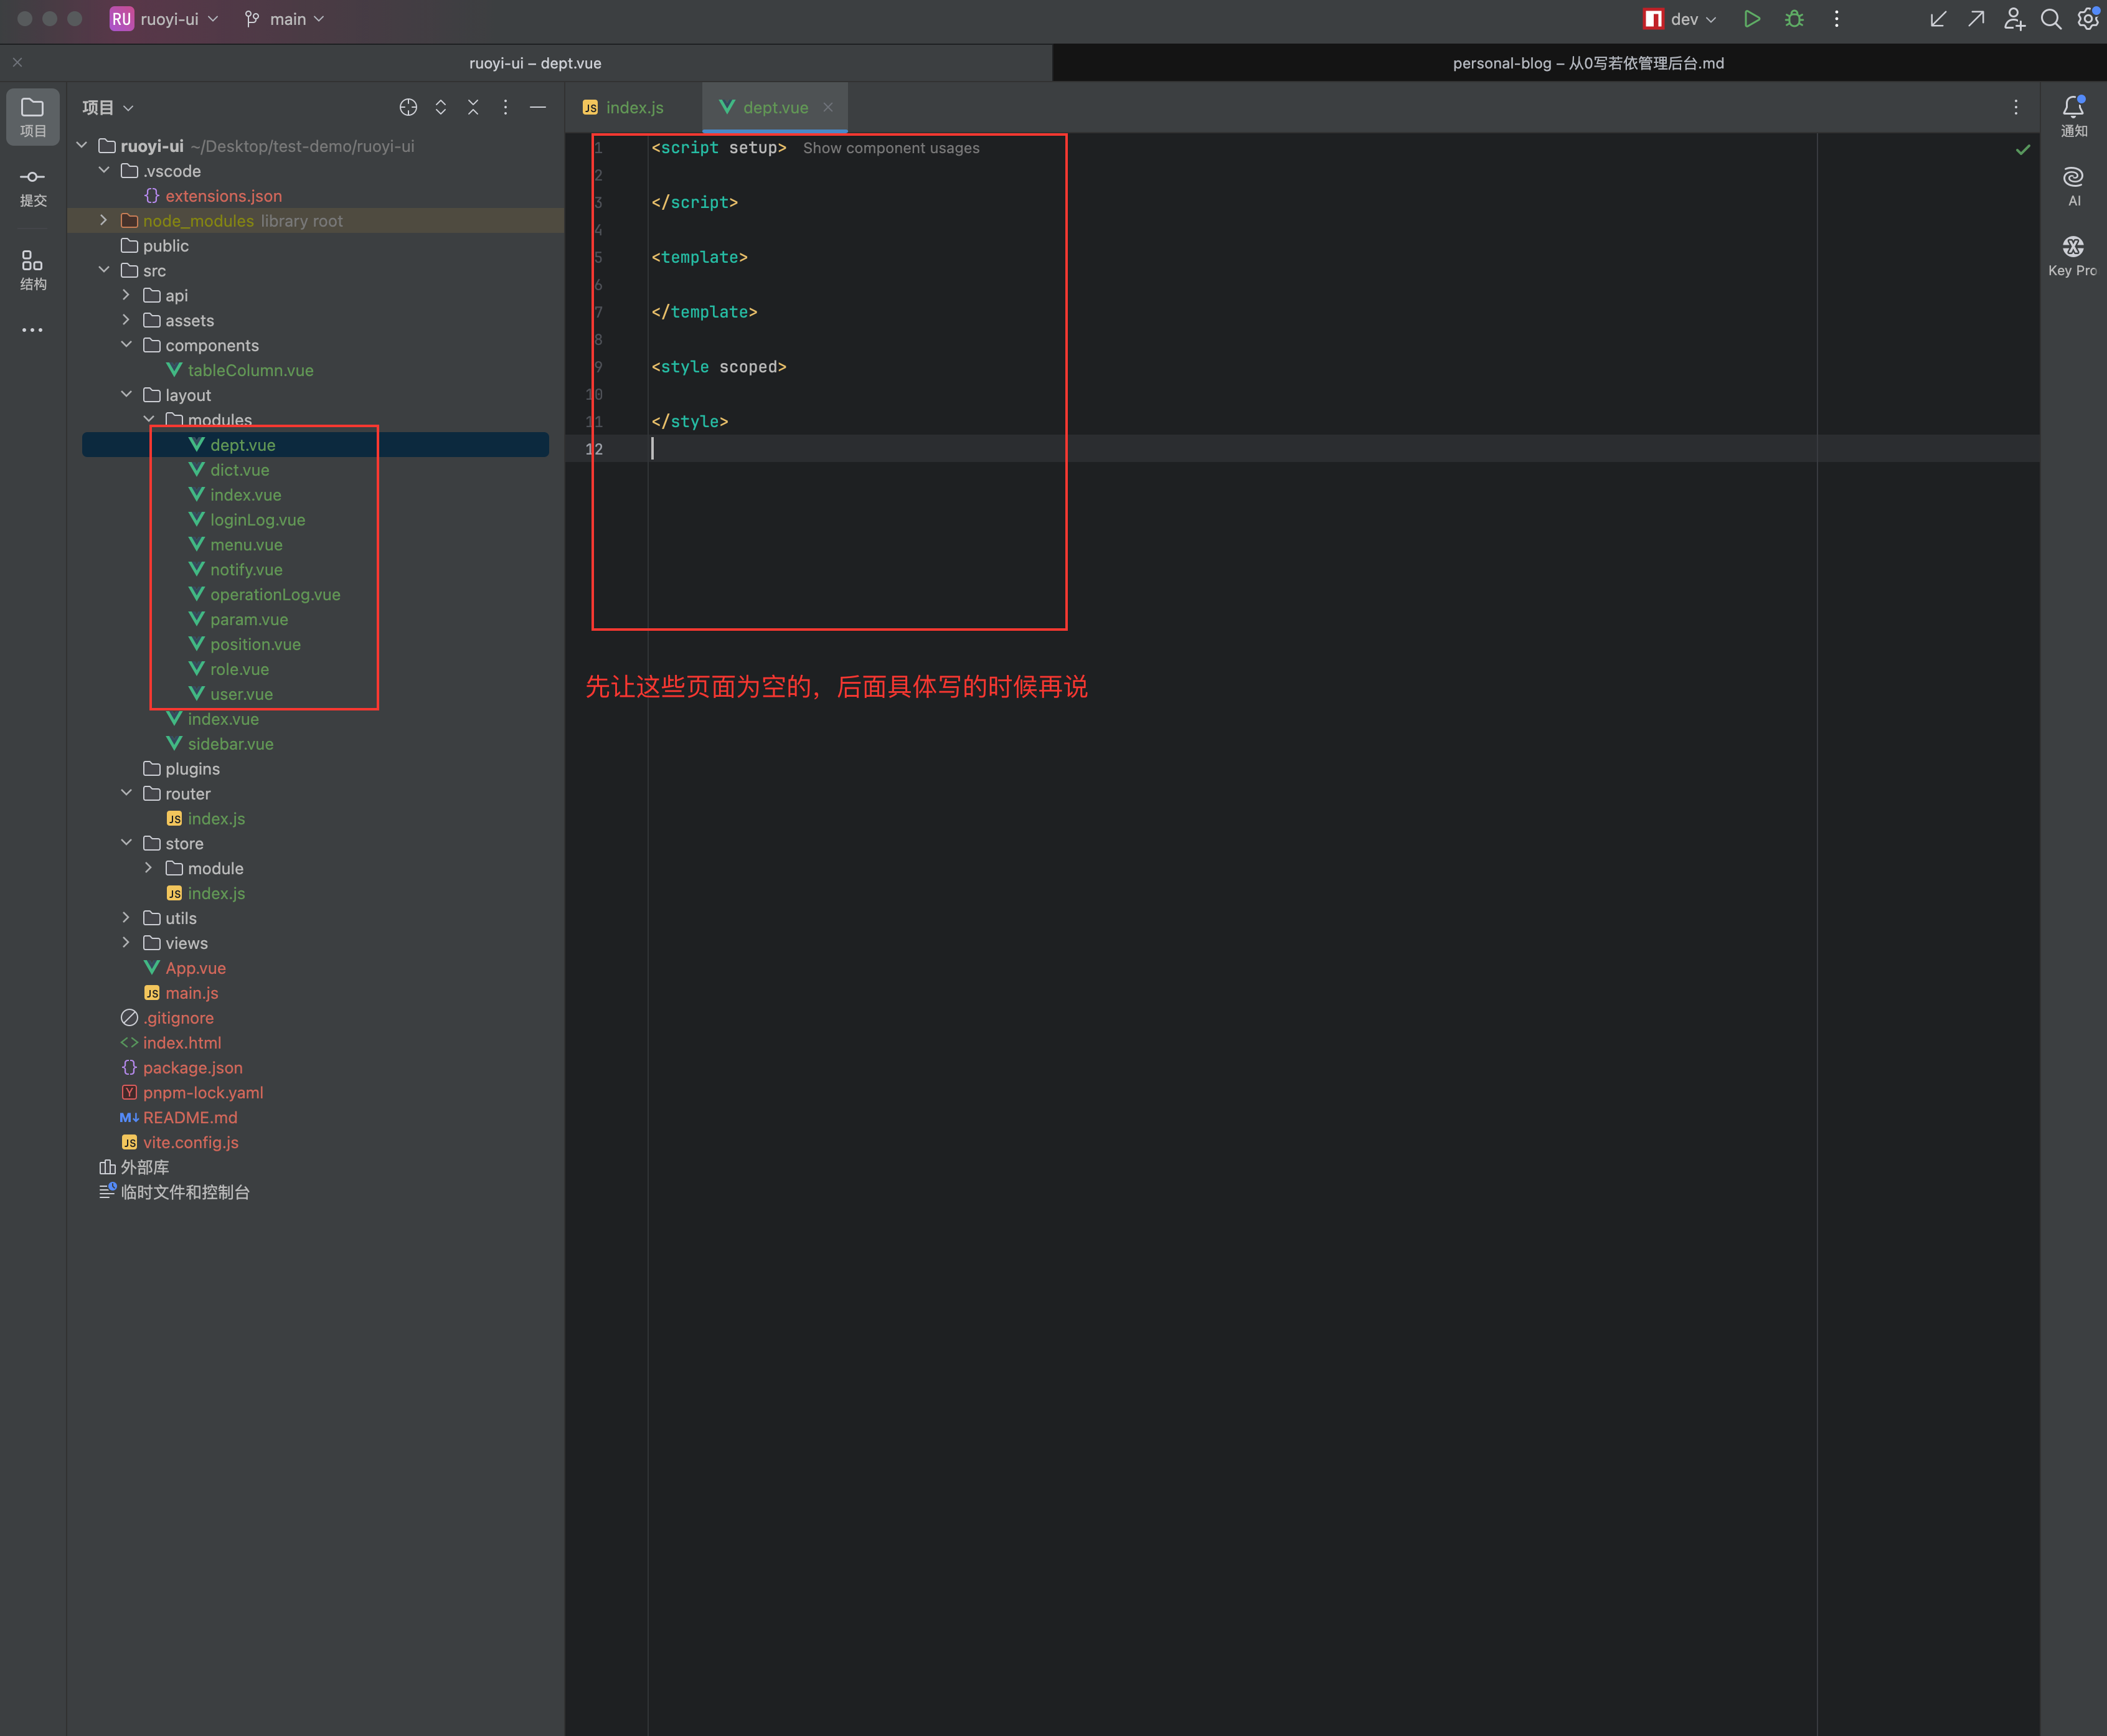
最后,调整菜单页面了
sidebar.vue⚠️注意页面是调整最大的,先上代码,然后解释
<template> <el-menu background-color="#304156" text-color="#85909f" :default-active="activeIndex" class="sidebar-menu" :collapse="isCollapse" :router="true" @select="handleMenuItemSelect" > <!-- 顶部系统信息 --> <el-menu-item index="/index" style="height: 56px; padding: 0 20px;"> <img src="@/assets/logo/logo.png" style="width: 32px; height: 32px; margin-right: 12px;" alt="logo图片"> <span style="font-size: 14px; color: #ffffff"> 若依管理系统 </span> </el-menu-item> <!-- 菜单项 --> <template v-for="item in mainMenuItems" :key="item.index"> <el-menu-item v-if="!item.children" :index="item.index"> <el-icon> <component :is="getIconComponent(item.icon)" /> </el-icon> <span>{{ item.title }}</span> </el-menu-item> <el-sub-menu v-else :index="item.index"> <template #title> <el-icon> <component :is="getIconComponent(item.icon)" /> </el-icon> <span>{{ item.title }}</span> </template> <template v-for="subItem in item.children" :key="subItem.index"> <el-menu-item v-if="!subItem.children" :index="subItem.index"> <el-icon> <component :is="getIconComponent(subItem.icon)" /> </el-icon> <span>{{ subItem.title }}</span> </el-menu-item> <el-sub-menu v-else :index="subItem.index"> <template #title> <el-icon> <component :is="getIconComponent(subItem.icon)" /> </el-icon> <span>{{ subItem.title }}</span> </template> <template v-for="sonItem in subItem.children" :key="sonItem.index"> <el-menu-item v-if="!sonItem.children" :index="sonItem.index"> <el-icon> <component :is="getIconComponent(sonItem.icon)" /> </el-icon> <span>{{ sonItem.title }}</span> </el-menu-item> </template> </el-sub-menu> </template> </el-sub-menu> </template> </el-menu> </template> <script lang="ts" setup> import * as Icons from '@element-plus/icons-vue'; import { defineProps } from 'vue'; import { useRouter } from 'vue-router'; // 获取全部路由 const router = useRouter(); // 路由转菜单 const generateMenuItems = (routers) => { return routers.map(route => { const menuItem = { index: route.path, title: route.meta?.title || '', icon: route.meta?.icon || '', name: route.meta?.name || '', children: route.children ? generateMenuItems(route.children) : null }; return menuItem; }); }; const menuItems = generateMenuItems(router.options.routes); // 获取主要菜单 const mainMenuItems = menuItems.find(item => item.index === '/')?.children || []; // 是否菜单塌陷 true:塌陷,false:不塌陷 const props = defineProps({ isCollapse: { type: Boolean, required: true }, activeIndex: { type: String, required: true } }); </script> <style lang="scss"> .el-menu-vertical-demo:not(.el-menu--collapse) { width: 200px; min-height: 400px; } .sidebar-menu { height: 100%; border: 0; } span { font-size: 13px; } .logo-container { display: flex; width: 100%; height: 50px; align-items: center; justify-content: center; } .logo-container img { width: 32px; height: 32px; margin-right: 12px; } </style>- 获取全部的路由,然后从路由中提取出菜单信息,这个菜单信息是有层级结构的(警告不影响,这里就忽略了)
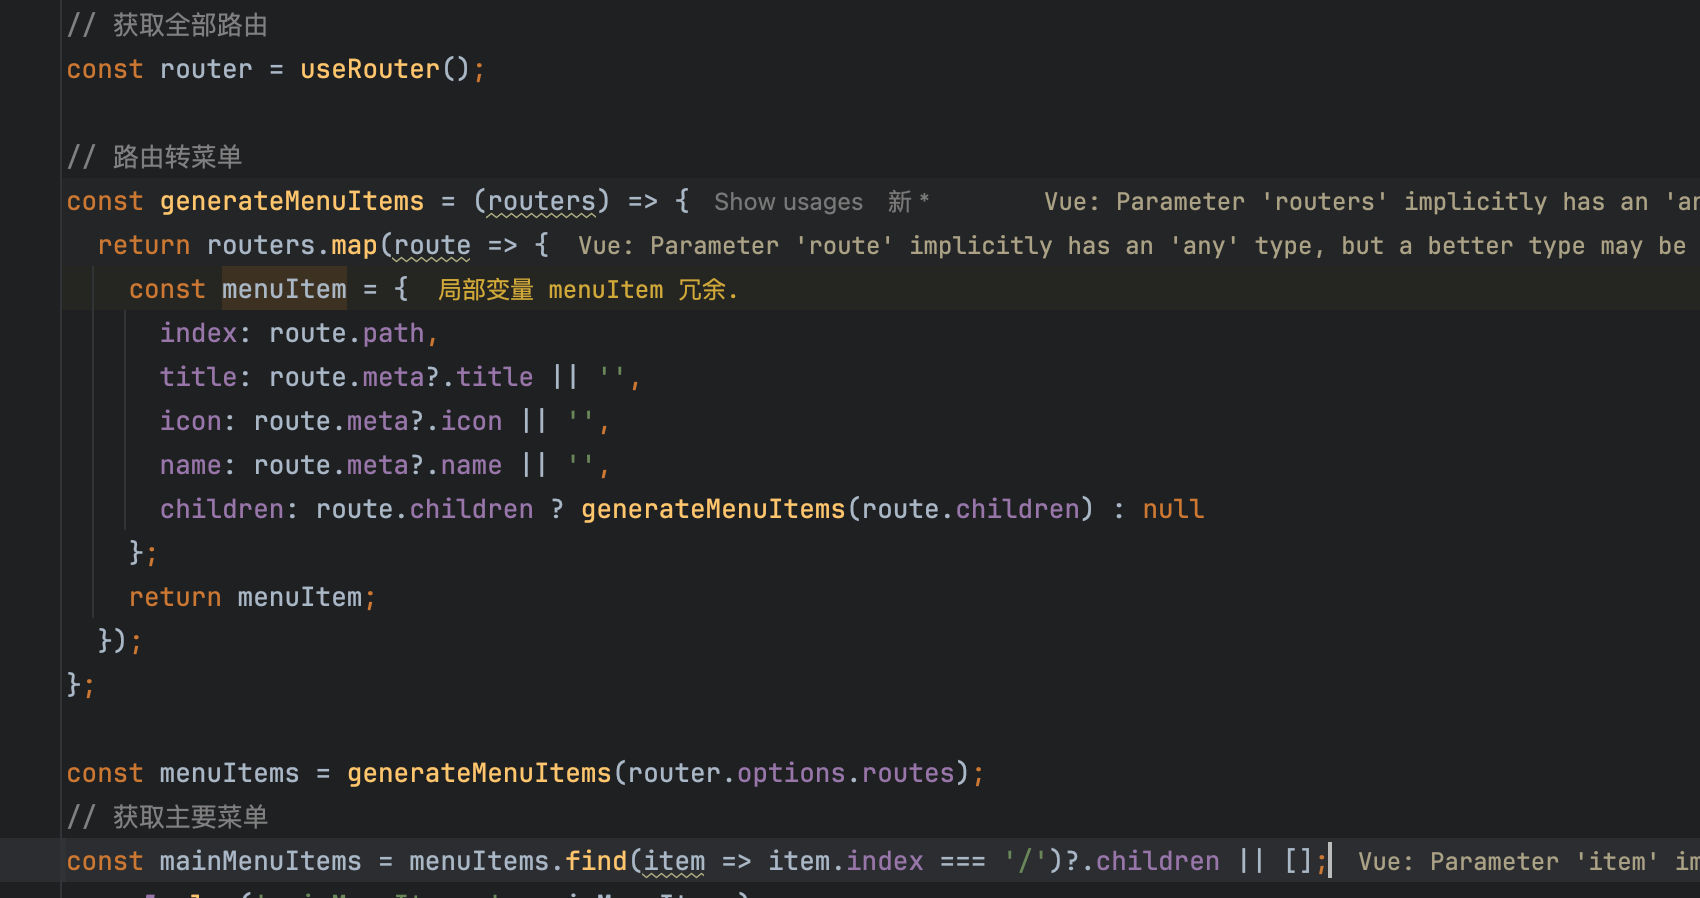
mainMenuItems的具体结构如下[ { "index": "/index", "title": "首页", "icon": "HomeFilled", "name": "index", "children": null }, { "index": "/system", "title": "系统管理", "icon": "Setting", "name": "", "children": [ { "index": "/user", "title": "用户管理", "icon": "User", "name": "system-user", "children": null }, { "index": "/role", "title": "角色管理", "icon": "UserFilled", "name": "system-role", "children": null }, { "index": "/menu", "title": "菜单管理", "icon": "Menu", "name": "system-menu", "children": null }, { "index": "/dept", "title": "部门管理", "icon": "Share", "name": "system-dept", "children": null }, { "index": "/position", "title": "岗位管理", "icon": "CirclePlusFilled", "name": "system-position", "children": null }, { "index": "/dict", "title": "字典管理", "icon": "Notebook", "name": "system-dict", "children": null }, { "index": "/param", "title": "参数设置", "icon": "Document", "name": "system-param", "children": null }, { "index": "/notify", "title": "通知公告", "icon": "ChatDotRound", "name": "system-notify", "children": null }, { "index": "/log", "title": "日志管理", "icon": "Tickets", "name": "system-log", "children": [ { "index": "/operation", "title": "操作日志", "icon": "Memo", "name": "system-log-operation", "children": null }, { "index": "/login", "title": "登录日志", "icon": "DataLine", "name": "system-log-login", "children": null } ] } ] } ]- 改造页面,将
mainMenuItems的数据渲染上去
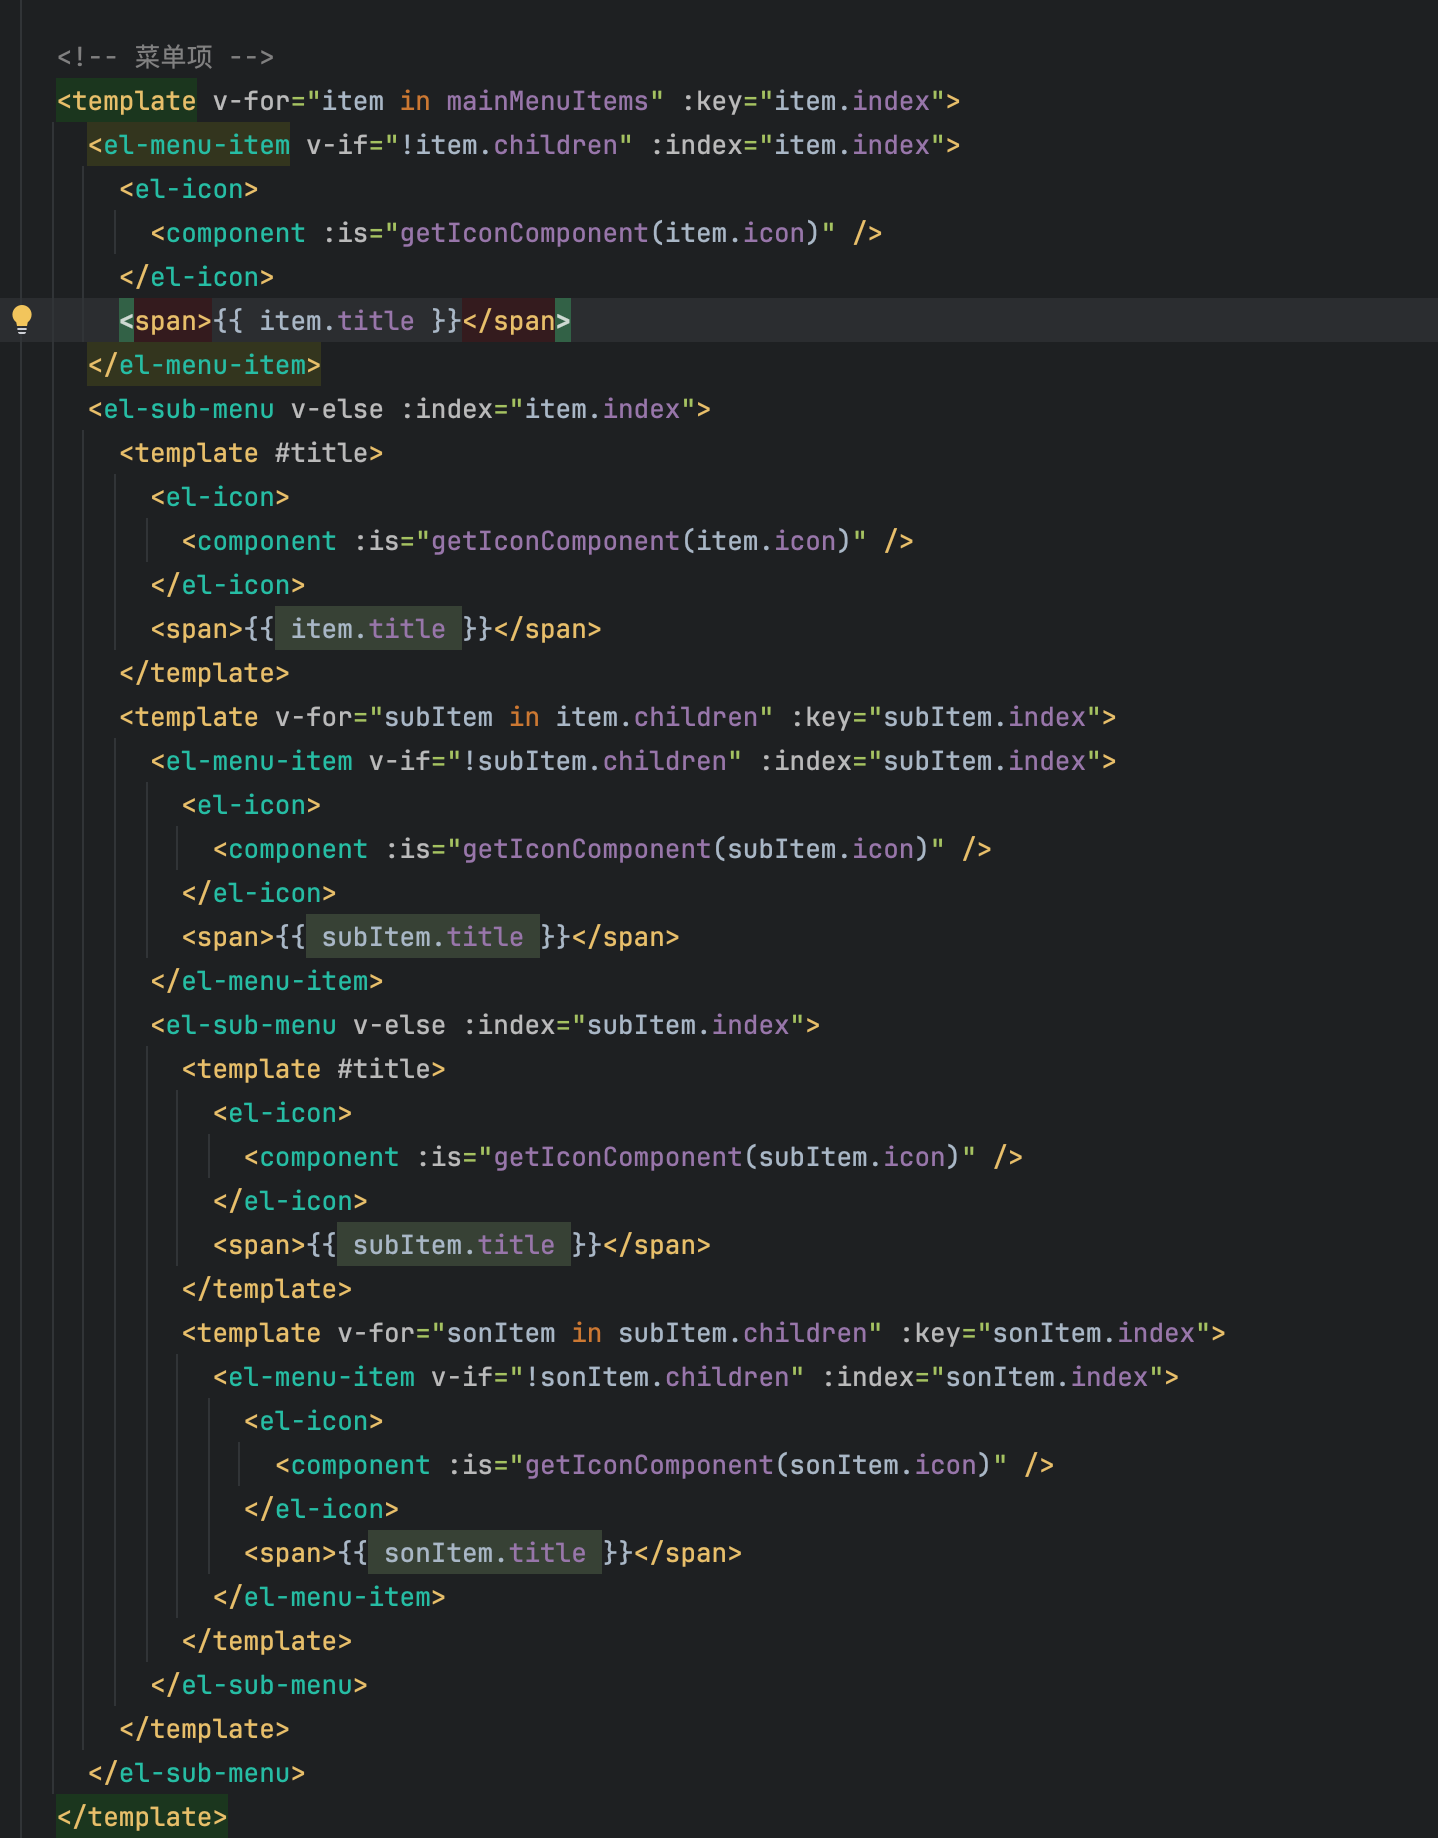
里面有个方法
getIconComponent是获取图标的,如果我们直接将图标的字符串放上是不生效的。
⚠️注意:我这里一开始的时候是确定了菜单只有
三层,所以这里的代码适用于小于等于3层;如果你的大于三层,只需要在最后一层中自己接着套娃.- 菜单路径
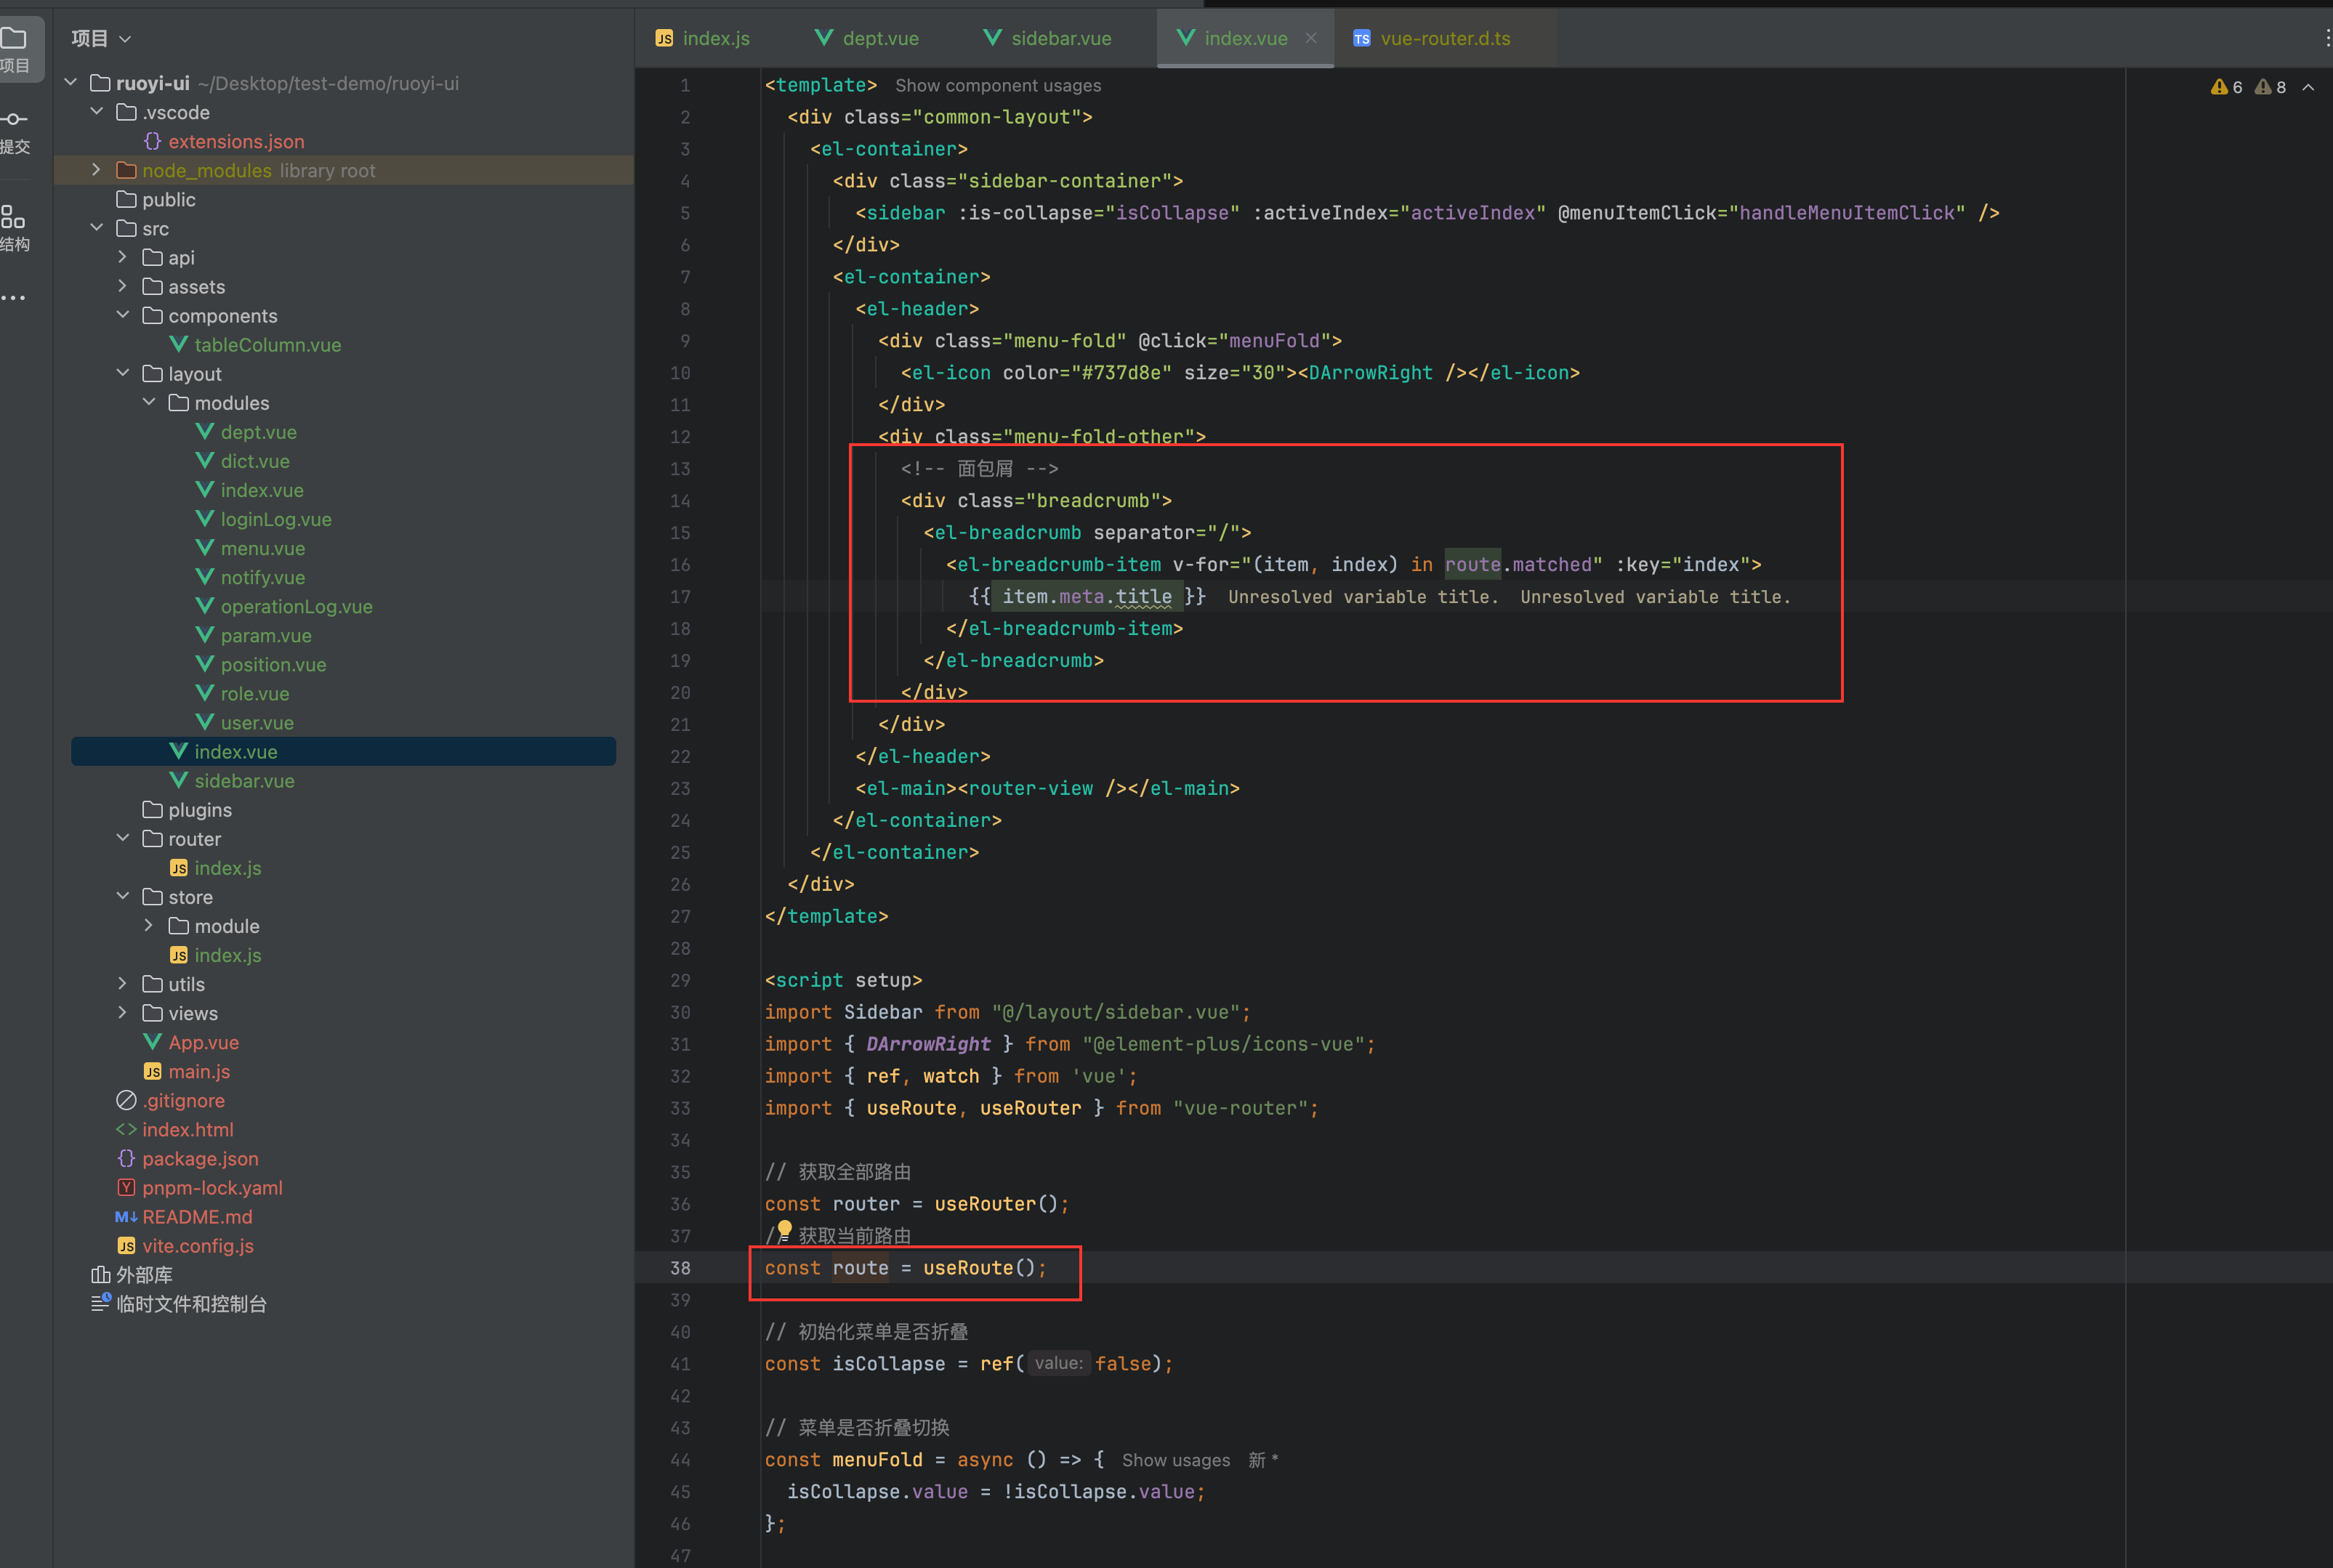
<div class="menu-fold-other">
  <!-- 面包屑 -->
  <div class="breadcrumb">
    <el-breadcrumb separator="/">
      <el-breadcrumb-item v-for="(item, index) in route.matched" :key="index">
        {{ item.meta.title }}
      </el-breadcrumb-item>
    </el-breadcrumb>
  </div>
</div>
<script setup>
import { useRoute, useRouter } from "vue-router";
const route = useRoute();
</script>
OK,完成
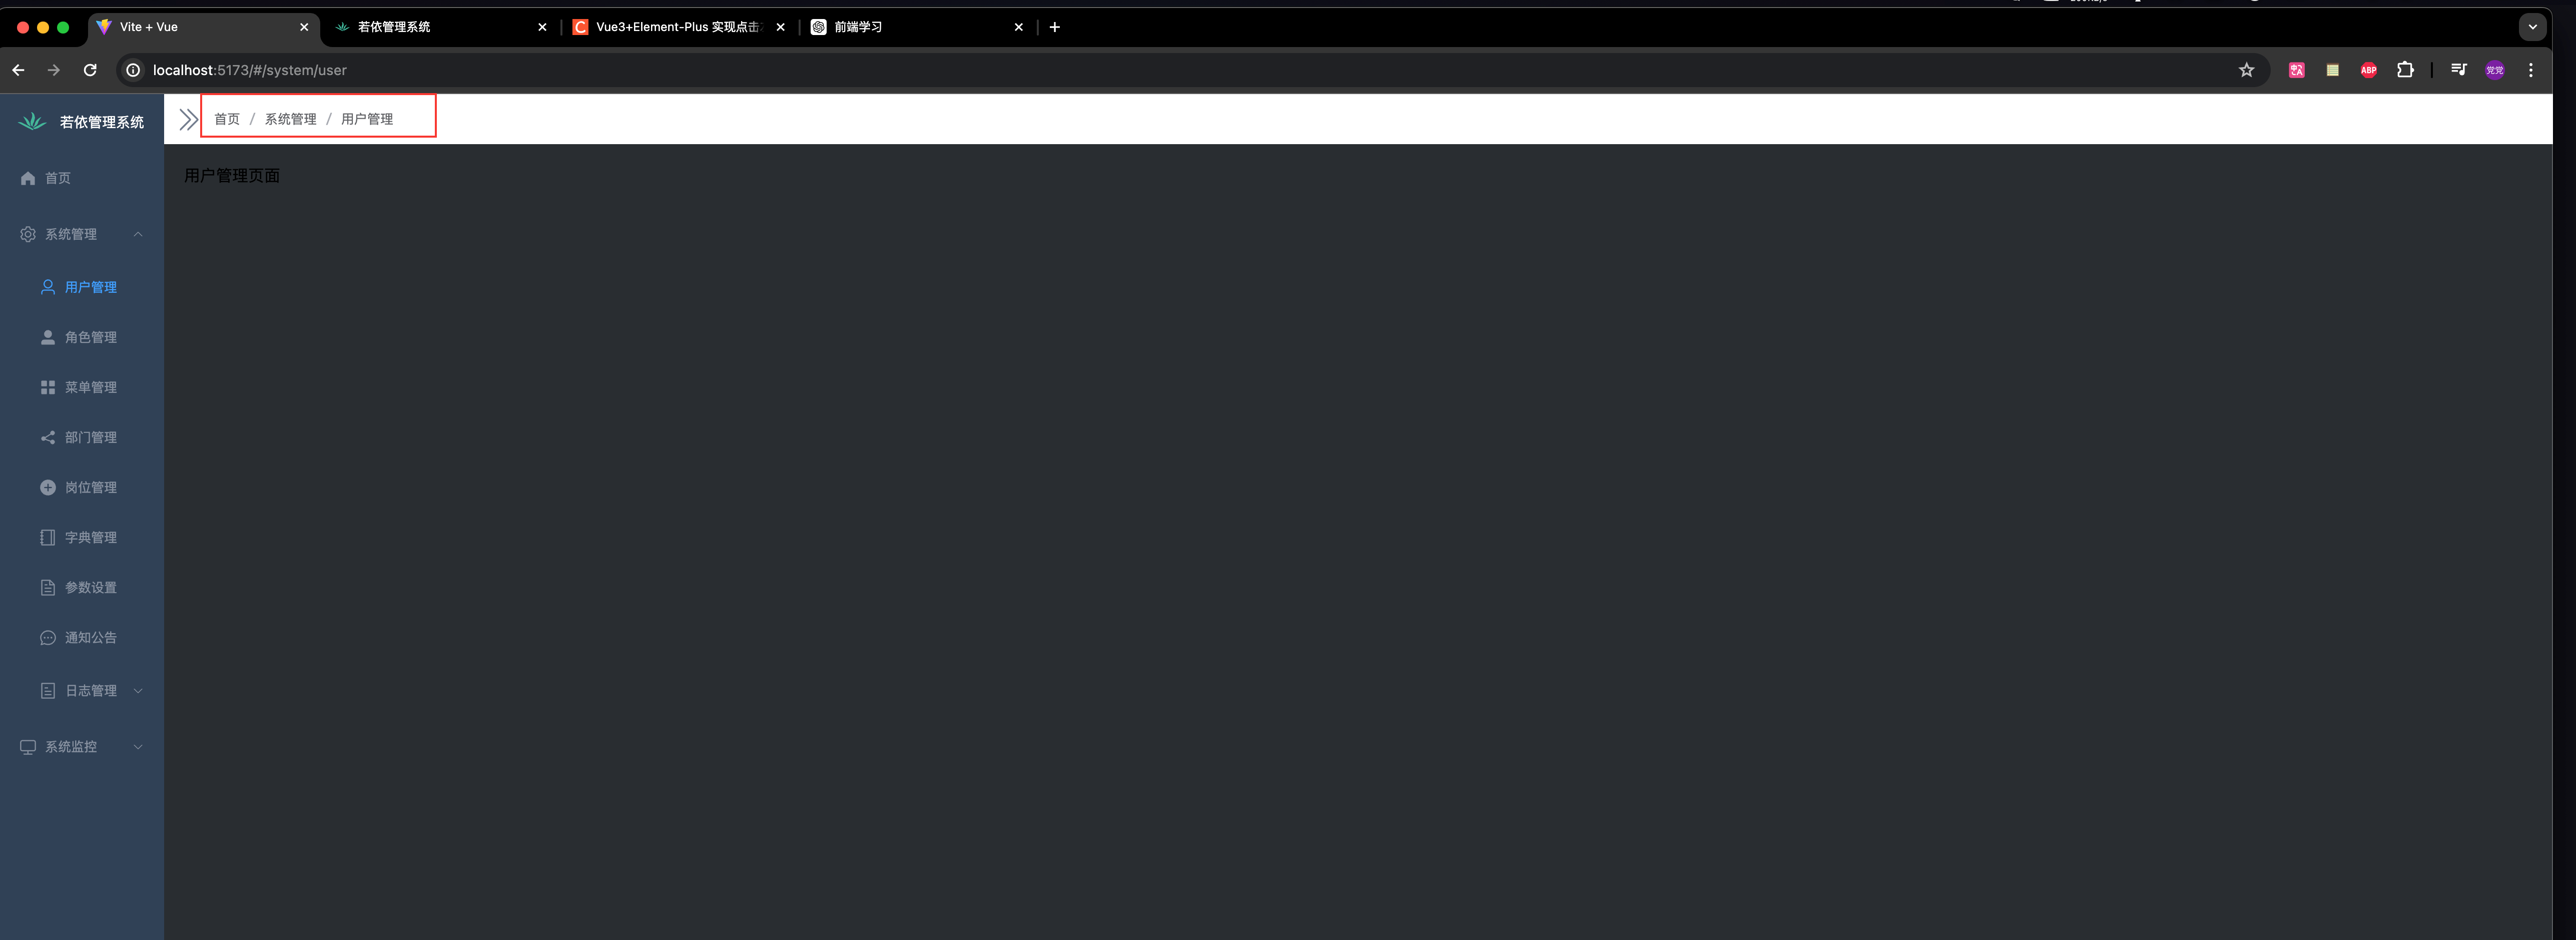
- 顶部标签页
细节说明一下:
- 点击
新的菜单才会出现,重复点击不会再创建信息的 首页是固定的第一个,不可以删除- 有多个标签页面被打开,强制刷新页面时,其他页面会被关闭,当前页面会被保留
- 鼠标点击标签页面,菜单会切换到对应的菜,当选中的标签页的菜单处于折叠状态,会帮你打开折叠定位到对应的菜单
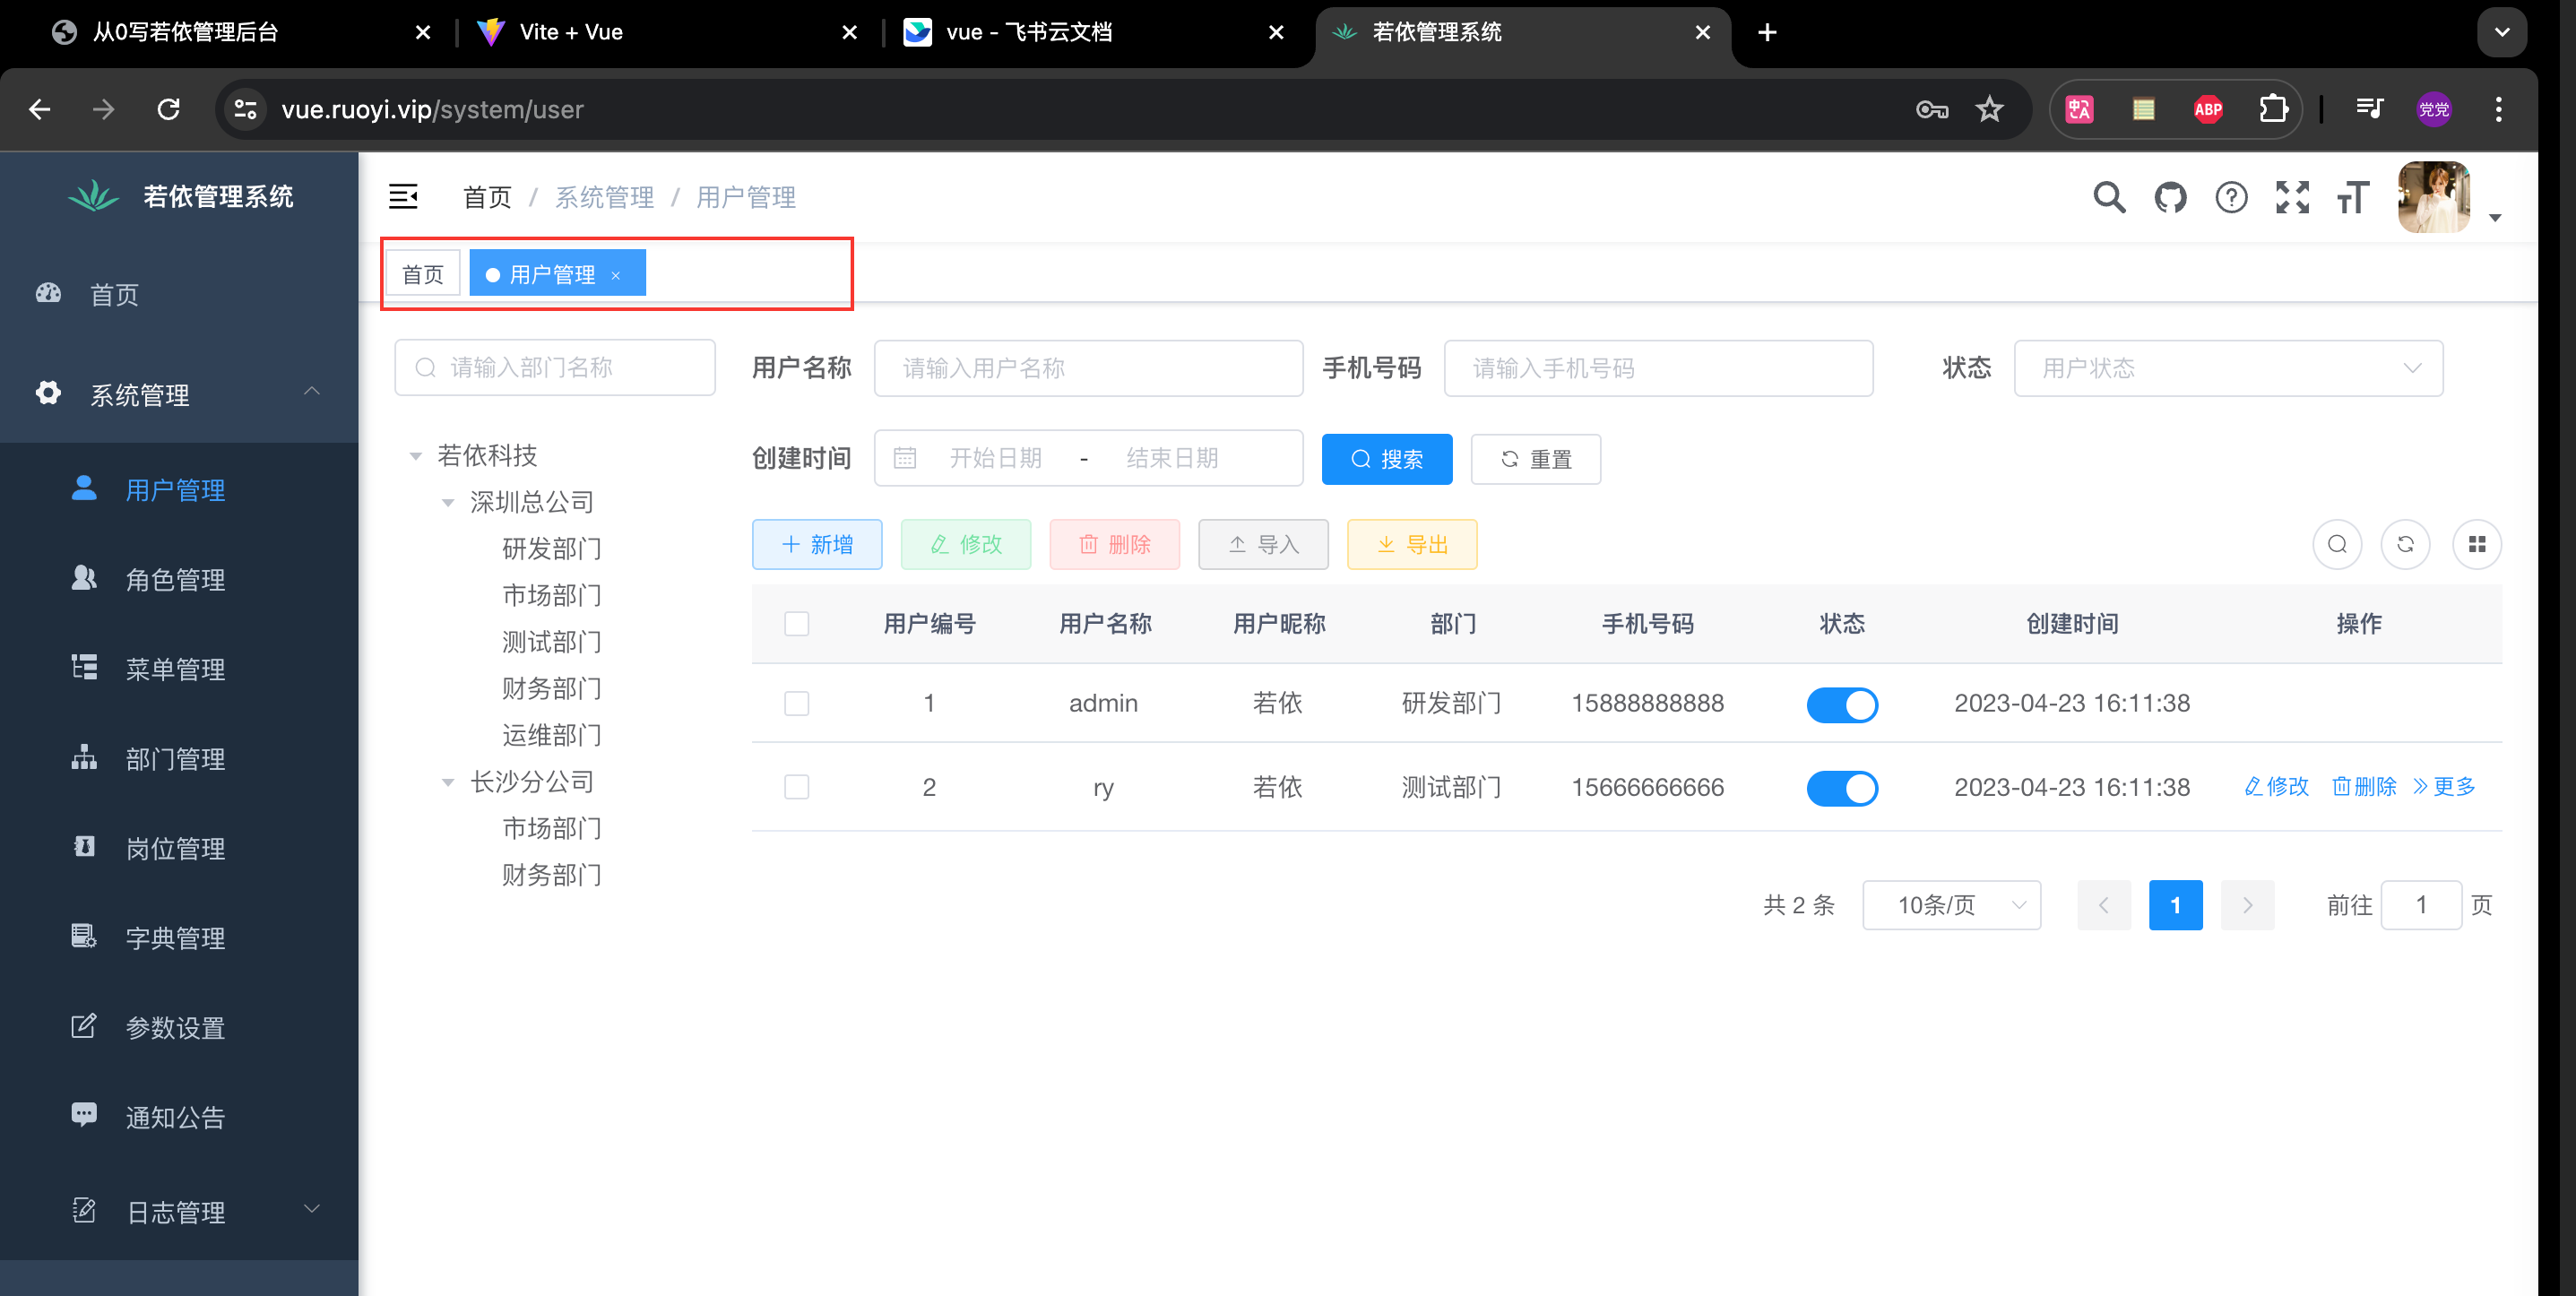
这里是 element-ui-标签页 对应的标签页
具体代码
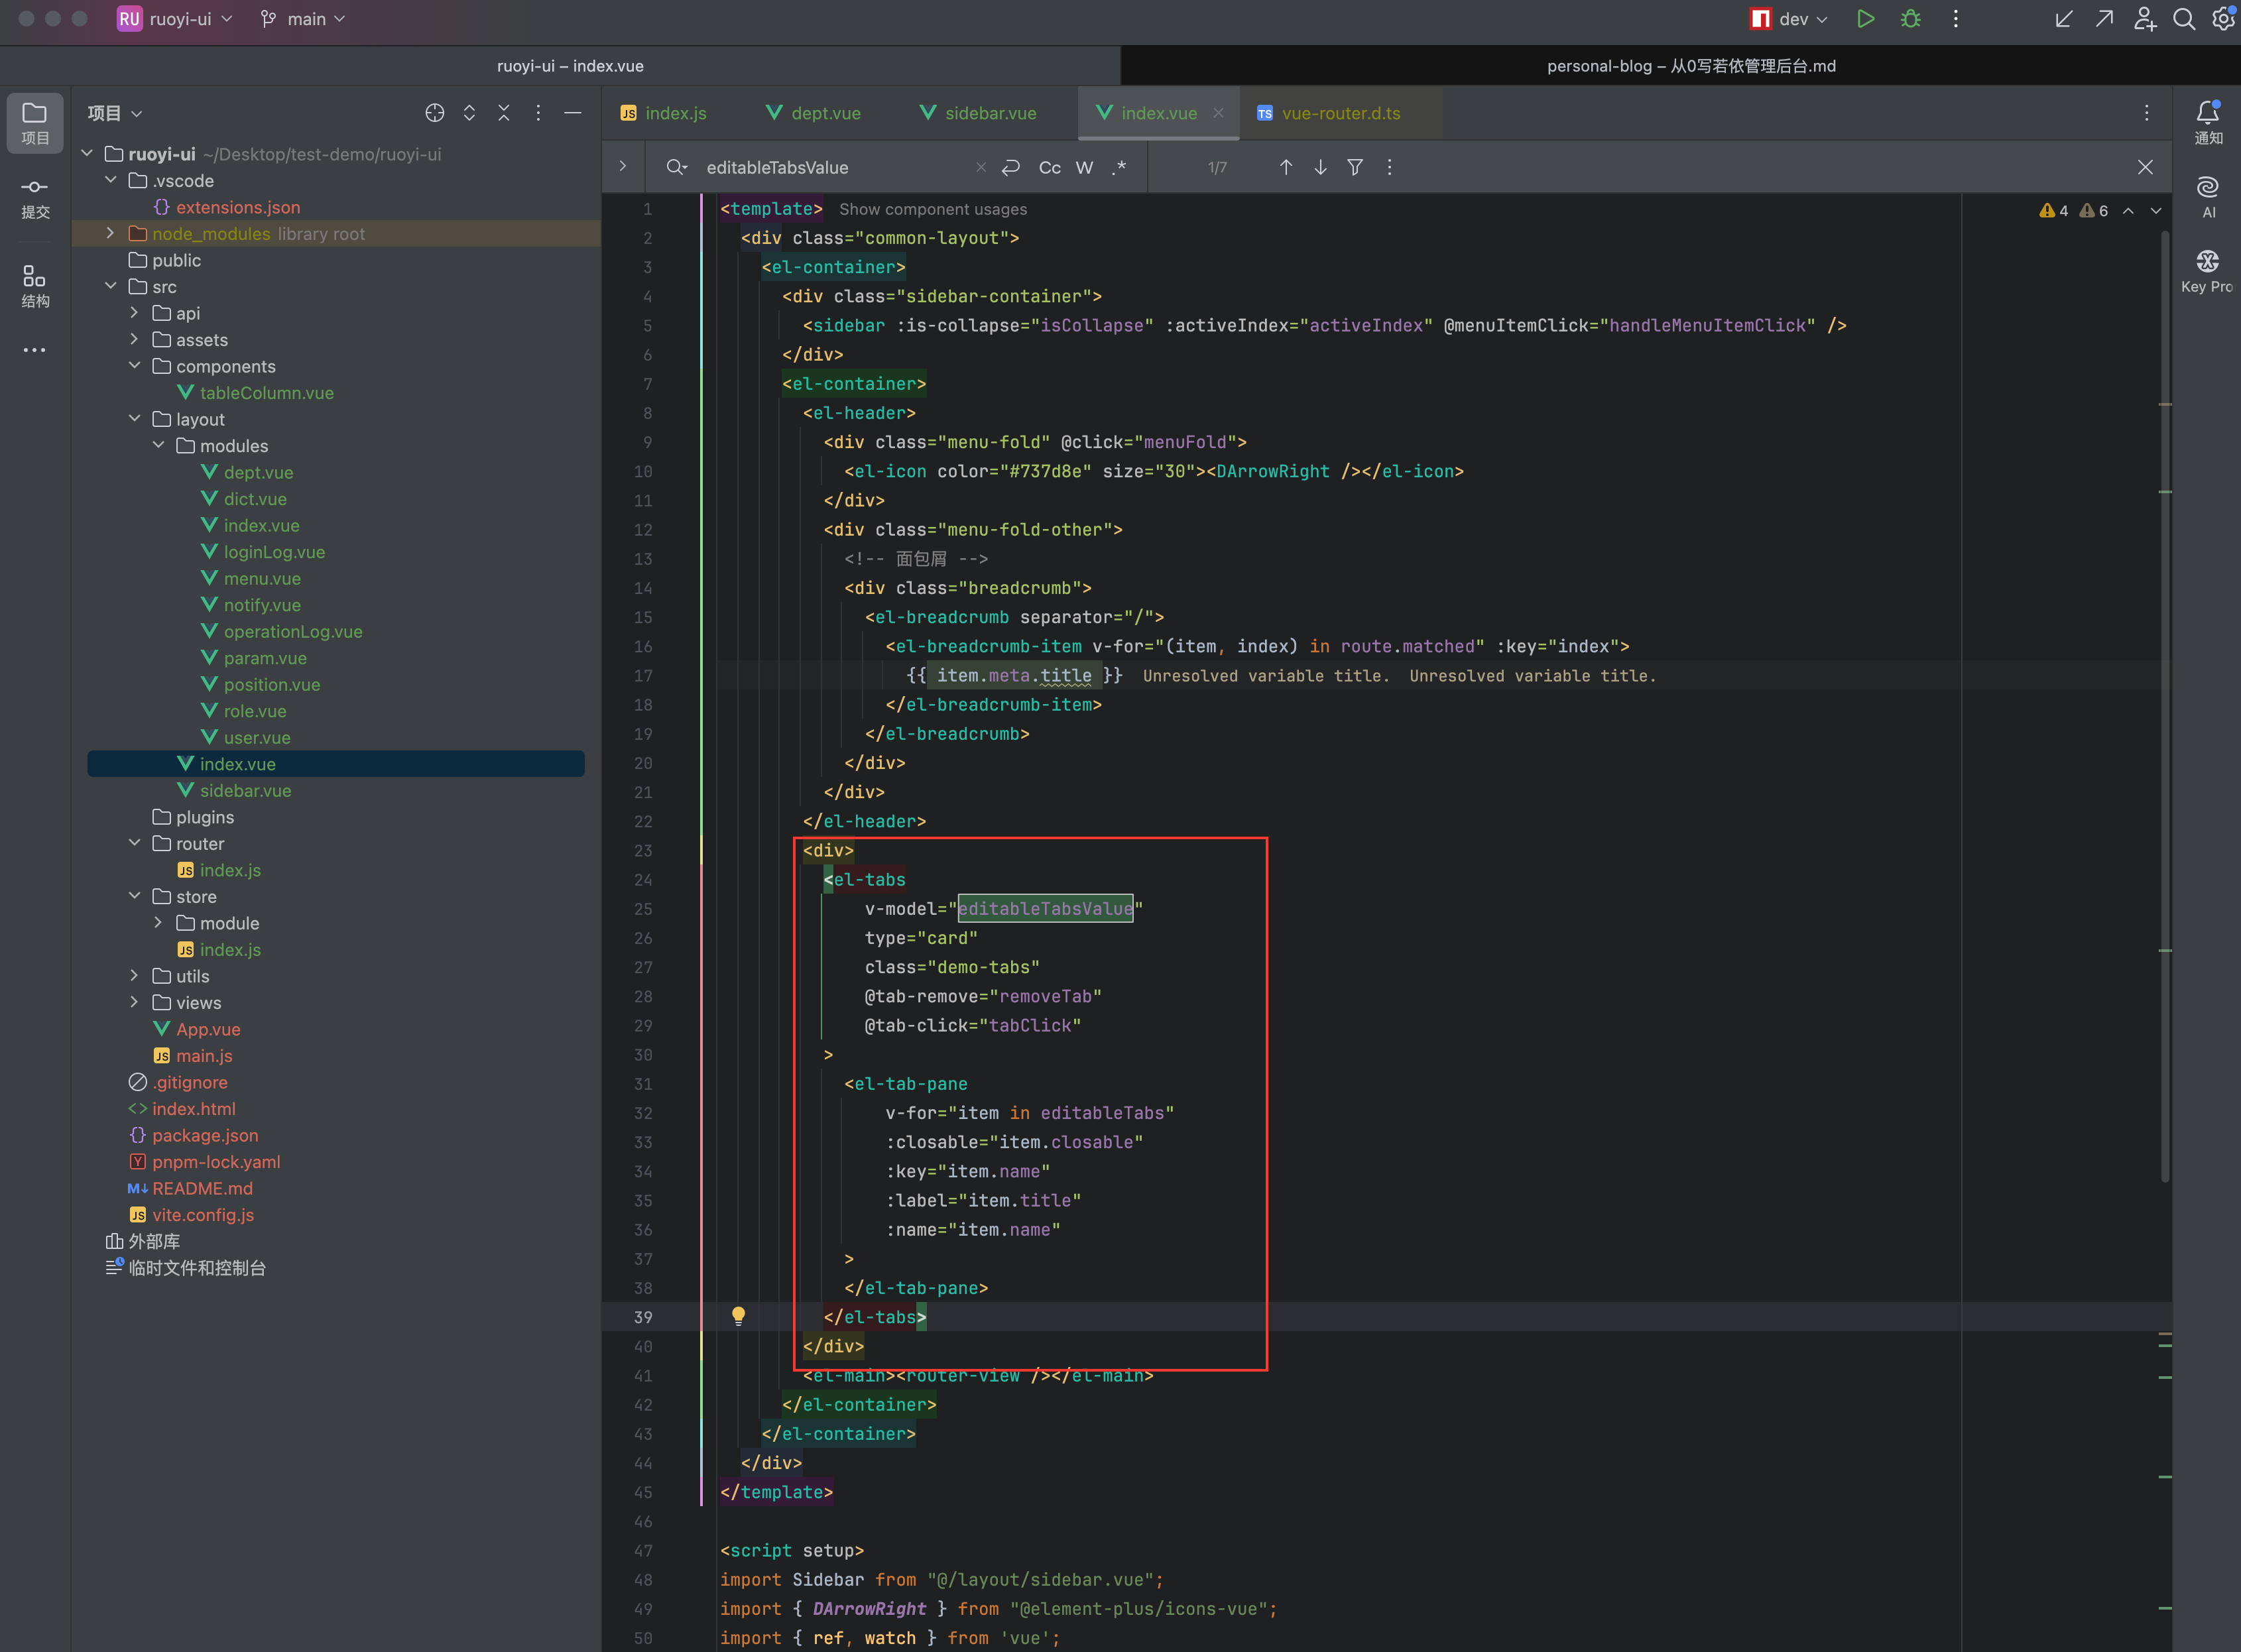
<div>
  <el-tabs
           v-model="editableTabsValue"
           type="card"
           class="demo-tabs"
           @tab-remove="removeTab"
           @tab-click="tabClick"
           >
    <el-tab-pane
                 v-for="item in editableTabs"
                 :closable="item.closable"
                 :key="item.name"
                 :label="item.title"
                 :name="item.name"
                 >
    </el-tab-pane>
  </el-tabs>
</div>
这里面的方法如下:
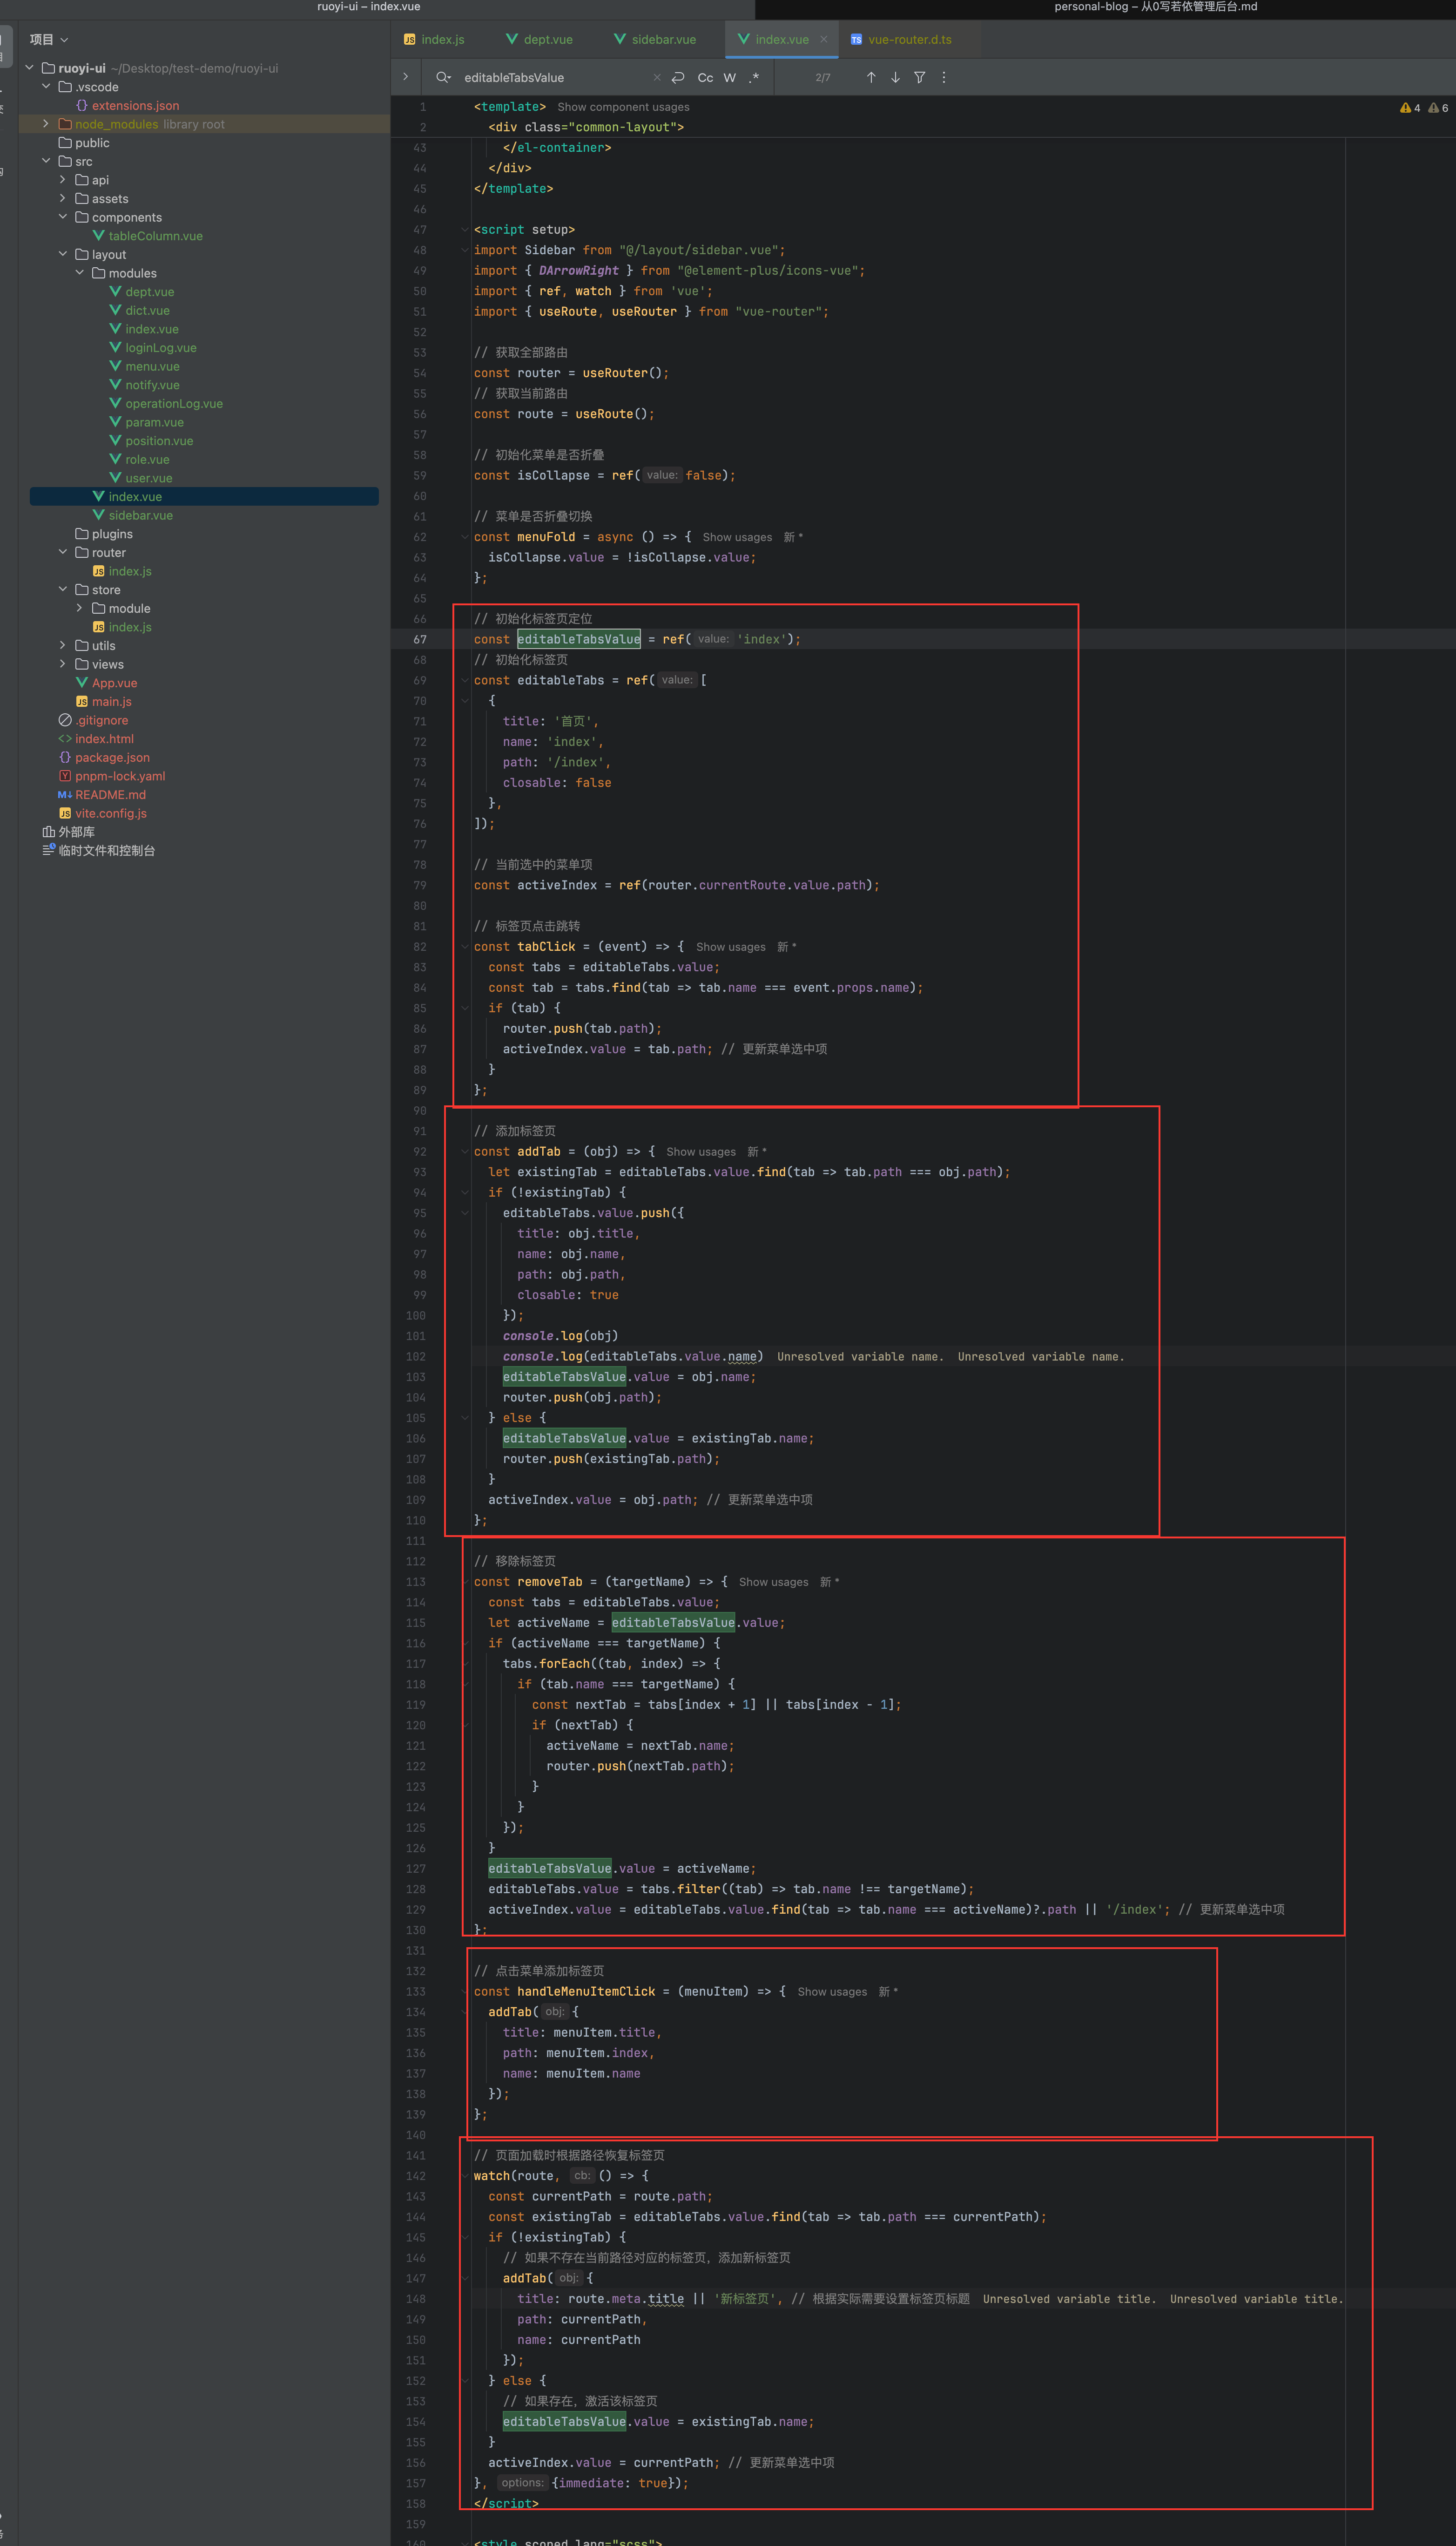
<script setup>
import Sidebar from "@/layout/sidebar.vue";
import { DArrowRight } from "@element-plus/icons-vue";
import { ref, watch } from 'vue';
import { useRoute, useRouter } from "vue-router";

// 获取全部路由
const router = useRouter();
// 获取当前路由
const route = useRoute();

// 初始化菜单是否折叠
const isCollapse = ref(false);

// 菜单是否折叠切换
const menuFold = async () => {
  isCollapse.value = !isCollapse.value;
};

// 初始化标签页定位
const editableTabsValue = ref('index');
// 初始化标签页
const editableTabs = ref([
  {
    title: '首页',
    name: 'index',
    path: '/index',
    closable: false
  },
]);

// 当前选中的菜单项
const activeIndex = ref(router.currentRoute.value.path);

// 标签页点击跳转
const tabClick = (event) => {
  const tabs = editableTabs.value;
  const tab = tabs.find(tab => tab.name === event.props.name);
  if (tab) {
    router.push(tab.path);
    activeIndex.value = tab.path; // 更新菜单选中项
  }
};

// 添加标签页
const addTab = (obj) => {
  let existingTab = editableTabs.value.find(tab => tab.path === obj.path);
  if (!existingTab) {
    editableTabs.value.push({
      title: obj.title,
      name: obj.name,
      path: obj.path,
      closable: true
    });
    console.log(obj)
    console.log(editableTabs.value.name)
    editableTabsValue.value = obj.name;
    router.push(obj.path);
  } else {
    editableTabsValue.value = existingTab.name;
    router.push(existingTab.path);
  }
  activeIndex.value = obj.path; // 更新菜单选中项
};

// 移除标签页
const removeTab = (targetName) => {
  const tabs = editableTabs.value;
  let activeName = editableTabsValue.value;
  if (activeName === targetName) {
    tabs.forEach((tab, index) => {
      if (tab.name === targetName) {
        const nextTab = tabs[index + 1] || tabs[index - 1];
        if (nextTab) {
          activeName = nextTab.name;
          router.push(nextTab.path);
        }
      }
    });
  }
  editableTabsValue.value = activeName;
  editableTabs.value = tabs.filter((tab) => tab.name !== targetName);
  activeIndex.value = editableTabs.value.find(tab => tab.name === activeName)?.path || '/index'; // 更新菜单选中项
};

// 点击菜单添加标签页
const handleMenuItemClick = (menuItem) => {
  addTab({
    title: menuItem.title,
    path: menuItem.index,
    name: menuItem.name
  });
};

// 页面加载时根据路径恢复标签页
watch(route, () => {
  const currentPath = route.path;
  const existingTab = editableTabs.value.find(tab => tab.path === currentPath);
  if (!existingTab) {
    // 如果不存在当前路径对应的标签页,添加新标签页
    addTab({
      title: route.meta.title || '新标签页', // 根据实际需要设置标签页标题
      path: currentPath,
      name: currentPath
    });
  } else {
    // 如果存在,激活该标签页
    editableTabsValue.value = existingTab.name;
  }
  activeIndex.value = currentPath; // 更新菜单选中项
}, {immediate: true});
</script>
⚠️注意一下,我们需要点击标签页,反向选中菜单,因此我们需要告诉菜单页面的我们当前选中是哪个页面
在
layout/index.vue中有一行代码,是用来获取当前页面的路径信息// 当前选中的菜单项 const activeIndex = ref(router.currentRoute.value.path);然后将这个参数传递给
sidebar.vue页面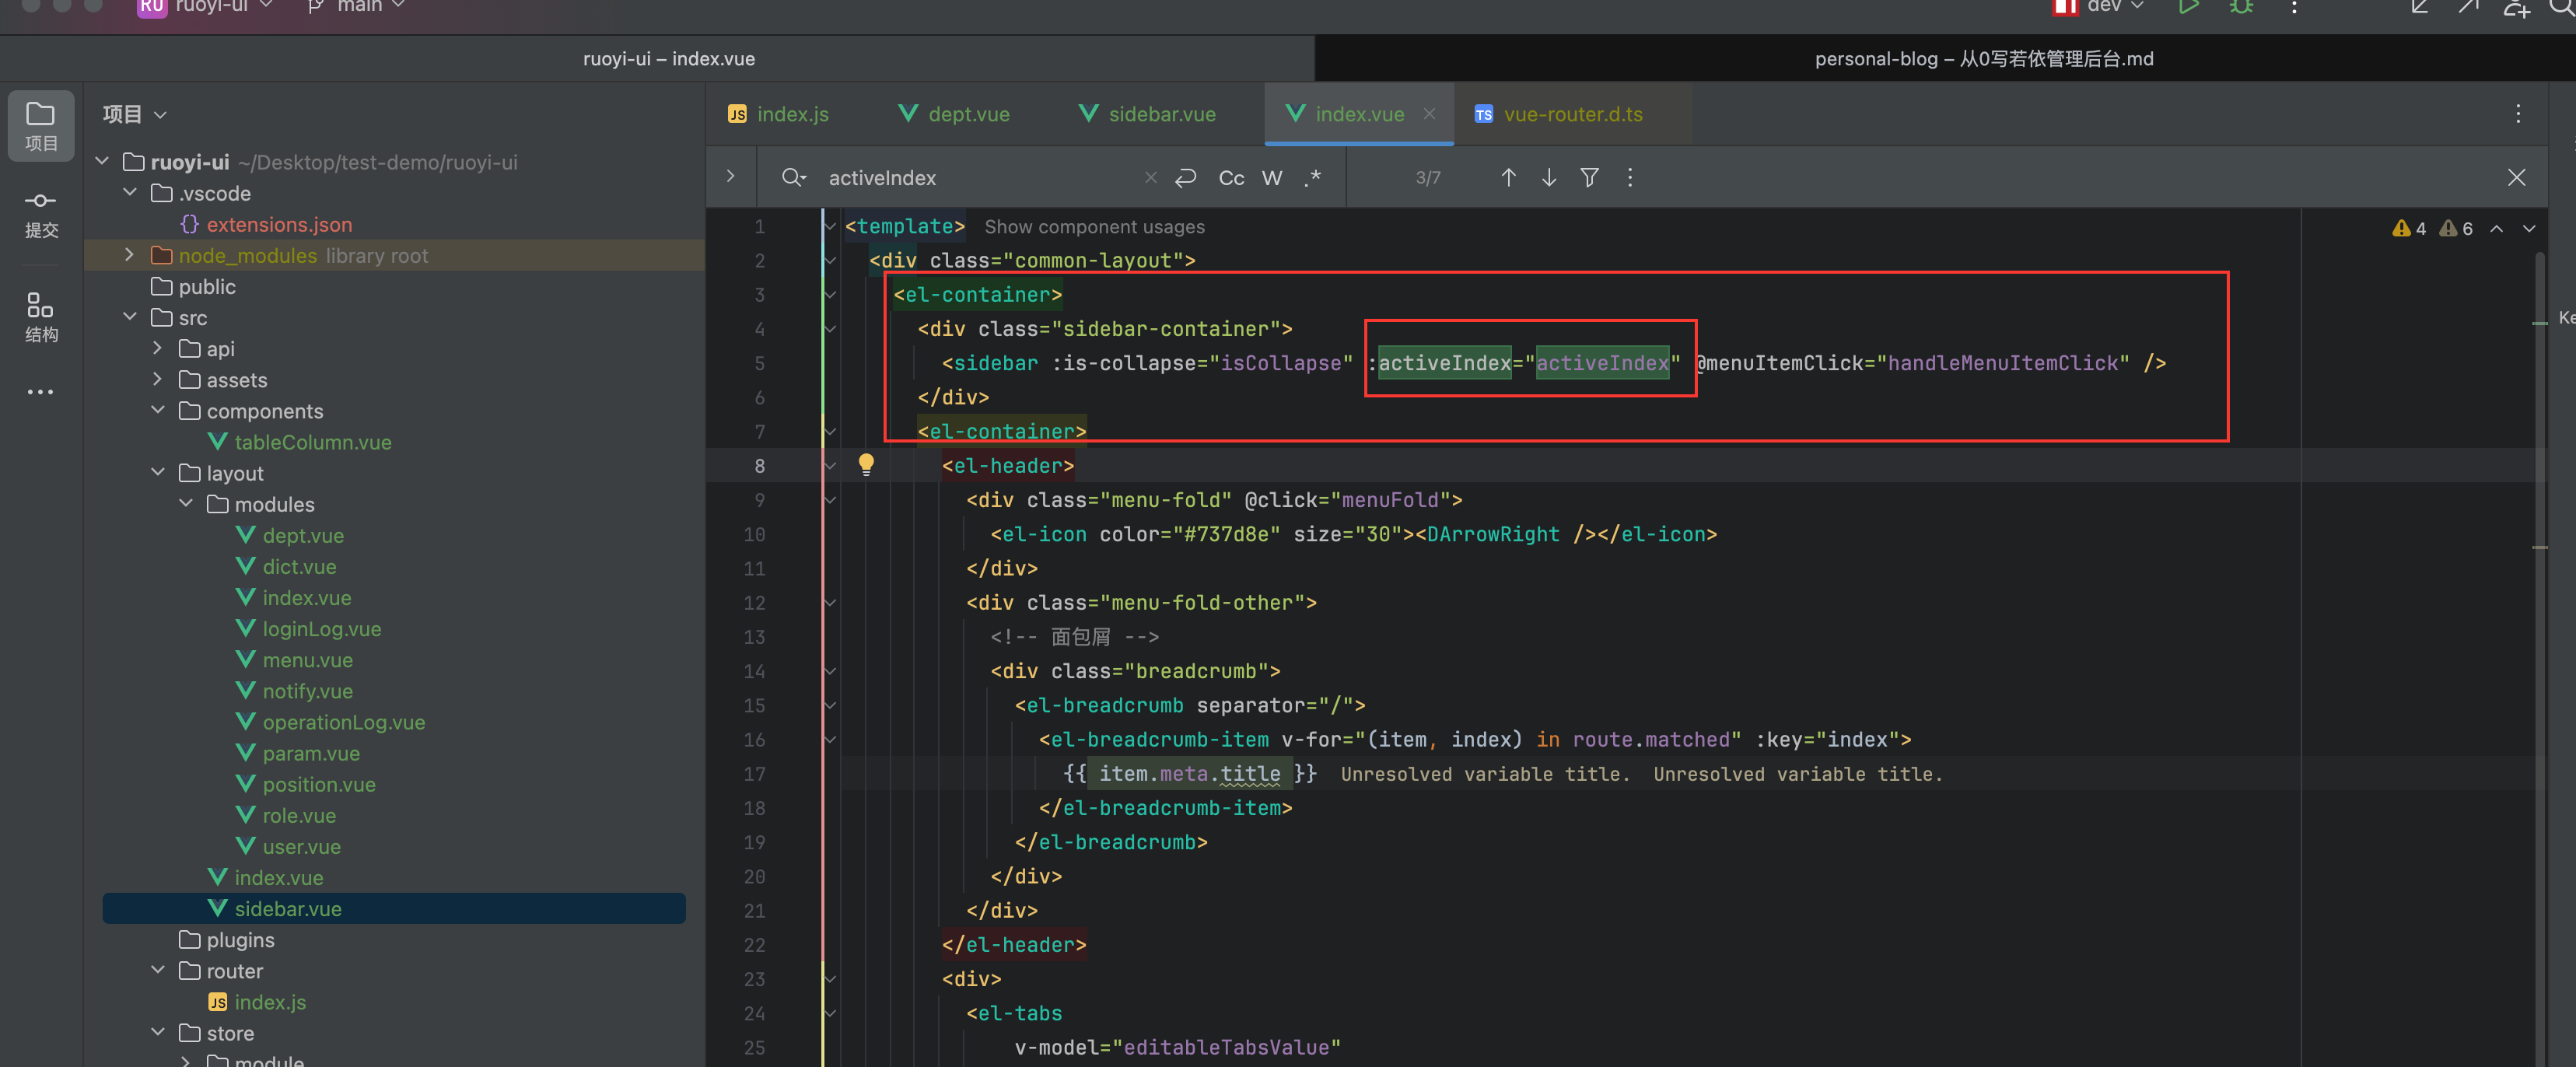
sidebar.vue页面接收一下参数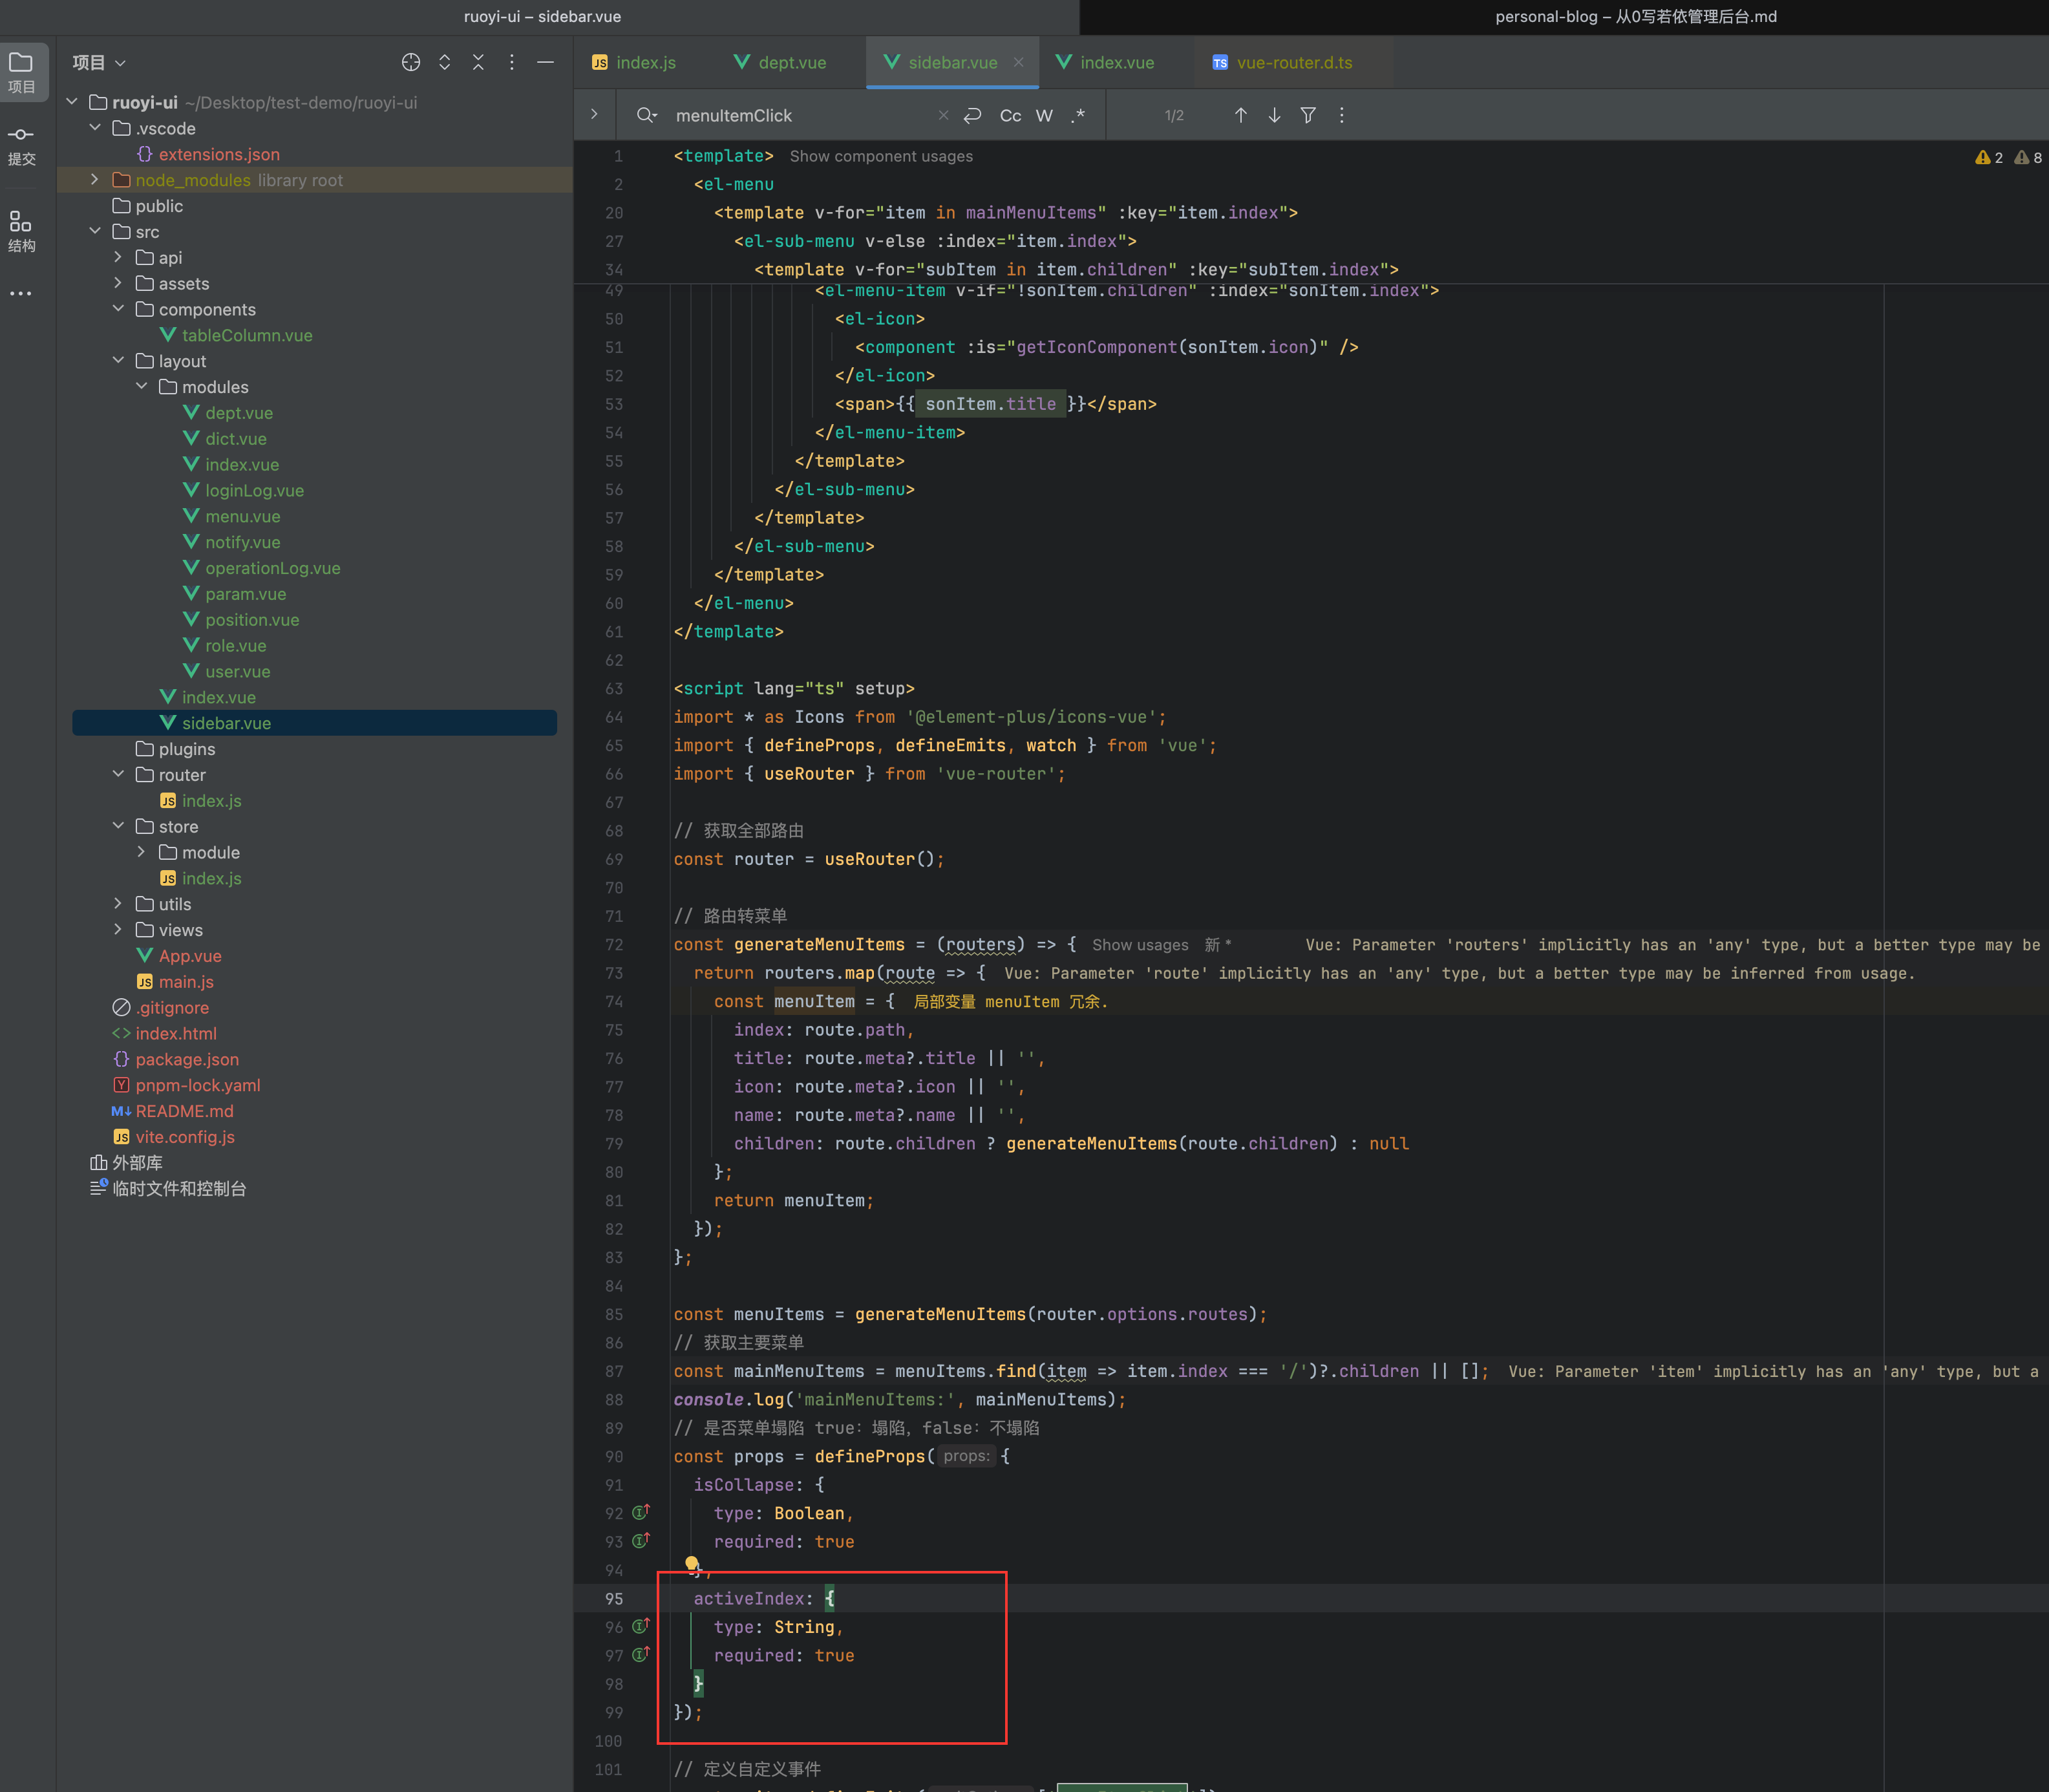
页面上加上这个参数就可以了
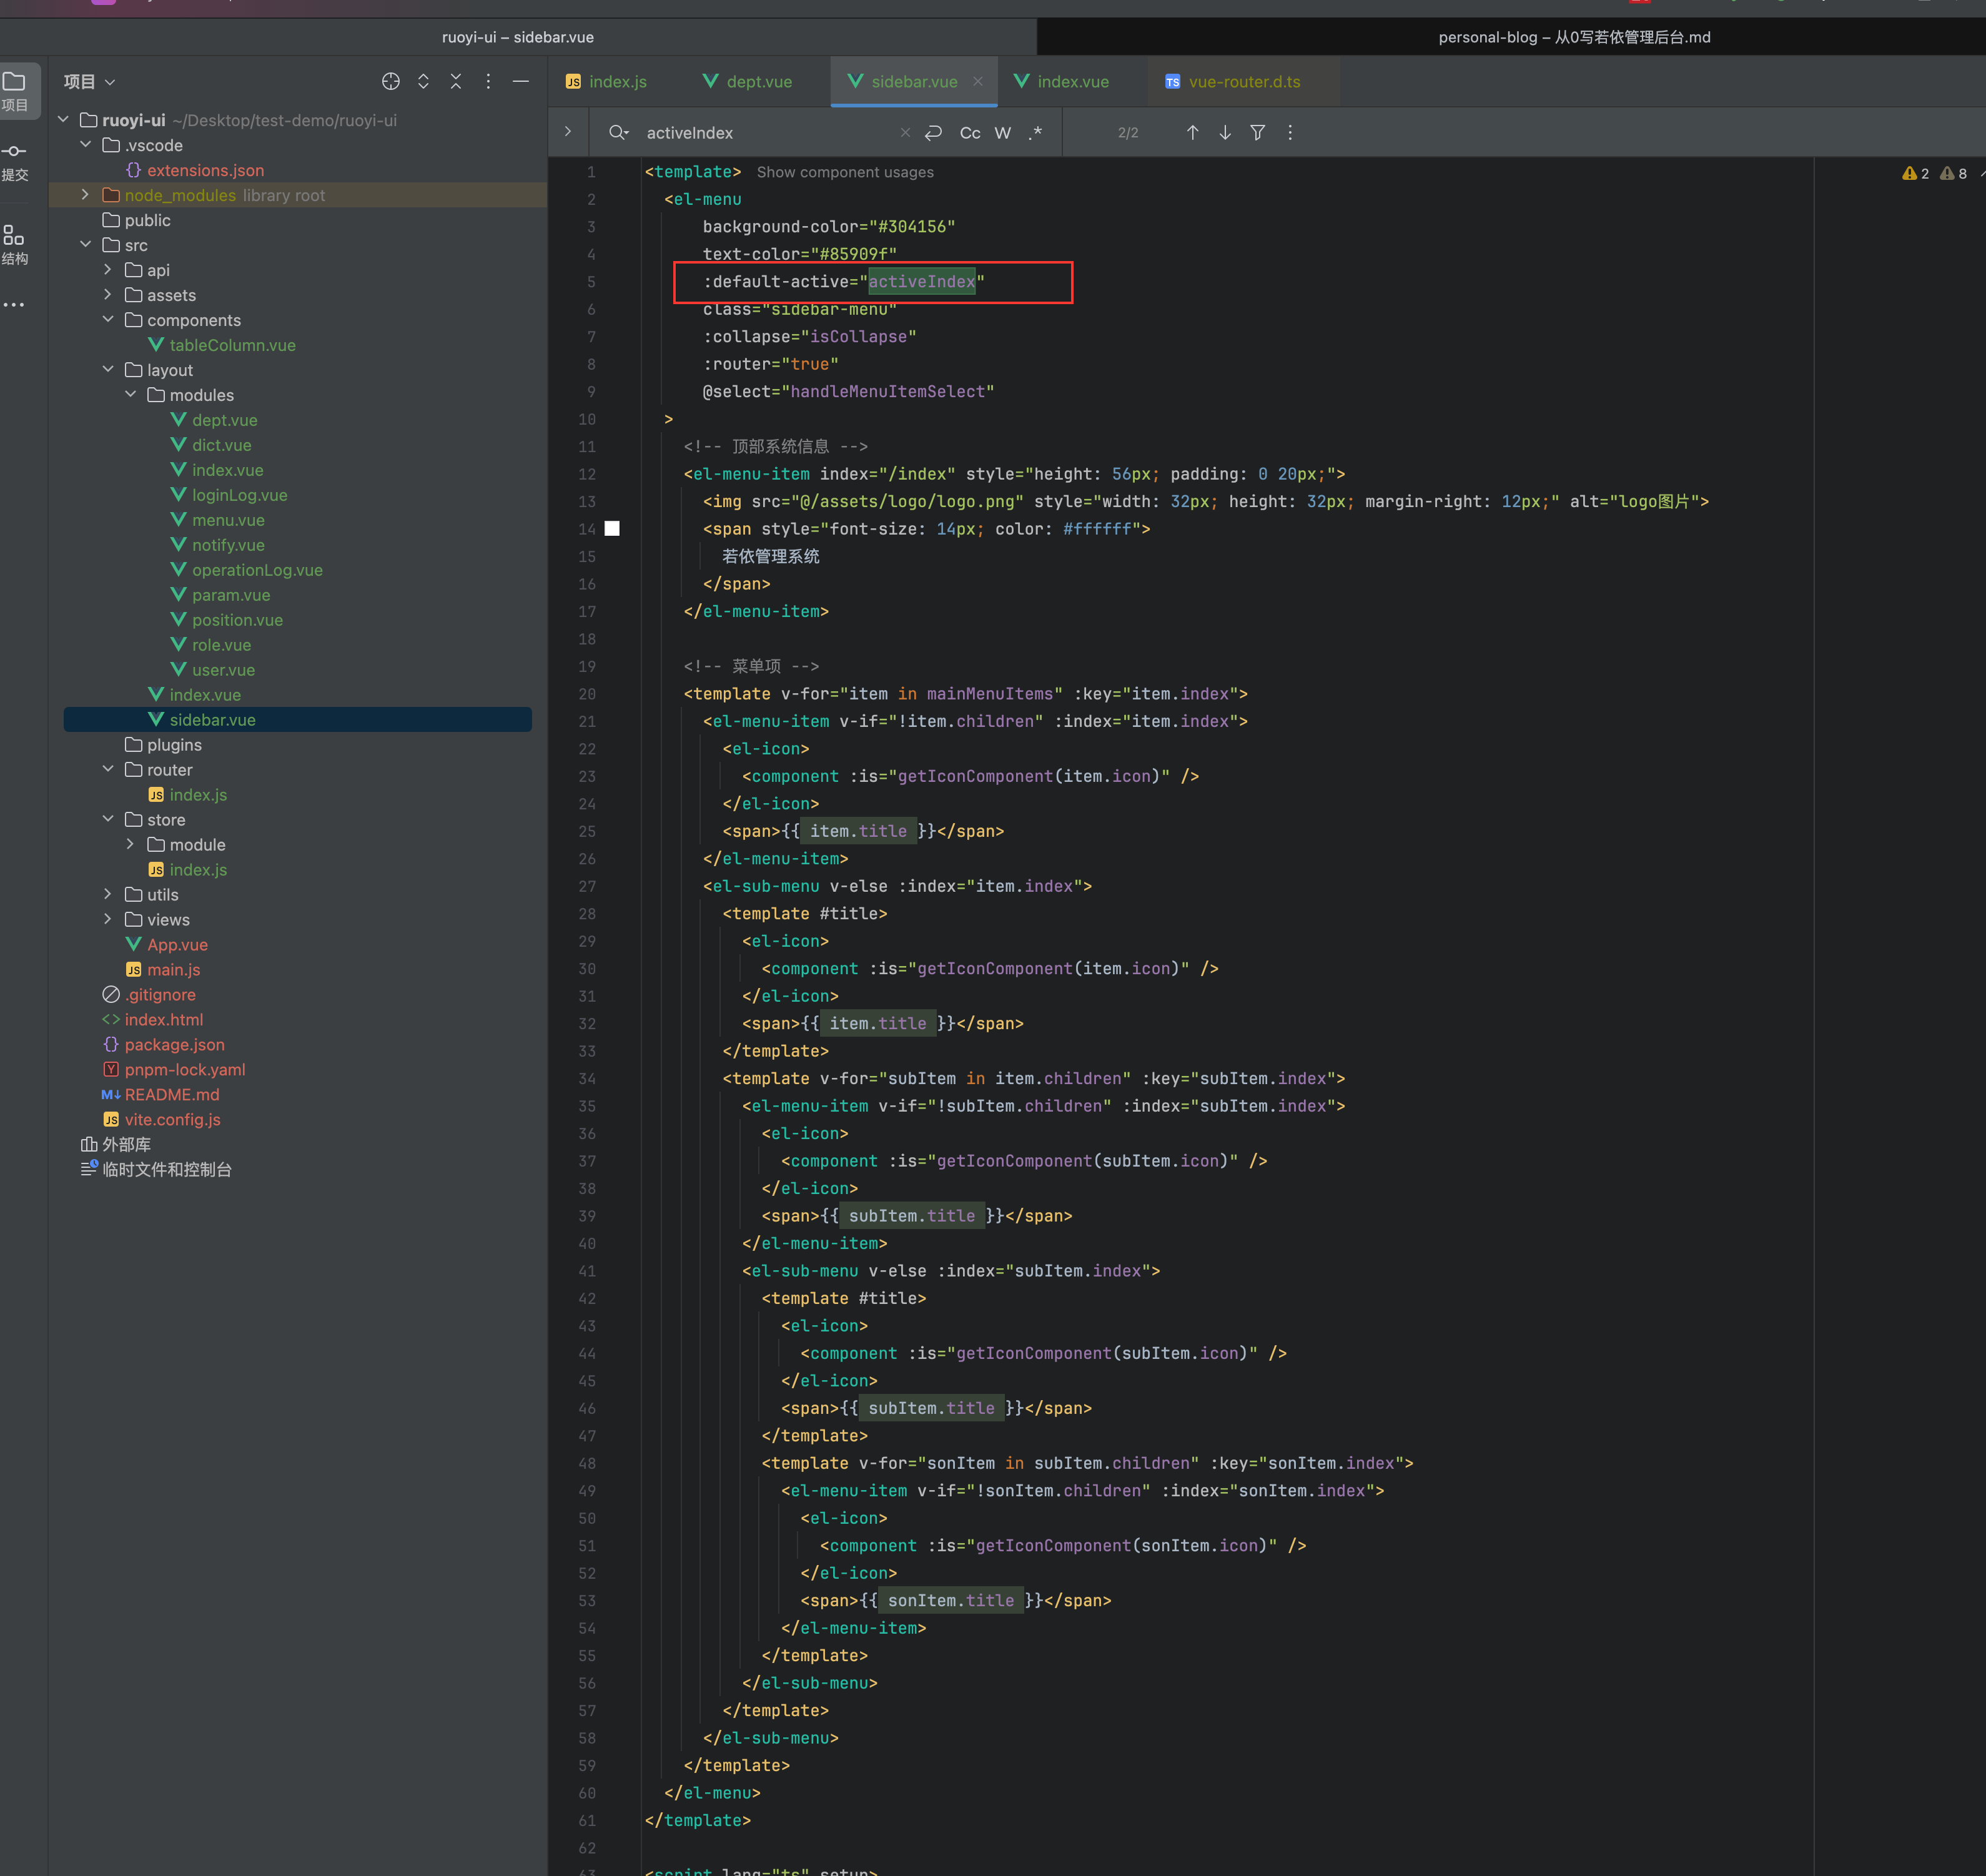
效果